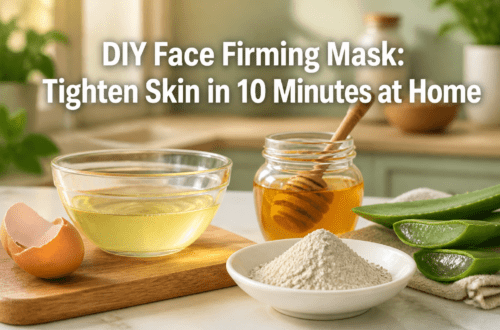
Quick Answer
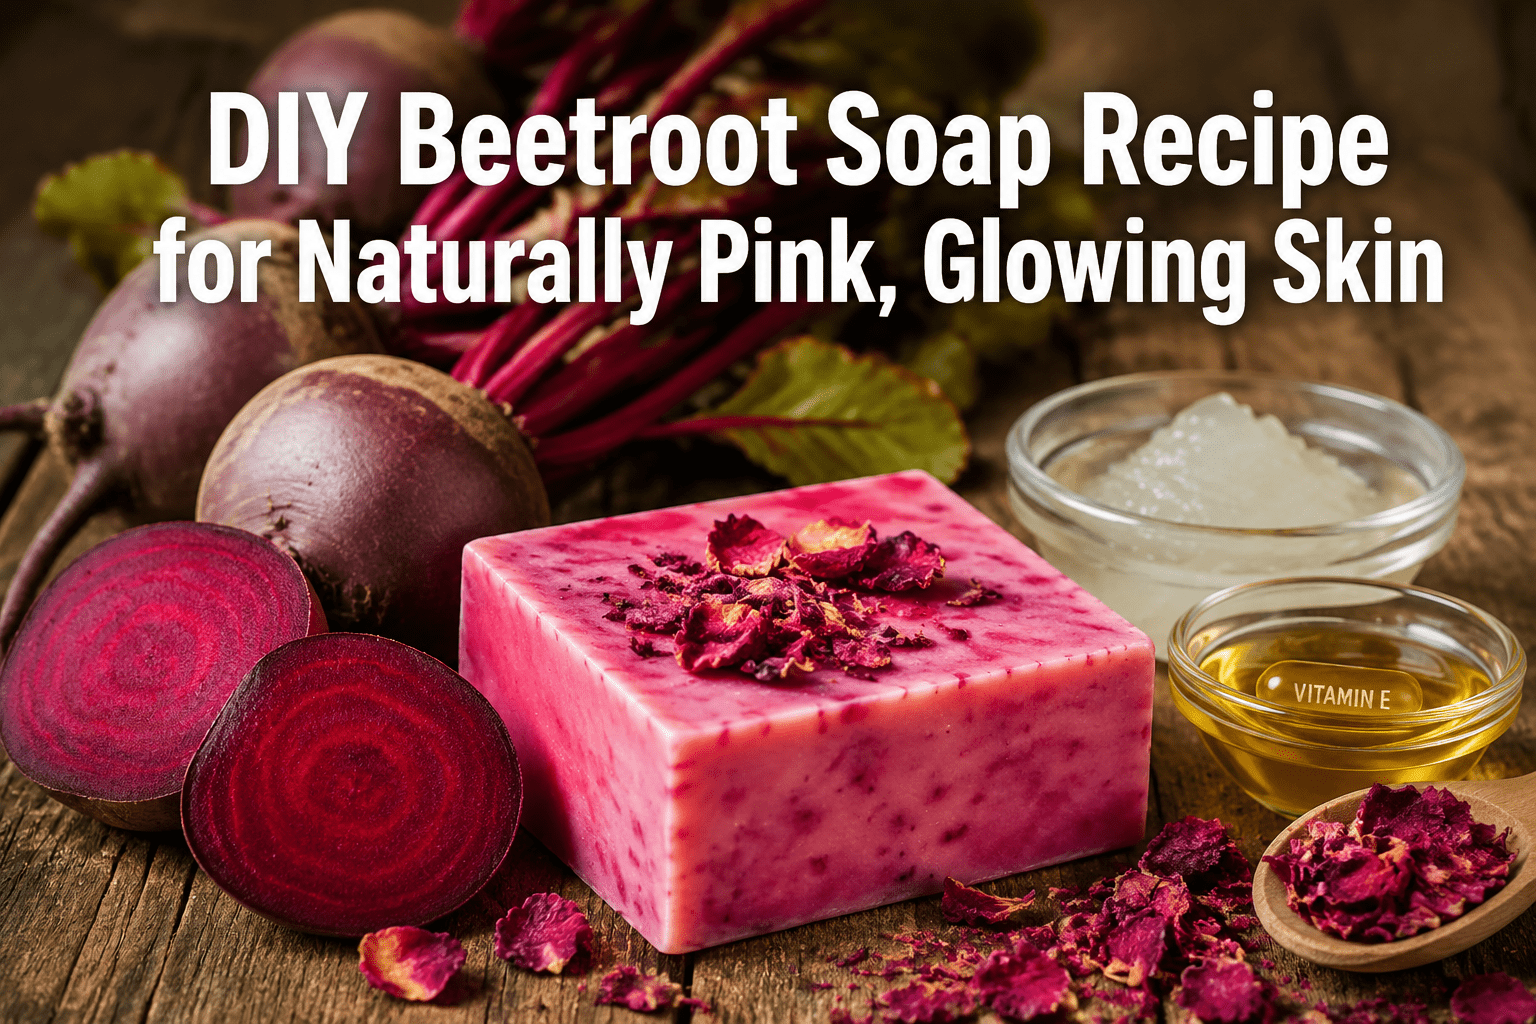
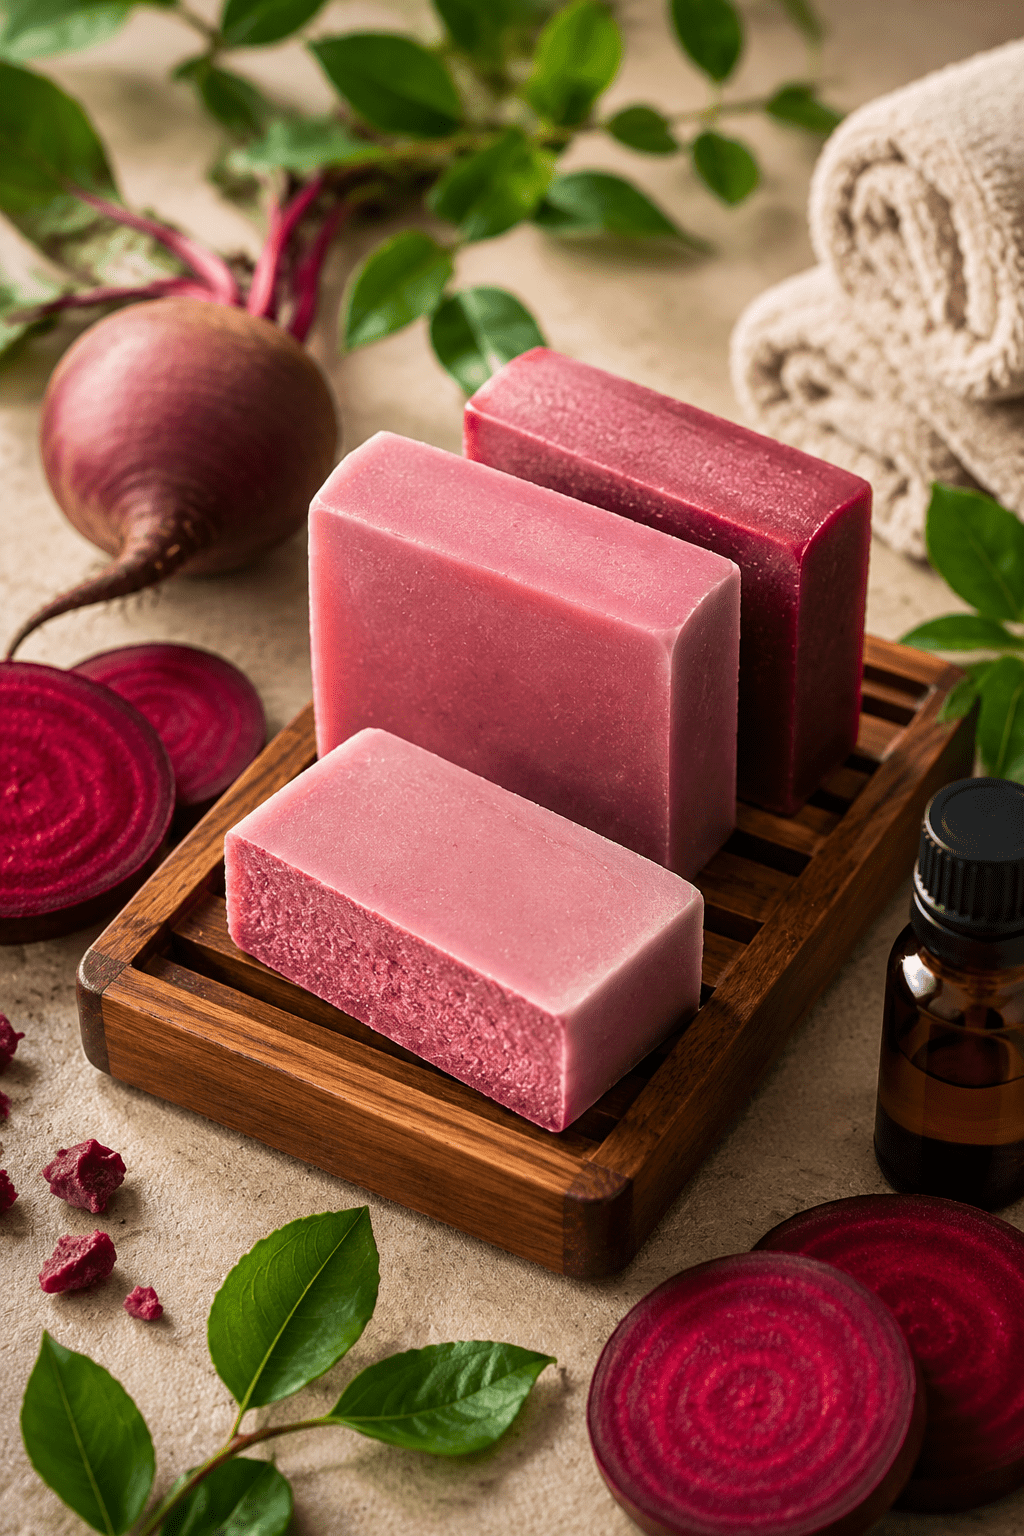
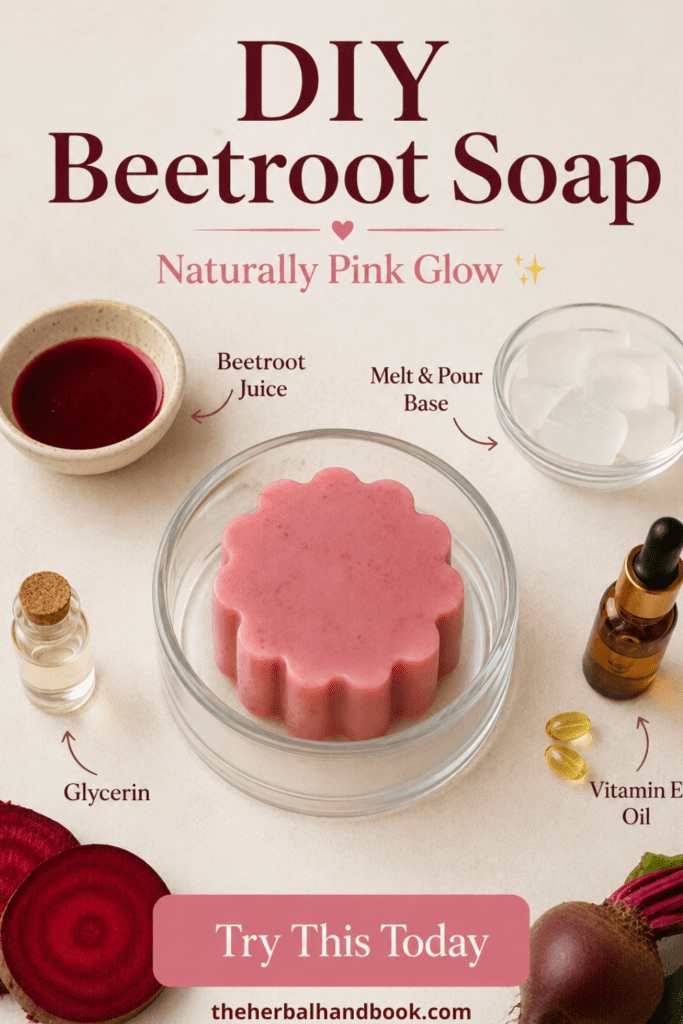
A DIY beetroot soap recipe combines melted soap base with fresh beetroot juice or powder, glycerin, and vitamin E oil to create a naturally pink bar that cleanses and nourishes skin. The melt-and-pour method is the easiest starting point — no lye required, and the whole process takes under an hour plus 6 hours of setting time. The result is a gentle, antioxidant-rich soap that gives skin a healthy, rosy glow.
Key Takeaways
- 🌿 Beetroot juice or powder gives the soap its natural pink color and delivers antioxidants to skin during cleansing.
- 🧼 Melt-and-pour soap base (400–500g) is the safest and most beginner-friendly option — no lye handling needed.
- 💧 Glycerin (1 tablespoon) and 2–3 vitamin E oil capsules boost moisture and skin-nourishing benefits.
- 🌡️ Melt gently using a double boiler or microwave to avoid scorching the base.
- 🍃 Fresh beetroot juice gives a deeper pink; beet powder (1 tsp) gives a lighter, more stable color with less risk of color transfer.
- ⏱️ Allow 6 hours of cooling time in silicone molds before unmolding.
- ⚠️ Advanced makers can try cold-process soap with lye, but safety gear (goggles, gloves, long sleeves) is non-negotiable.
- 🧴 This soap suits most skin types, but do a patch test first if you have sensitive or reactive skin.
What Makes Beetroot a Good Ingredient for Homemade Soap?
Beetroot contains natural pigments called betalains, which give it that vivid red-purple color. These pigments also carry antioxidant properties, which is why beetroot has become a popular addition to natural skincare products.
When added to soap, beetroot contributes:
- Natural pink-to-red color without synthetic dyes
- Antioxidants that may help protect skin from environmental stress
- A mild, earthy scent that blends well with floral or citrus essential oils
“Beetroot’s natural pigment does the heavy lifting here — you get a beautiful pink bar without a single drop of artificial colorant.”
It’s worth noting that while beetroot is widely used in natural beauty recipes, the skin benefits during a quick soap rinse are more general wellness claims than clinically proven dermatological results [3]. That said, the glycerin and vitamin E you add alongside it are well-established skin-conditioning ingredients.
If you love using vegetables and plants in your skincare, you might also enjoy this carrot face mask for glowing skin — another root vegetable with a strong reputation in natural beauty.
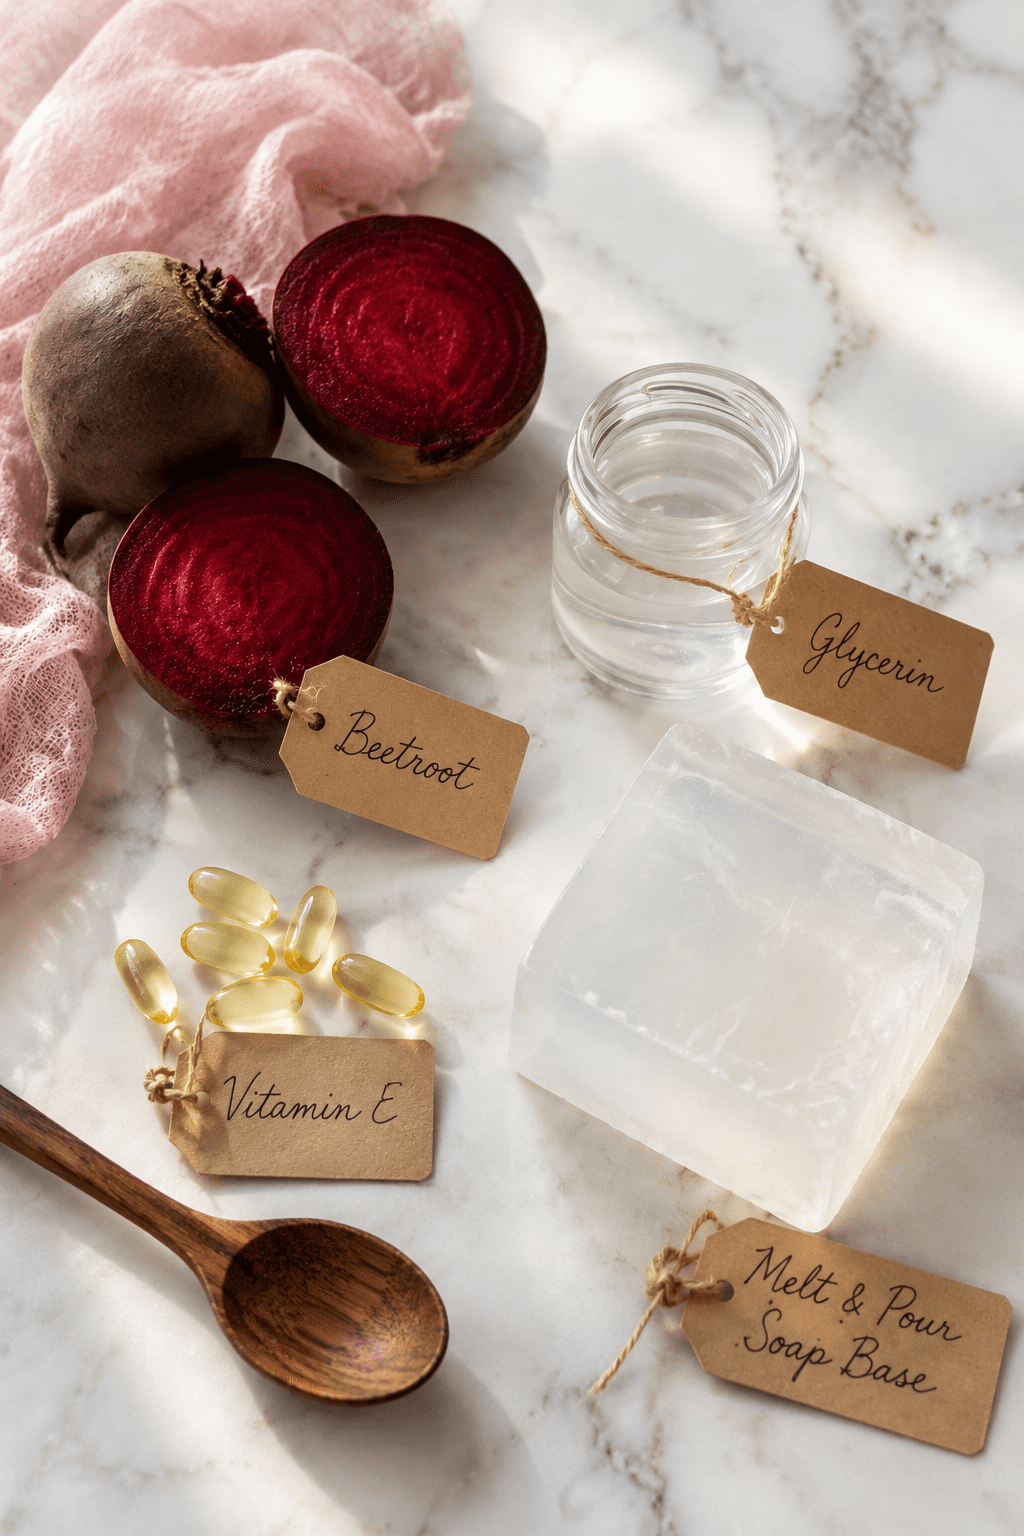
What Ingredients Do You Need for This DIY Beetroot Soap Recipe?
You need 6 core ingredients, most of which are easy to find at a grocery store or online.
| Ingredient | Amount | Purpose |
|---|---|---|
| Melt-and-pour soap base | 400–500g | The soap foundation |
| Fresh beetroot juice OR beet powder | 2–3 tbsp juice OR 1 tsp powder | Color + antioxidants |
| Glycerin | 1 tablespoon | Moisture retention |
| Vitamin E oil capsules | 2–3 capsules | Skin nourishment |
| Essential oil (optional) | 10–15 drops | Fragrance |
| Silicone soap mold | 1 mold | Shaping |
Fresh juice vs. beet powder: Fresh juice gives a deeper, more vibrant pink [3]. Beet powder (1 teaspoon) produces a lighter color and reduces the chance of the color transferring onto washcloths or skin [4]. Choose powder if you’re making soap as a gift or want a more stable result.
Soap base options: A clear glycerin base lets the pink color show through beautifully. A white base gives a more pastel, milky pink tone. Both work well [1].
How to Prepare Fresh Beetroot Juice for Soap Making
Fresh juice gives the most vivid color, but you need to prepare it correctly to get a concentrated result.
Steps to prepare beetroot juice:
- Wash one medium beetroot thoroughly under running water.
- Peel the outer skin using a vegetable peeler.
- Cut into small chunks and add to a blender — do not add water (you want concentrated juice, not diluted liquid) [3].
- Blend until smooth.
- Strain through a clean muslin cloth or fine mesh strainer, pressing firmly to extract as much juice as possible.
- Use 2–3 tablespoons of the strained juice in your recipe.
Quick tip: Wear gloves during this step. Beetroot stains hands and surfaces fast. Work on a surface you don’t mind getting a little pink.
Step-by-Step DIY Beetroot Soap Recipe (Melt & Pour Method)
This is the beginner-friendly version — no lye, no complicated chemistry, and no special equipment beyond a microwave or stovetop [1].
What you’ll need:
- All ingredients from the table above
- Double boiler OR microwave-safe glass bowl
- Spatula or wooden spoon
- Thermometer (optional but helpful)
- Silicone soap mold
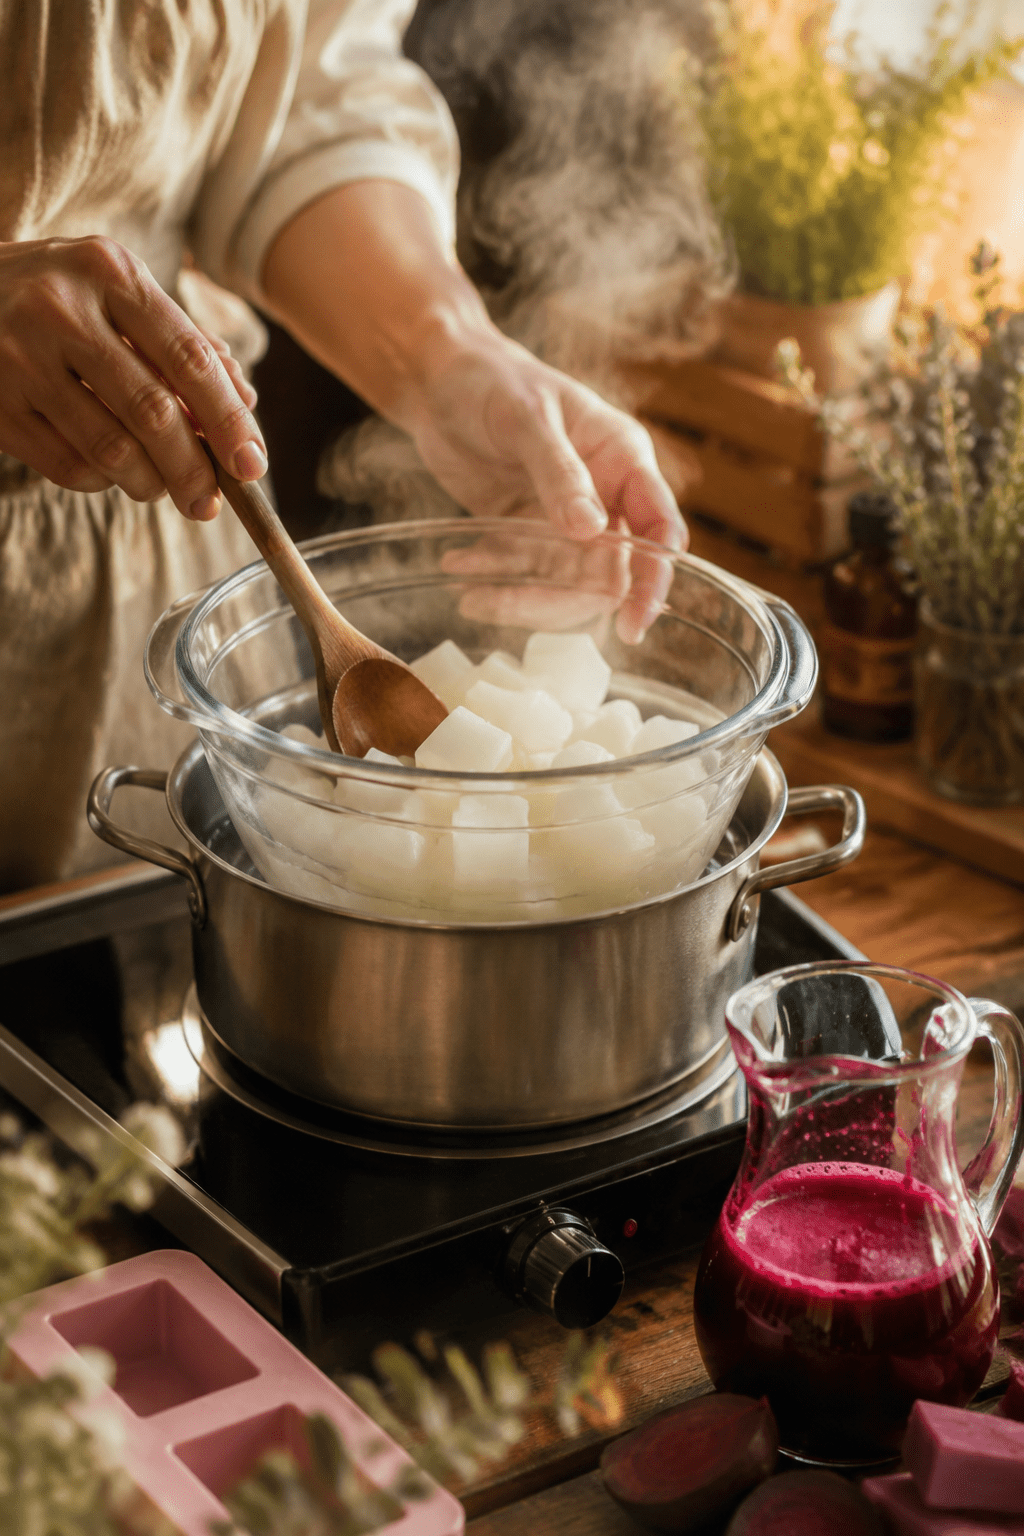
Step 1: Melt the soap base
Cut your soap base into small, even cubes. This helps it melt faster and more evenly. Melt using one of two methods:
- Double boiler: Place cubes in a heat-safe bowl over simmering water, stirring gently until fully melted [2].
- Microwave: Heat in 30-second bursts, stirring between each round, until smooth. Avoid overheating — scorched base smells unpleasant and loses clarity.
Step 2: Cool slightly before adding ingredients
Let the melted base cool for 2–3 minutes. Adding beetroot juice to extremely hot base can degrade the pigment and reduce the pink color intensity.
Step 3: Add glycerin and vitamin E
Stir in 1 tablespoon of glycerin. Pierce your vitamin E capsules and squeeze the oil directly into the mixture. Stir gently.
Step 4: Add beetroot juice or powder
Pour in your 2–3 tablespoons of fresh juice, or stir in 1 teaspoon of beet powder. Mix slowly and evenly — aggressive stirring creates bubbles in the finished bar [3].
Step 5: Add essential oils (optional)
If using fragrance, add 10–15 drops of your chosen essential oil now. Rose, lavender, and geranium all pair beautifully with beetroot’s earthy scent.
Step 6: Pour into molds
Pour the mixture slowly into your silicone mold. Tap the mold gently on the counter to release any air bubbles. If bubbles remain on the surface, a quick spritz of rubbing alcohol flattens them.
Step 7: Set and unmold
Leave the soap undisturbed at room temperature for at least 6 hours [3]. Once firm, pop it out of the silicone mold. Your soap is ready to use immediately — no curing time needed with melt-and-pour.
For more natural skincare recipes you can make at home, check out these 5 DIY face masks for glowing skin and this DIY turmeric butter for skin — both pair well with a beetroot soap routine.
Can Beginners Try the Cold Process Method?
Cold process soap is an option for more experienced makers, but it’s not recommended for first-timers. It involves handling lye (sodium hydroxide), which is caustic and requires careful safety measures [4].
If you do try cold process:
- Wear goggles, gloves, and long sleeves — always [4].
- Cool both your oils and lye-water solution to 130°F (54°C) or below before combining [4].
- Work in a well-ventilated area.
- Use a dedicated soap-making pitcher — never reuse it for food.
Choose cold process if: You want a more artisan, long-lasting bar and you’re comfortable with lye safety protocols.
Stick with melt-and-pour if: You’re new to soap making, making soap with kids nearby, or want a quick, safe project.
Common Mistakes to Avoid With This Recipe
Even a simple melt-and-pour recipe has a few pitfalls. Here’s what to watch for:
- Overheating the base: Causes scorching and a burnt smell. Always melt low and slow.
- Adding juice to boiling-hot base: Degrades the pigment. Wait for the base to cool slightly first.
- Using too much liquid: More than 3 tablespoons of fresh juice can prevent the soap from setting properly. Stick to the recommended amount.
- Skipping the patch test: Even natural ingredients can irritate sensitive skin. Test a small area before using the soap on your face or body.
- Storing in a humid bathroom: Melt-and-pour soap absorbs moisture from the air (“sweating”). Store unused bars in a cool, dry place wrapped in wax paper or cling film.
You might also love pairing your beetroot soap with a DIY vanilla sugar scrub for a full natural skincare routine, or try this DIY collagen balm for dry, dull skin as a follow-up moisturizer.
How Long Does Homemade Beetroot Soap Last?
Melt-and-pour beetroot soap typically lasts 6–12 months when stored properly. The main factors that shorten shelf life are moisture exposure and heat.
Storage tips:
- Wrap bars individually in wax paper or shrink wrap.
- Keep in a cool, dry location away from direct sunlight.
- Use a soap dish with drainage so the bar doesn’t sit in water between uses.
The vitamin E oil in this recipe also acts as a natural preservative, which helps extend the soap’s shelf life slightly.
FAQ
Q: Will beetroot soap stain my skin pink?
A: Fresh beetroot juice can temporarily tint skin during lathering, but it rinses off completely. Using beet powder instead of fresh juice minimizes this effect [4].
Q: Is this soap safe for the face?
A: Yes, for most people. The melt-and-pour base is gentle, and glycerin is a well-known skin-safe humectant. Always do a patch test first, especially if you have sensitive or acne-prone skin.
Q: Can I use store-bought beetroot juice instead of fresh?
A: You can, but check the label. Many commercial beetroot juices contain added sugar or preservatives that could affect the soap’s texture and shelf life. Fresh or 100% pure juice is best.
Q: How much does it cost to make this soap at home?
A: A rough estimate for one batch (2–4 bars): soap base costs around $5–10, and the other ingredients (glycerin, vitamin E, beet) add another $3–5. Total is approximately $8–15 per batch, depending on where you source ingredients.
Q: Can I add other skin-loving ingredients to this recipe?
A: Yes. Honey (1 teaspoon) adds extra moisture. Oat flour (1 tablespoon) adds gentle exfoliation. Just keep add-ins small in quantity to avoid affecting the soap’s ability to set.
Q: Does beetroot soap help with dark spots or hyperpigmentation?
A: Some natural beauty enthusiasts use beetroot topically for this purpose, but there’s no strong clinical evidence that a rinse-off soap delivers meaningful results for pigmentation. For targeted skin concerns, a leave-on product like a serum or mask would be more effective.
Q: Can I use this recipe to make soap for kids?
A: The melt-and-pour method is safe for family use, but skip the essential oils for young children, as some can be irritating to sensitive skin.
Q: Why did my soap turn brown instead of pink?
A: This usually happens when the soap base was too hot when you added the beetroot juice, or when the soap is exposed to too much light during storage. Keep bars wrapped and away from sunlight.
Conclusion
Making a DIY beetroot soap recipe at home is genuinely one of the easiest natural skincare projects you can try. The melt-and-pour method keeps things simple and safe, the ingredients are affordable, and the result — a naturally pink, antioxidant-rich bar — is something you’ll actually want to use every day.
Your next steps:
- Gather your ingredients (soap base, fresh beetroot or beet powder, glycerin, vitamin E).
- Choose your method: fresh juice for a deeper pink, powder for a lighter, more stable color.
- Follow the 7-step process above, allow 6 hours to set, and unmold.
- Store your bars properly and do a patch test before your first use.
Once you’ve got this recipe down, explore more natural skincare ideas like these 7 calendula recipes for skin care or this DIY aloe vera face mask for glowing skin to build out a full natural beauty routine.
References
[1] Watch (Melt & Pour Pink Glowing Skin Tutorial) – https://www.youtube.com/watch?v=LOXmbncyoOU
[2] Watch (Homemade Beetroot Soap DIY) – https://www.youtube.com/watch?v=trLpsCnN5Jk
[3] Watch (How to Make Beetroot Soap with Base) – https://www.youtube.com/watch?v=Mw-IcAh6nmQ
[4] Beet Cold Process Soap Tutorial – https://soapqueen.com/bath-and-body-tutorials/beet-cold-process-soap-tutorial/