
Key Takeaways
- A DIY anti-age face mask made from kitchen ingredients can provide antioxidants, hydration, and gentle exfoliation without harsh chemicals
- Honey, avocado, yogurt, and oats are among the most dermatologist-recommended ingredients for homemade anti-aging treatments
- Natural masks work best when applied 1-2 times weekly for 15-20 minutes on clean, damp skin
- Always patch-test new ingredients on your inner wrist 24 hours before applying to your face
- Kitchen-based masks complement (but don’t replace) a solid skincare routine with SPF and retinoids
- Most DIY anti-age face masks cost under $2 per application and stay fresh for 3-5 days when refrigerated
- Combine ingredients strategically: pair humectants (honey) with emollients (avocado) for better skin barrier support
This content is for informational purposes only and is not medical advice. Always consult a healthcare professional before trying any remedy.
Quick Answer
A DIY anti-age face mask using kitchen ingredients offers an affordable, natural way to nourish mature skin with antioxidants and hydration. Dermatologists often recommend ingredients like honey (for moisture retention), avocado (for healthy fats), plain yogurt (for gentle exfoliation), and oats (for soothing inflammation). These masks work best as a complement to proven anti-aging actives like retinoids and sunscreen, not as replacements.
Why Kitchen Ingredients Work for Anti-Aging Skincare
Kitchen-based face masks deliver concentrated nutrients directly to your skin without synthetic additives or preservatives. Many common foods contain vitamins, fatty acids, and antioxidants that support skin health when applied topically[1].
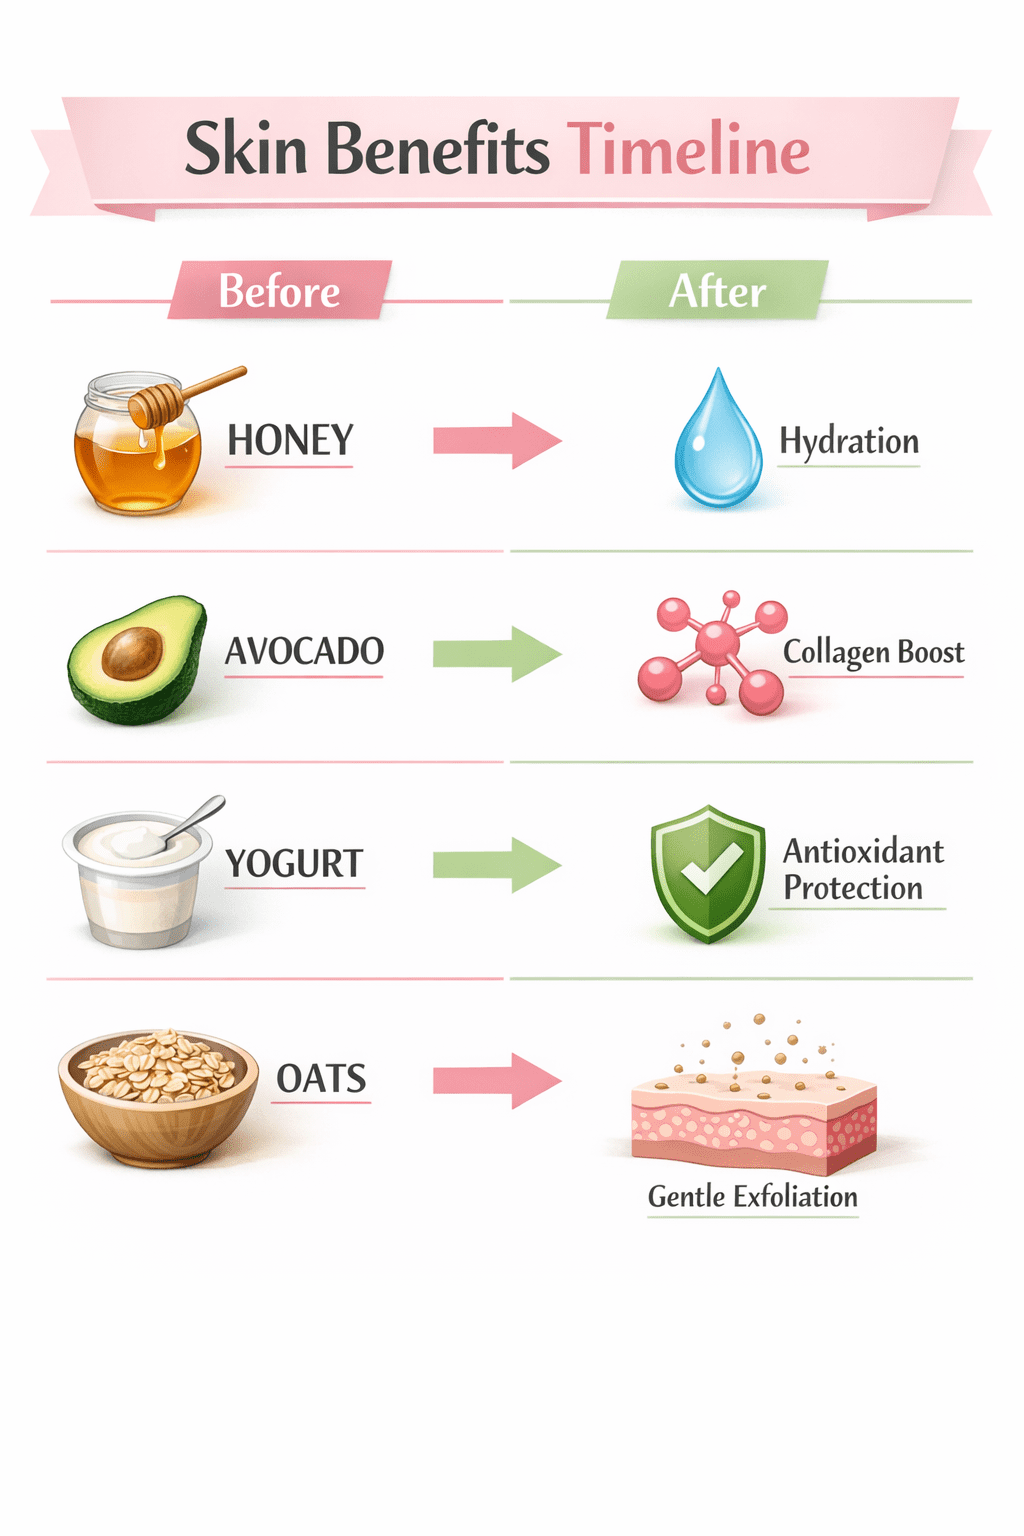
The science is straightforward: ingredients like honey contain natural humectants that draw moisture into skin, while avocado provides oleic acid and vitamin E that support the skin barrier. Yogurt offers lactic acid for gentle exfoliation, and oats contain anti-inflammatory compounds called avenanthramides[2].
These ingredients won’t replace prescription retinoids or professional treatments, but they can:
- Provide temporary hydration and plumping
- Deliver antioxidants that may help protect against environmental damage
- Offer gentle exfoliation to improve texture
- Soothe irritation and redness
- Support overall skin barrier health
Choose kitchen masks if you want a gentle, affordable addition to your routine. Skip them if you’re looking for dramatic wrinkle reduction—that requires proven actives like retinol or professional procedures.
For more natural skincare approaches, explore our DIY Skincare category.
What Kitchen Ingredients Do Dermatologists Actually Recommend?
Dermatologists point to specific kitchen staples that have both traditional use and some scientific backing for skin benefits.
Top Dermatologist-Approved Ingredients
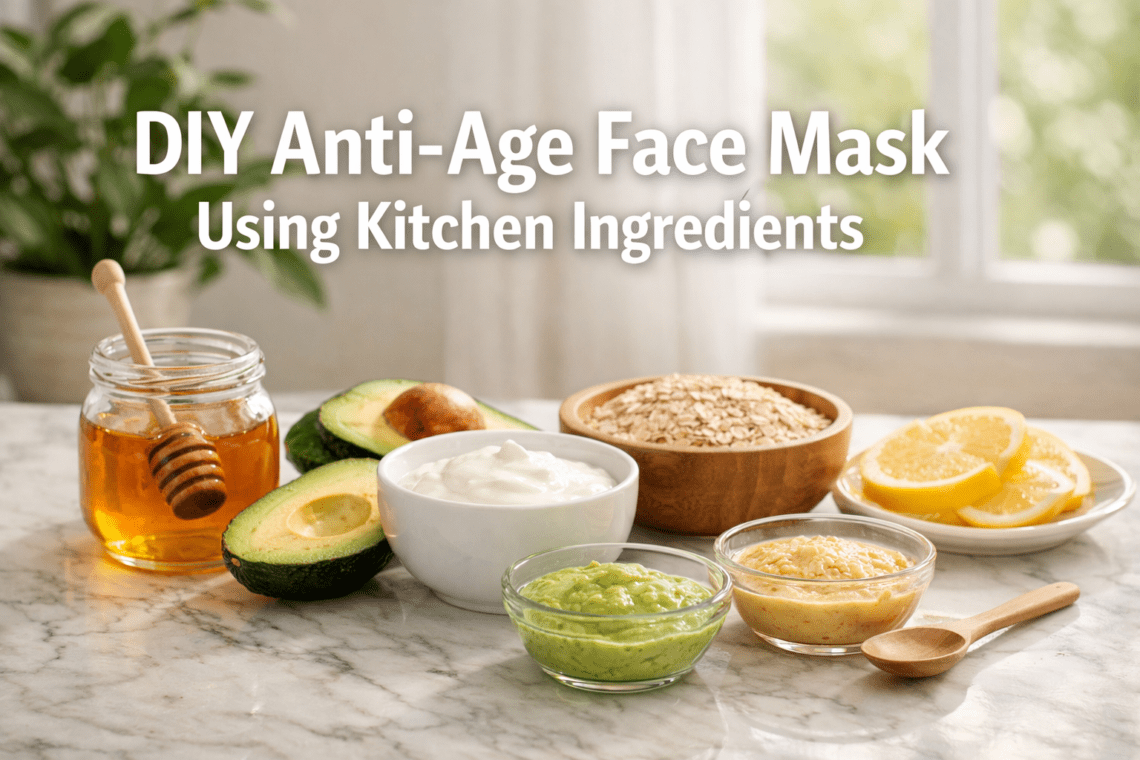
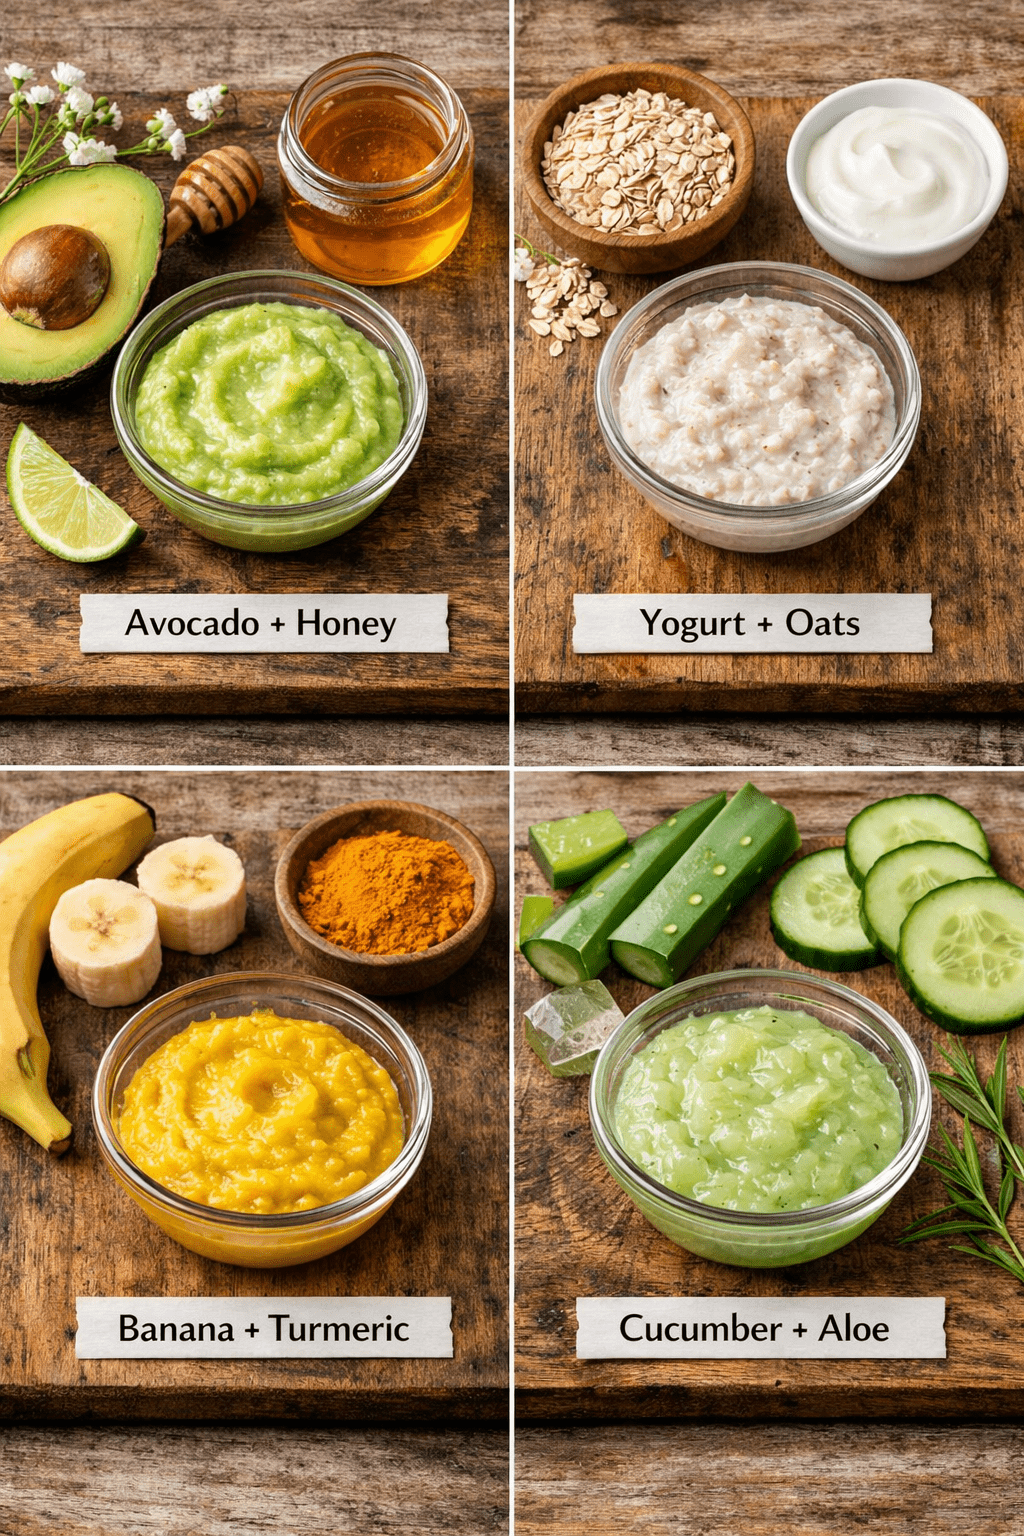
Honey – A natural humectant that attracts and retains moisture. Raw honey also contains enzymes and antioxidants. It’s gentle enough for sensitive skin and provides antimicrobial benefits[3].
Avocado – Rich in oleic acid, vitamins E and C, and healthy fats that nourish dry, mature skin. The creamy texture makes it easy to apply and blend with other ingredients[4].
Plain Yogurt – Contains lactic acid (an alpha-hydroxy acid) that gently exfoliates dead skin cells. Choose full-fat, unsweetened yogurt without added sugars or flavors[5].
Oats – Colloidal oatmeal soothes inflammation and irritation. Ground oats provide gentle physical exfoliation while calming redness[6].
Banana – Packed with potassium, vitamins A and E. The soft texture blends easily and provides moisture for dry skin.
Cucumber – High water content hydrates, while vitamin C and caffeic acid help reduce puffiness and irritation[7].
Olive Oil – Extra virgin olive oil contains squalene and polyphenols that may support skin barrier function. Use sparingly as it can be comedogenic for some skin types.
Ingredients to Use with Caution
Lemon juice – Too acidic for most skin and can cause photosensitivity. Skip this one despite its popularity in DIY recipes.
Baking soda – Disrupts skin’s natural pH balance. Not recommended by dermatologists for facial use.
Sugar – Can be too abrasive. If you want physical exfoliation, finely ground oats work better.
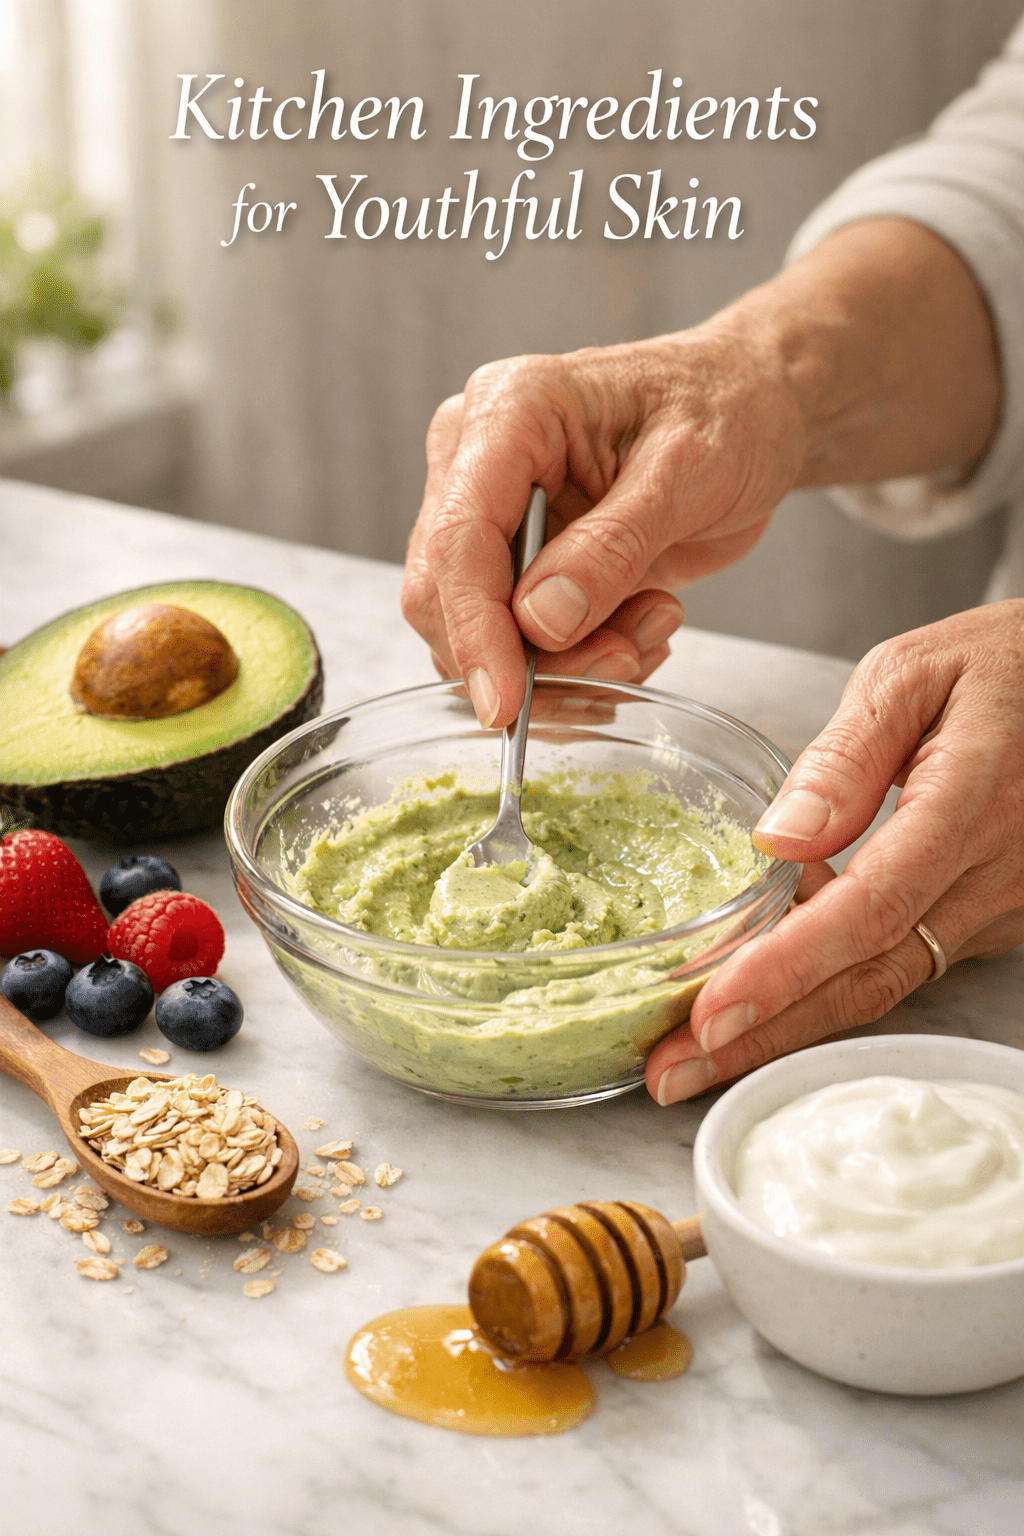
How to Make a Basic DIY Anti-Age Face Mask
Creating an effective anti-aging mask requires just 2-3 ingredients and about 5 minutes of prep time.
Simple Honey-Avocado Hydrating Mask
Ingredients:
- ½ ripe avocado
- 1 tablespoon raw honey
- 1 teaspoon plain yogurt (optional, for added exfoliation)
Instructions:
- Mash the avocado in a clean bowl until smooth with no lumps
- Add honey and mix thoroughly until well combined
- Stir in yogurt if using
- Apply immediately to clean, damp skin
- Leave on for 15-20 minutes
- Rinse with lukewarm water and pat dry
- Follow with your regular moisturizer
Storage: Refrigerate leftovers in an airtight container for up to 3 days. The mask may darken due to oxidation but remains safe to use.
Oat-Yogurt Soothing Mask
Ingredients:
- 2 tablespoons finely ground oats
- 2 tablespoons plain yogurt
- 1 teaspoon honey
Instructions:
- Grind oats in a coffee grinder or blender until powdery
- Mix with yogurt and honey until you get a spreadable paste
- Add a few drops of water if too thick
- Apply to clean skin, avoiding eye area
- Leave for 15 minutes
- Rinse with gentle circular motions for light exfoliation
This combination works well for sensitive skin that needs both hydration and calming benefits[8].
For additional natural face mask recipes, check out our guide to 5 DIY Face Masks for Glowing Skin.
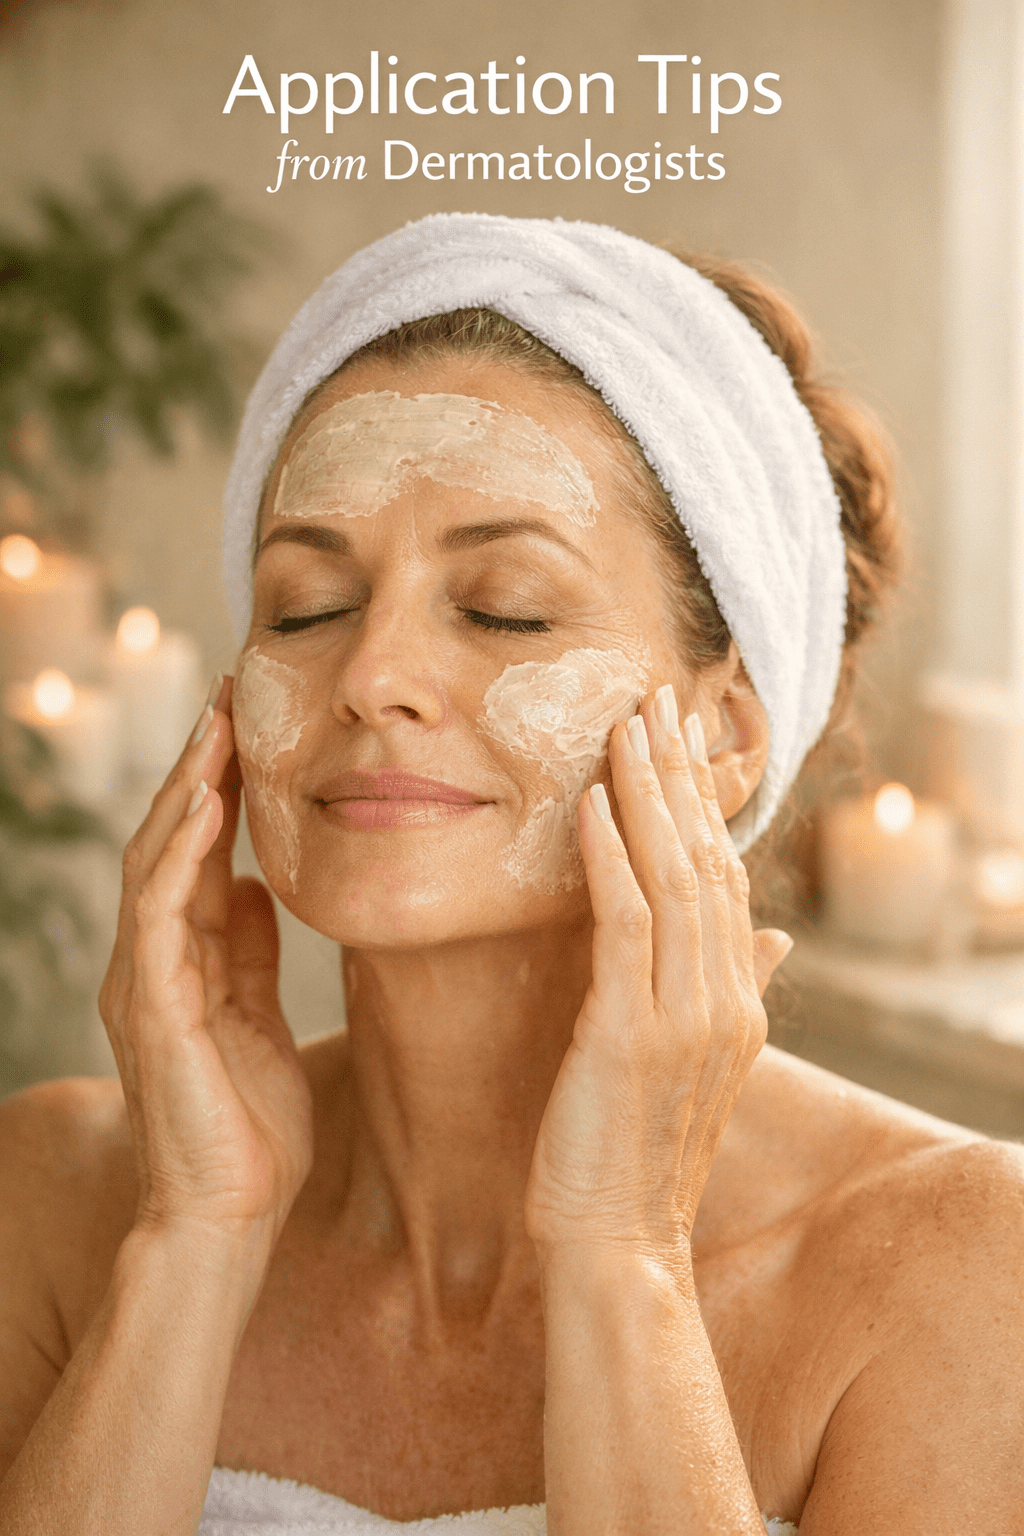
Best Application Practices for DIY Anti-Age Face Masks
Proper application maximizes benefits and minimizes potential irritation.
Before Application
Patch test first – Apply a small amount to your inner wrist or behind your ear. Wait 24 hours to check for redness, itching, or irritation.
Start with clean skin – Wash your face with your regular cleanser and pat dry. Slightly damp skin helps masks spread more easily.
Tie back hair – Use a headband or hair tie to keep hair away from your face.
During Application
- Use clean fingers or a soft brush to apply an even layer
- Avoid the delicate eye area (the skin is too thin for most masks)
- Apply a medium-thick layer—you should see the mask, but it shouldn’t drip
- Relax for 15-20 minutes (longer isn’t better and can dry out skin)
- Keep a damp washcloth nearby for quick cleanup
After Removal
- Rinse thoroughly with lukewarm water
- Pat skin dry with a clean towel
- Apply your regular serum and moisturizer while skin is still slightly damp
- Use sunscreen if it’s daytime (always essential for anti-aging)
Frequency: Use masks 1-2 times per week. More frequent use won’t speed results and may irritate skin.
Common mistake: Letting clay-based masks dry completely. For kitchen masks without clay, this isn’t usually an issue, but if you add ingredients like bentonite clay, mist with water to keep it damp.
Comparing DIY vs. Store-Bought Anti-Aging Masks
Both options have merits depending on your priorities and skin goals.
| Factor | DIY Kitchen Masks | Store-Bought Masks |
|---|---|---|
| Cost | $1-3 per application | $5-50 per application |
| Ingredient control | Complete transparency | Varies by brand |
| Convenience | Requires prep and cleanup | Ready to use |
| Shelf life | 3-5 days refrigerated | 6-24 months |
| Active concentration | Unknown/variable | Standardized and tested |
| Clinical evidence | Limited to individual ingredients | Often tested as complete formulas |
| Customization | Highly customizable | Fixed formulations |
Choose DIY masks when:
- You want complete control over ingredients
- You’re on a tight budget
- You enjoy the ritual of making skincare
- You have specific sensitivities to preservatives or fragrances
Choose store-bought masks when:
- You want proven concentrations of actives like retinol or peptides
- Convenience is a priority
- You need longer shelf stability
- You’re targeting specific concerns that require specialized ingredients
I find that combining both approaches works well—using kitchen masks for gentle weekly hydration and store-bought treatments with proven actives for targeted anti-aging work.
Common Mistakes to Avoid with DIY Anti-Age Face Masks
Even natural ingredients can cause problems when used incorrectly.
Using citrus directly on skin – Lemon, lime, and grapefruit juice are too acidic and can cause chemical burns or photosensitivity. The pH is wrong for facial skin.
Skipping the patch test – Food allergies can manifest on skin too. Always test new ingredients first, especially if you have sensitive skin or known allergies.
Expecting dramatic results – Kitchen masks provide gentle benefits, not Botox-level wrinkle reduction. Set realistic expectations for hydration, temporary plumping, and overall skin health support.
Applying to broken skin – Wait until any cuts, active breakouts, or irritated areas heal before using masks with exfoliating ingredients like yogurt.
Storing improperly – Leftover masks need refrigeration and should be used within 3-5 days. Discard if you notice any off smell, mold, or color changes.
Using too frequently – More isn’t better. Overuse can disrupt your skin barrier, especially with exfoliating ingredients. Stick to 1-2 times weekly.
Mixing incompatible ingredients – Some combinations don’t work well together. For example, mixing honey (acidic) with baking soda (alkaline) neutralizes both.
Ignoring your base routine – No mask replaces daily sunscreen, which is the single most important anti-aging step you can take.
How Long Before You See Results?
Kitchen-based face masks provide some immediate effects but require consistency for lasting benefits.
Immediate (right after use):
- Skin feels softer and more hydrated
- Temporary plumping from moisture
- Smoother texture from gentle exfoliation
- Reduced redness if using soothing ingredients like oats
After 2-4 weeks of regular use:
- Improved overall hydration
- More even skin tone
- Slightly refined texture
- Better product absorption from your other skincare
After 2-3 months:
- Enhanced skin barrier function
- More resilient skin that recovers faster from irritation
- Cumulative antioxidant protection benefits
What won’t change: Deep wrinkles, significant sagging, or pigmentation issues require proven actives (retinoids, vitamin C, niacinamide) or professional treatments. Kitchen masks support healthy skin but aren’t miracle workers.
Track your progress by taking photos in the same lighting every two weeks. This helps you see subtle improvements that daily mirror checks might miss.
For a broader understanding of natural approaches to wellness, see our Natural Remedies for Beginners: Complete Guide.
Building a Complete Anti-Aging Routine Around DIY Masks
Face masks work best as part of a comprehensive skincare strategy, not as standalone solutions.
Morning Routine
- Gentle cleanser
- Antioxidant serum (vitamin C)
- Moisturizer
- Broad-spectrum SPF 30+ (non-negotiable)
Evening Routine
- Double cleanse (oil cleanser, then water-based)
- Treatment product (retinoid 2-3x weekly)
- Hydrating serum or essence
- Night cream or facial oil
Weekly Additions
- DIY anti-age face mask (1-2x weekly)
- Gentle exfoliation if not using retinoids
- Extra hydrating treatment as needed
The masks complement your active ingredients by providing hydration and barrier support, which helps skin tolerate more potent treatments better.
Budget allocation tip: If money is tight, prioritize sunscreen and a basic retinoid over expensive serums. Add DIY masks for affordable hydration and antioxidant support.
FAQ
How often should I use a DIY anti-age face mask?
Use homemade anti-aging masks 1-2 times per week. More frequent application won’t accelerate results and may irritate your skin, especially if the mask contains exfoliating ingredients like yogurt or oats.
Can DIY face masks replace my anti-aging serums?
No. Kitchen masks provide hydration and gentle nourishment but can’t replace proven anti-aging actives like retinoids, vitamin C, or peptides. Use them as complementary treatments, not replacements for your core routine.
Are DIY anti-age face masks safe for sensitive skin?
Most kitchen ingredients like honey, avocado, and oats are gentle enough for sensitive skin. Always patch-test first, avoid citrus and baking soda, and start with single-ingredient masks to identify any reactions.
How long can I store leftover DIY face mask?
Refrigerate leftover masks in an airtight container for 3-5 days maximum. Discard if you notice any changes in smell, color, or texture, or if mold appears.
What’s the best time of day to apply a face mask?
Evening is ideal because you can follow with your nighttime routine and let your skin recover overnight. However, morning masks work fine too if that fits your schedule better.
Can I use a DIY anti-age face mask if I’m using retinol?
Yes, but avoid masks with exfoliating ingredients (like yogurt) on the same night you use retinol. Hydrating masks with honey and avocado can actually help soothe any dryness from retinoid use.
Will kitchen ingredients clog my pores?
Some ingredients like coconut oil and olive oil can be comedogenic for acne-prone skin. Honey, yogurt, and mashed banana are generally non-comedogenic. Know your skin type and choose accordingly.
Do I need to wash my face before applying a DIY mask?
Yes, always apply masks to clean skin. This removes dirt, oil, and makeup that would otherwise block ingredient absorption and potentially cause breakouts.
Can men use these DIY anti-age face masks too?
Absolutely. Skin is skin regardless of gender. Men can benefit from the same hydrating and antioxidant-rich ingredients that support healthy aging.
What’s the minimum age to start using anti-aging masks?
There’s no specific age, but most people start incorporating preventive anti-aging care in their late 20s or early 30s. Focus on sunscreen and hydration first, then add targeted treatments as needed.
Can I mix multiple recipes together?
It’s better to stick with tested combinations initially. Once you know how your skin reacts to individual ingredients, you can experiment with custom blends based on what works for you.
Should I apply moisturizer after removing a DIY mask?
Yes, always follow with your regular moisturizer or facial oil while skin is still slightly damp. Masks provide temporary benefits, but you need to seal in that hydration with your usual products.
Conclusion
Creating a DIY anti-age face mask from kitchen ingredients offers an accessible, affordable way to support your skin’s health as you age. Ingredients like honey, avocado, yogurt, and oats provide genuine benefits—hydration, gentle exfoliation, antioxidants, and barrier support—without harsh chemicals or high costs.
Remember that these masks work best as part of a complete skincare routine that includes daily sunscreen (your most powerful anti-aging tool), proven actives like retinoids, and consistent gentle care. Kitchen masks won’t erase deep wrinkles or replace professional treatments, but they can enhance your skin’s overall health, texture, and resilience.
Your next steps:
- Choose one simple recipe to try this week (the honey-avocado mask is a great starter)
- Patch-test on your inner wrist 24 hours before facial application
- Apply to clean skin 1-2 times weekly for 15-20 minutes
- Track your results with photos every two weeks
- Adjust ingredients based on how your skin responds
The beauty of DIY skincare is that you control exactly what goes on your face. Start simple, stay consistent, and enjoy the ritual of caring for your skin with ingredients you can pronounce and afford.
For more natural wellness approaches, explore our collection of Natural Remedies and Guides & How-Tos.
References
[1] Diy Face Masks At Home – https://www.naturalinspirations.com/blogs/news/diy-face-masks-at-home
[2] 8 Diy Anti Aging Face Mask At Home – https://chicnutrix.com/blogs/world-of-chic/8-diy-anti-aging-face-mask-at-home
[3] Diy Anti Aging Face Masks Created With Simple Kitchen Ingredients – https://jameschristiancosmetics.com/blog/beauty/diy-anti-aging-face-masks-created-with-simple-kitchen-ingredients/
[4] Best Homemade Face Mask Recipes Using Kitchen Ingredients – https://ollieskincare.com/blogs/goat-farm-blog/best-homemade-face-mask-recipes-using-kitchen-ingredients
[5] Diy Homemade Face Mask How To – https://www.elle.com/beauty/makeup-skin-care/a23880455/diy-homemade-face-mask-how-to/
[6] Homemade Face Masks – https://www.healthline.com/health/homemade-face-masks
[7] Top Natural Diy Face Masks For Glowing Skin – https://armpearlbeauty.com/blogs/wisdom/top-natural-diy-face-masks-for-glowing-skin
[8] Diy Face Mask Recipes – https://www.ipsy.com/blog/diy-face-mask-recipes