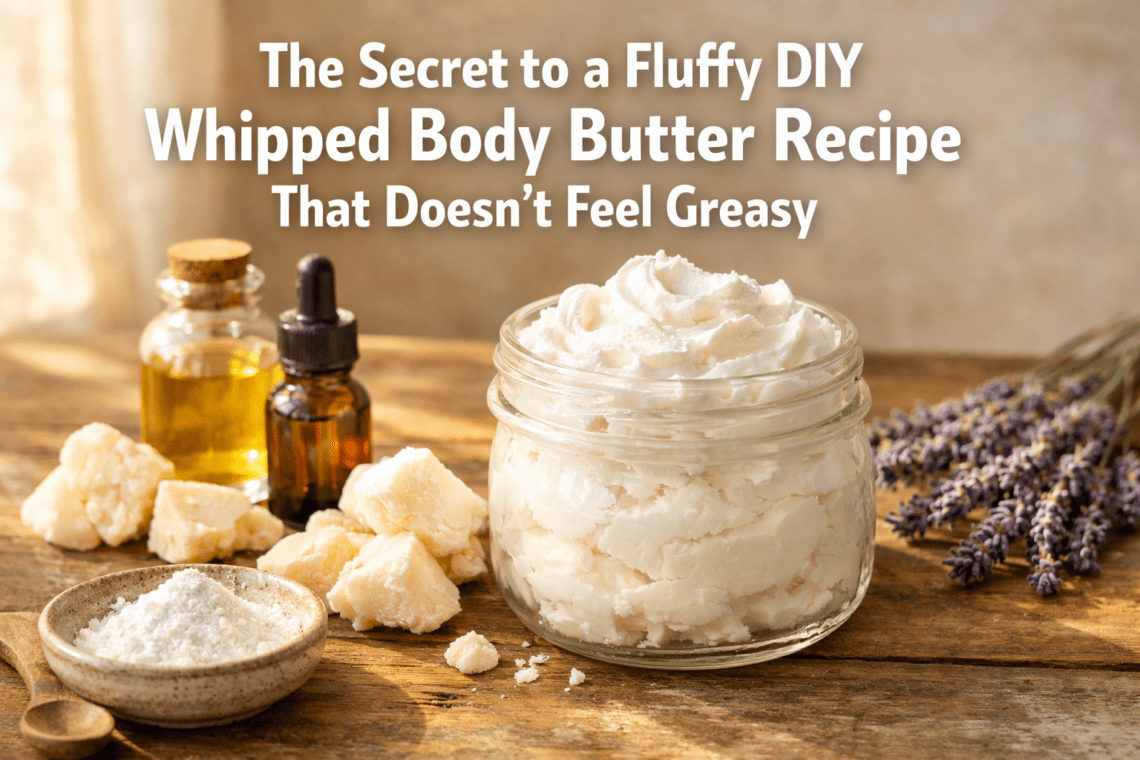
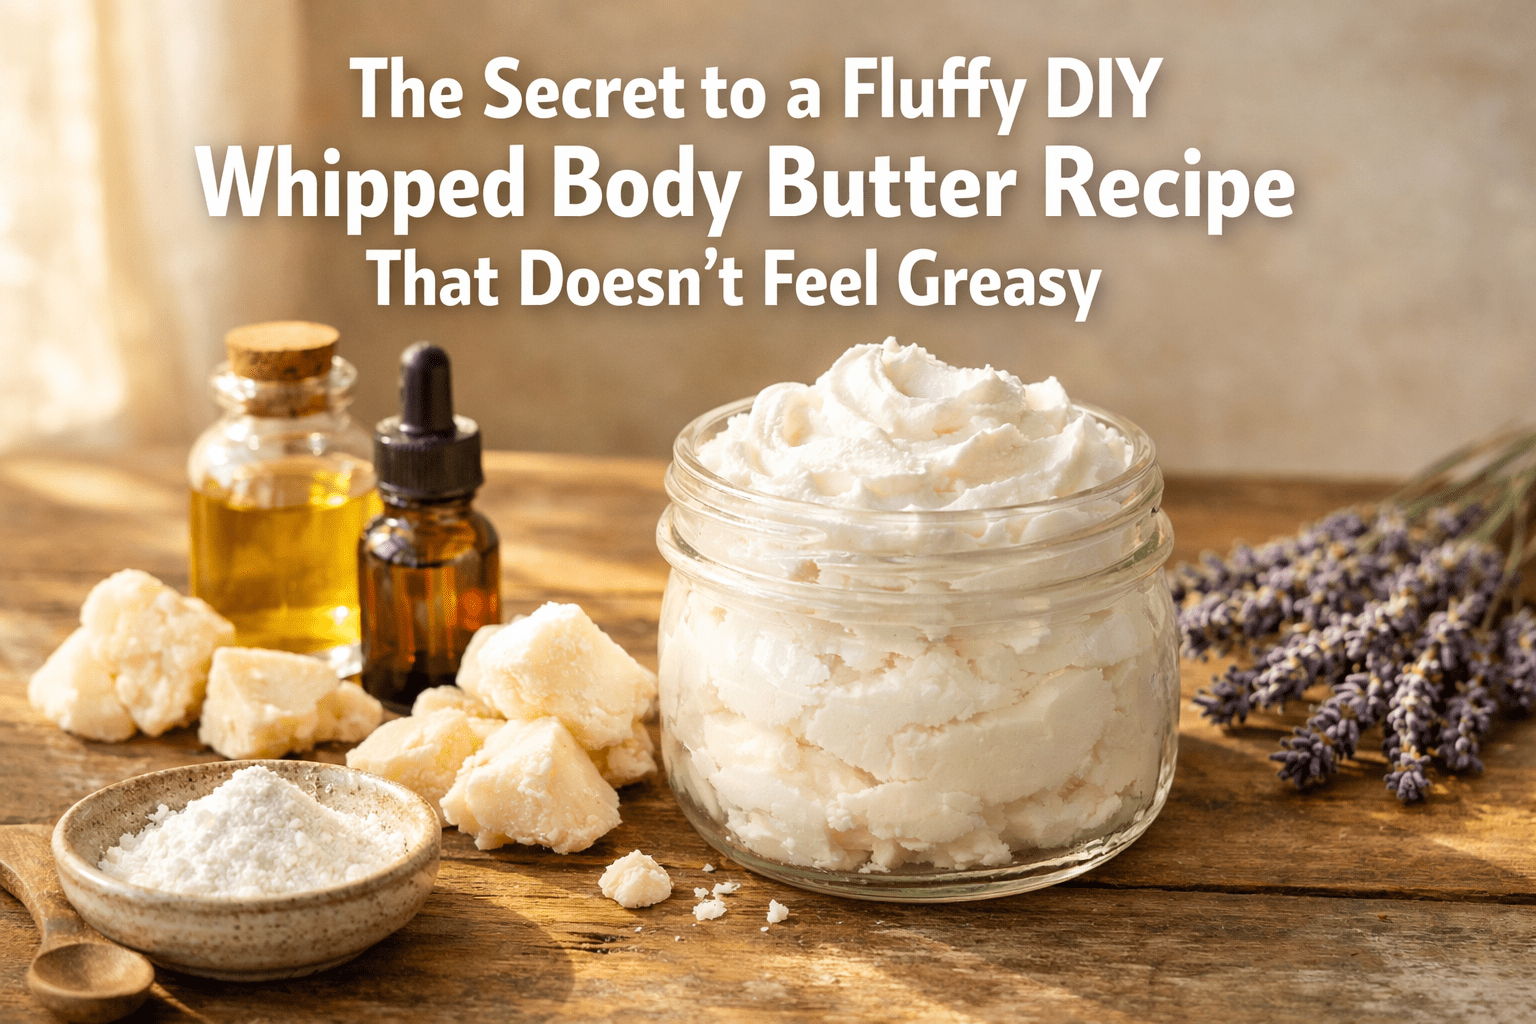
Quick Answer: The secret to a non-greasy whipped body butter is two things working together: lightweight carrier oils (like jojoba or argan) and a small amount of arrowroot powder or tapioca starch. These two additions absorb excess oil on the skin’s surface, leaving your body butter feeling silky and light instead of slick. Whip the cooled mixture for 3-5 minutes on high speed until it doubles in size, and you’ll get that fluffy, cloud-like texture every time.
Key Takeaways
- Arrowroot powder is the #1 fix for greasy body butter — add 1-2 teaspoons per 8 oz of ingredients to absorb excess oil [1][2][3]
- Jojoba oil is the best carrier oil for a non-greasy finish; avoid heavy oils like olive oil as your primary liquid fat [1][3]
- Cool the butter mixture to semi-solid before whipping — this step is non-negotiable for fluffy peaks [1][2][3]
- Whip for 3-5 minutes on high speed until the mixture turns white and roughly doubles in size [1][2][3]
- Add essential oils and vitamin E during whipping, not during melting, to preserve their benefits [1][2][3]
- Equal-parts base ratios work best: shea butter, cocoa butter, coconut oil, and a liquid carrier oil in roughly equal amounts [1][2][3]
- Optional beeswax (3.5-4g) improves firmness and reduces oiliness if you want extra structure [2][3]
- Store finished body butter in a cool, dry place — heat will melt it back down
What Makes a DIY Whipped Body Butter Recipe Go Greasy (and How to Fix It)
Most body butters feel greasy because of two problems: heavy oils that sit on top of skin rather than absorbing, and skipping the one ingredient that fixes everything — arrowroot powder.
When you use oils like coconut oil or cocoa butter alone, they take a long time to absorb. Your skin ends up coated rather than moisturized. The fix is straightforward:
Two-part solution:
- Swap or reduce heavy oils — use jojoba, argan, or grapeseed as your liquid carrier oil instead of olive oil or castor oil [1][3]
- Add arrowroot powder or tapioca starch — 1 to 2 teaspoons per 8 ounces of total ingredients creates a silkier, drier finish [1][2][3][4][5]
“Arrowroot powder is the single most impactful ingredient for making body butter feel non-greasy. It acts like a dry powder that absorbs the slick feeling without drying out your skin.”
Jojoba oil is technically a liquid wax, not an oil, which is why it absorbs so quickly and mimics the skin’s natural sebum. That’s why it shows up in nearly every non-greasy recipe [1][2][3].
Common mistake: Using too much coconut oil. Coconut oil is solid at room temperature and melts on skin, which can feel heavy. Keep it at no more than 1/4 of your total recipe, or replace it with mango butter for a lighter feel.
The Exact Ingredients You Need for a Non-Greasy DIY Whipped Body Butter Recipe
Here’s a straightforward ingredient list that balances moisture and absorption. These ratios are consistent across multiple tested recipes [1][2][3].
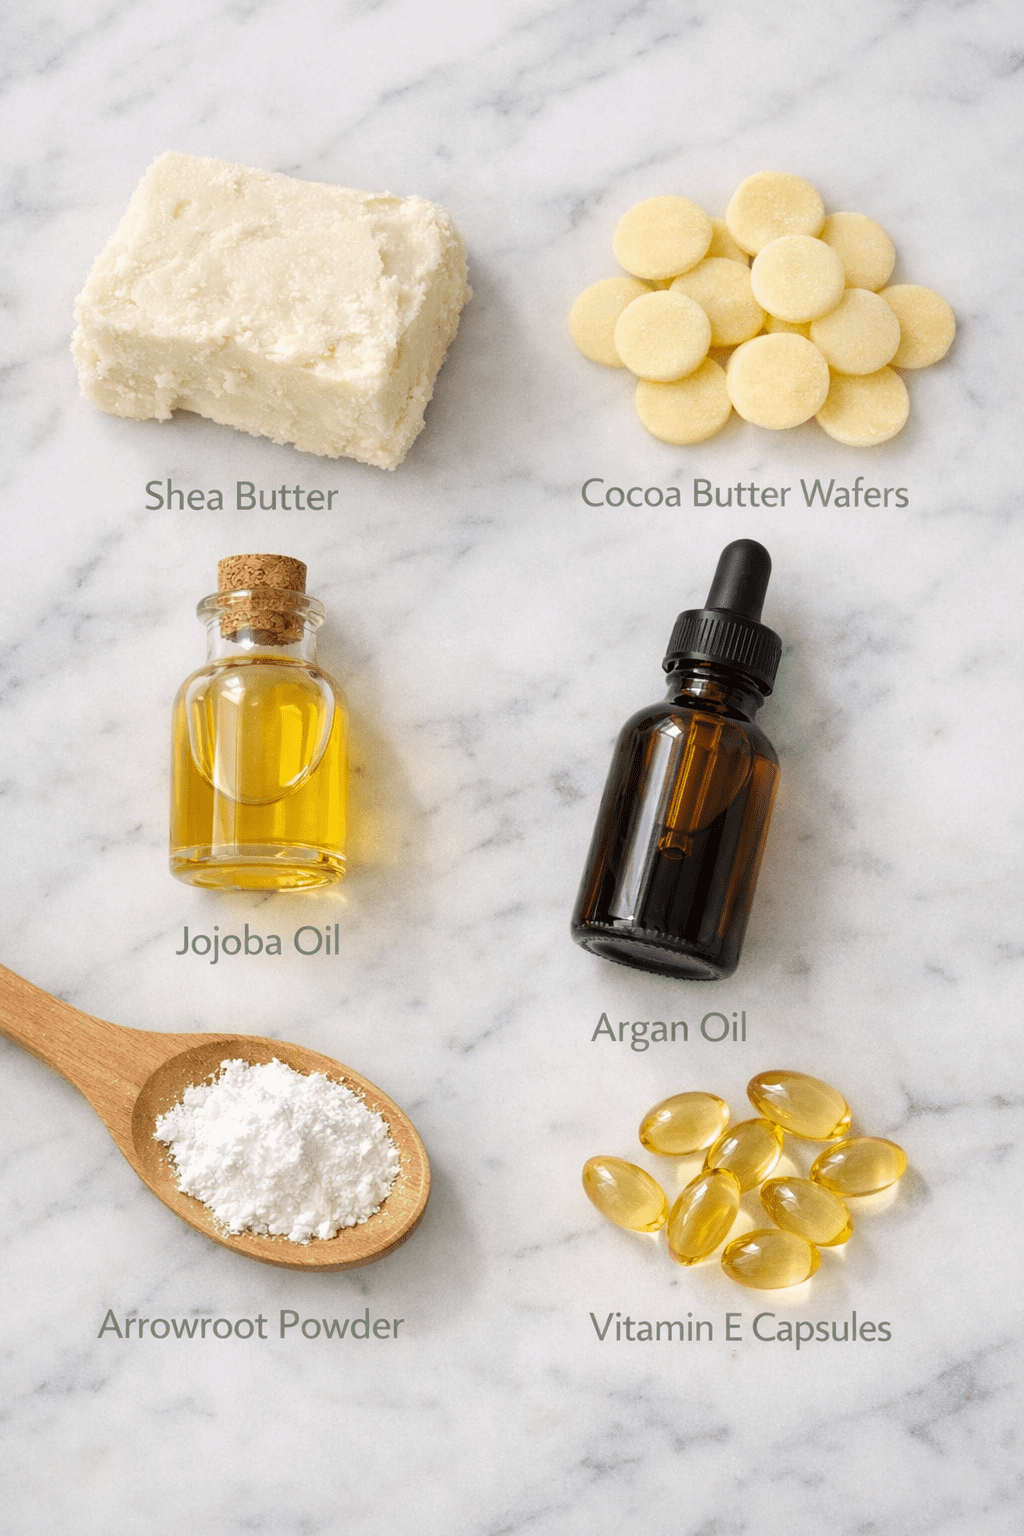
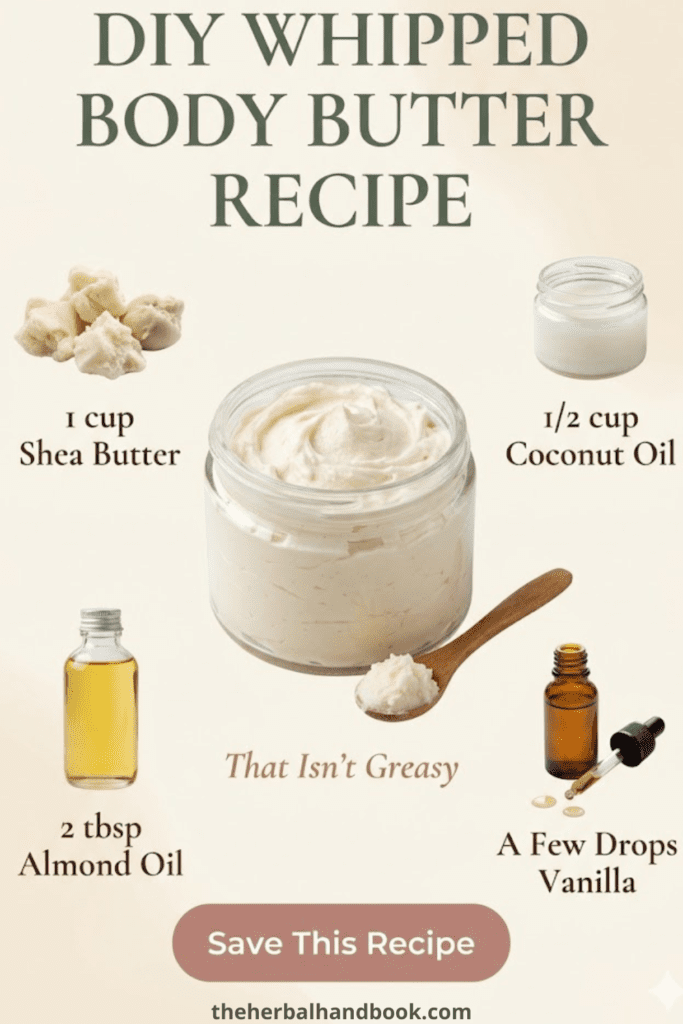
Base Ingredients (makes approx. 8 oz)
| Ingredient | Amount | Purpose |
|---|---|---|
| Raw shea butter | 1/2 cup (approx. 50g) | Deep moisture, base texture |
| Cocoa butter | 1/4 cup (approx. 25g) | Firmness, skin barrier support |
| Coconut oil (refined) | 1/4 cup (approx. 50g) | Softening, whippability |
| Jojoba oil | 1/4 cup (approx. 55ml) | Lightweight absorption, non-greasy |
| Arrowroot powder | 1-2 tsp | Oil absorption, silky finish |
| Vitamin E oil | 1/4 tsp | Preservation, antioxidant benefit |
| Essential oil of choice | 15-20 drops | Fragrance (optional) |
| Beeswax pellets (optional) | 3.5-4g | Extra firmness, reduced oiliness |
Choose your essential oil based on skin goal:
- Lavender — calming, all skin types
- Frankincense — mature or dry skin
- Geranium — balancing, combination skin
- Tea tree — acne-prone or oily skin (use sparingly)
If you enjoy making your own skin-nourishing products, you might also love this DIY turmeric butter for a radiant skin glow — it uses a similar base and pairs beautifully with a body butter routine.
Step-by-Step: How to Make a Fluffy DIY Whipped Body Butter Recipe
Follow these steps in order. The cooling step is where most people go wrong, so don’t rush it.
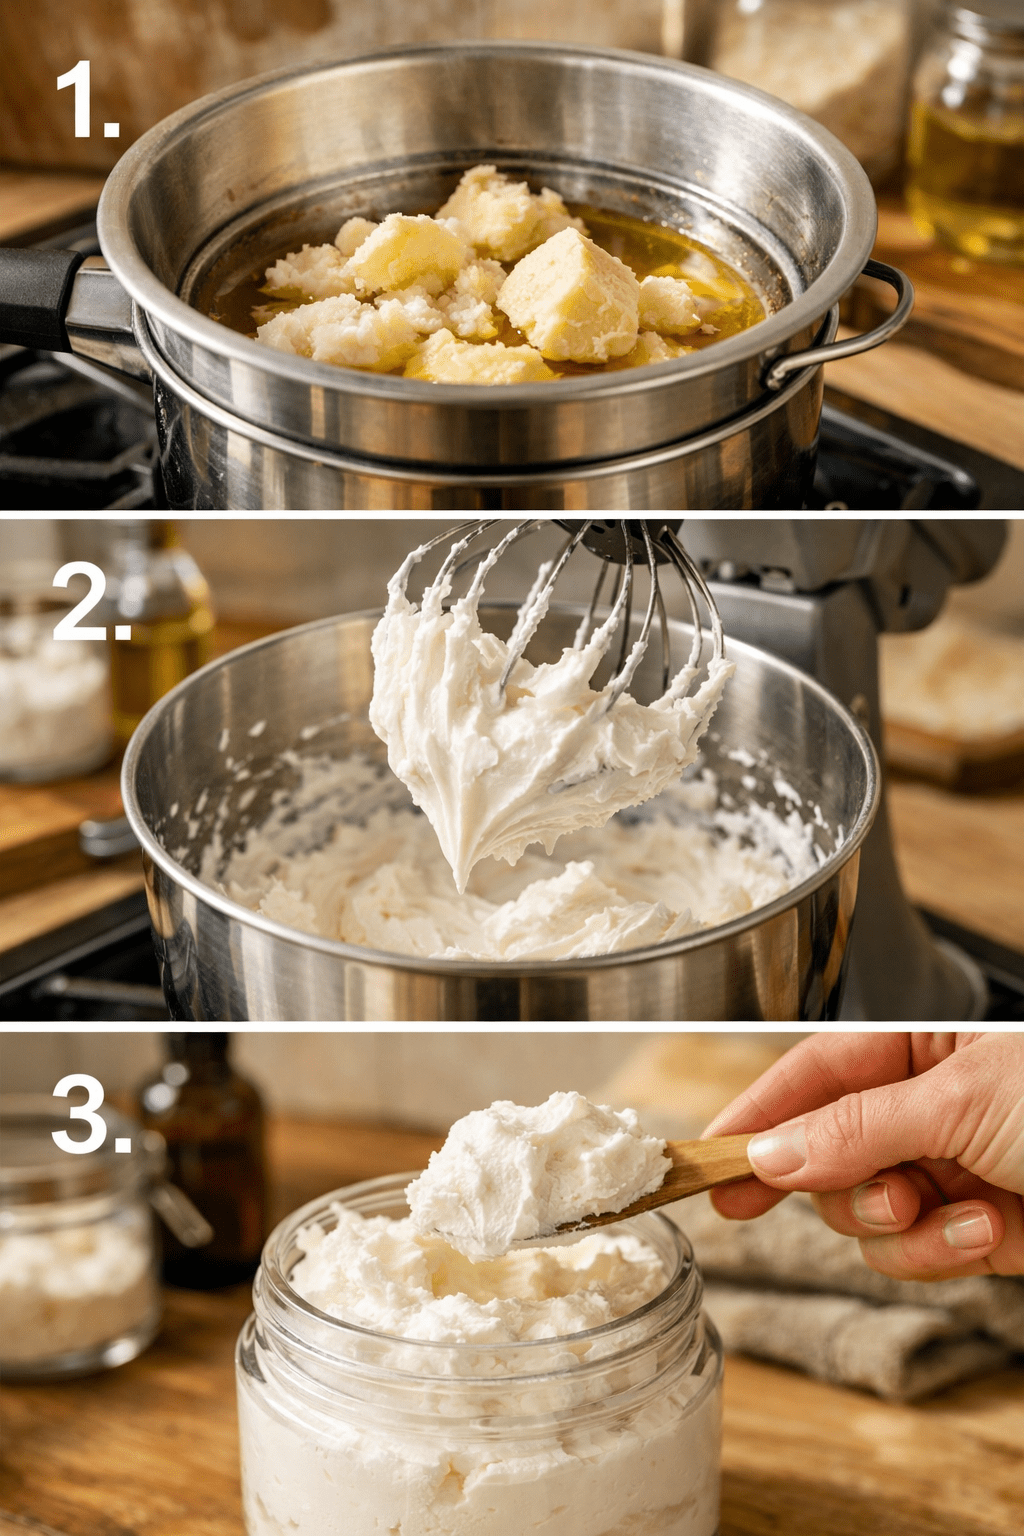
Step 1: Melt Your Solid Butters and Oils
Combine shea butter, cocoa butter, coconut oil, and beeswax pellets (if using) in a double boiler or a heat-safe bowl set over a pot of simmering water. Stir gently until fully melted. This usually takes 5-10 minutes on low heat.
Do not microwave — uneven heat can degrade the quality of your butters.
Step 2: Add Your Liquid Oil
Remove from heat and stir in jojoba oil. Mix until fully combined.
Step 3: Cool Until Semi-Solid (Critical Step)
Pour the mixture into a clean mixing bowl and let it cool at room temperature until it turns opaque and semi-firm — similar to soft coconut oil. This can take 1-2 hours at room temperature, or about 20-30 minutes in the refrigerator [1][2][3].
Why this matters: If you whip the mixture while it’s still liquid, you won’t get peaks. The semi-solid state is what traps air and creates that fluffy texture.
Step 4: Whip on High Speed
Using a stand mixer or hand mixer, whip the cooled mixture on high speed for 3-5 minutes. You’ll see it transform from yellow and opaque to white and airy, roughly doubling in size [1][2][3].
Step 5: Add Arrowroot, Vitamin E, and Essential Oils
During the last minute of whipping, add:
- Arrowroot powder (1-2 tsp)
- Vitamin E oil (1/4 tsp)
- Essential oils (15-20 drops)
Continue whipping until fully incorporated [1][2][3].
Step 6: Transfer and Store
Scoop into a clean glass jar with a lid. Store at room temperature away from direct sunlight and heat. Use within 3-6 months.
Why the Cooling Step Makes or Breaks Your Whipped Body Butter
Cooling the mixture before whipping is the most skipped step — and the one that determines whether you get fluffy peaks or a runny mess.
When the butter mixture is semi-solid, the fat molecules are in a partially crystallized state. Whipping at this stage forces air into the structure, creating a stable foam. If the mixture is too warm, it stays liquid and won’t hold air. If it’s too cold and fully solid, it becomes too stiff to whip properly [1][2][3].
The sweet spot: The mixture should look like soft, slightly grainy coconut oil — opaque but still scoopable with a spoon.
Edge case: If your kitchen is very warm (above 75°F / 24°C), your body butter may soften or melt after whipping. In that case, add an extra 1/4 teaspoon of arrowroot powder and store in the refrigerator. Bring to room temperature for a few minutes before each use.
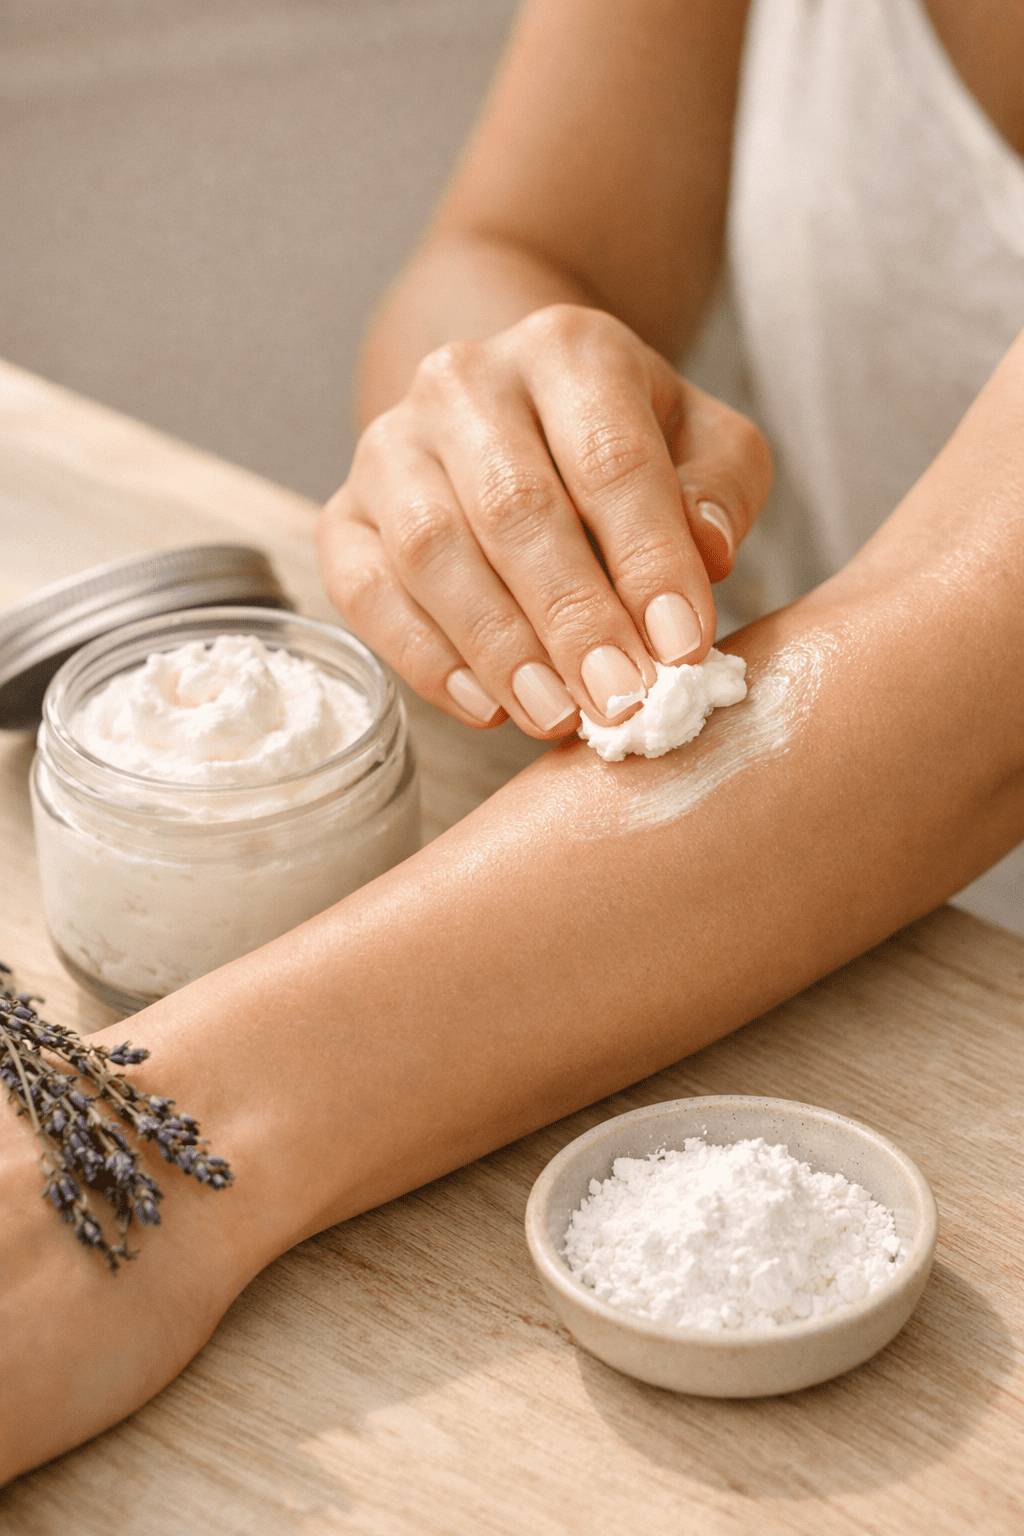
How to Apply Whipped Body Butter So It Absorbs Without Feeling Greasy
Even a perfectly made body butter can feel greasy if you apply too much at once. The key is using a small amount on slightly damp skin.
Best application method:
- After a shower, pat skin mostly dry but leave it slightly damp
- Scoop a pea-sized amount (for one arm) and warm it between your palms
- Massage in circular motions until fully absorbed
- Wait 2-3 minutes before dressing
Slightly damp skin helps the butter absorb faster because water acts as a carrier. Applying to completely dry skin slows absorption and increases the chance of that greasy feeling.
If you love DIY skincare rituals, pairing your body butter routine with a DIY vanilla sugar scrub for soft, glowy skin before moisturizing gives even better results — exfoliated skin absorbs moisture more effectively.
For your face, skip the body butter and try a lighter option like this DIY face moisturizer with aloe vera for sensitive skin instead.
Ingredient Swaps and Variations Worth Trying
Once you’ve made the base recipe, it’s easy to customize. Here are swaps that work well:
If you want even lighter texture:
- Replace cocoa butter with mango butter (lighter, less waxy)
- Use argan oil instead of jojoba (similar absorption, slightly richer feel)
- Increase arrowroot powder to 2 full teaspoons [3][4]
If you want a vegan version:
- Replace beeswax with candelilla wax (use half the amount — it’s stronger)
- All other ingredients in the base recipe are already plant-based
If you want added skin benefits:
- Add 1 teaspoon of rosehip oil for brightening (add during whipping, not melting)
- Add a few drops of frankincense essential oil for mature skin support
You can also explore this DIY collagen balm recipe for dry, dull skin if you want a firmer balm-style moisturizer with similar nourishing ingredients.
Troubleshooting: Why Your Body Butter Isn’t Fluffy or Still Feels Greasy
Problem: Butter won’t whip into peaks
- Cause: Mixture is too warm
- Fix: Return to refrigerator for 10-15 more minutes, then try again
Problem: Grainy or gritty texture
- Cause: Cocoa butter cooled too quickly, forming large crystals
- Fix: Gently re-melt and cool more slowly at room temperature (skip the fridge)
Problem: Still feels greasy on skin
- Cause: Not enough arrowroot powder, or using too much product
- Fix: Add another 1/2 teaspoon of arrowroot and use less per application [1][2][3][4]
Problem: Butter melted in the jar
- Cause: Storage area is too warm
- Fix: Store in refrigerator; bring to room temperature for 5 minutes before use, or add a small amount of beeswax to the recipe for more stability [2][3]
Problem: Mixture separated
- Cause: Liquid oil and solid butters weren’t fully combined before cooling
- Fix: Re-melt, stir thoroughly, and cool again
For more DIY skincare inspiration that follows the same natural approach, check out the full DIY skincare category on The Herbal Handbook.
FAQ
Can I use coconut oil as my only fat in a DIY whipped body butter recipe?
Technically yes, but it won’t feel as light. Coconut oil melts on skin and can leave a slick residue. Blending it with shea butter and a lightweight oil like jojoba gives a much better result [1][3].
How long does homemade whipped body butter last?
Most recipes last 3-6 months at room temperature. Adding vitamin E oil extends shelf life slightly by slowing oxidation [2][3]. Discard if it smells rancid or changes color significantly.
Can I use this body butter on my face?
It’s generally too heavy for facial skin, especially if you’re acne-prone. Stick to lighter options for your face. A DIY face moisturizer with aloe vera is a better choice for facial use.
What’s the difference between body butter and body lotion?
Body lotion contains water and typically needs a preservative. Body butter is water-free (anhydrous), so it doesn’t need a preservative but feels richer. Body butter is better for very dry skin; lotion is lighter for daily use.
Can I make this without a mixer?
Yes, but it takes more effort. Use a fork or whisk and work quickly. The texture won’t be quite as fluffy, but it will still work. A hand mixer gives the best results.
Is arrowroot powder safe for all skin types?
Arrowroot powder is generally well-tolerated and considered safe for most skin types, including sensitive skin. It’s a common ingredient in natural cosmetics and baby powders.
Why did my body butter turn grainy after a few days?
This is a common issue with cocoa butter. It can re-crystallize over time. To prevent it, melt your ingredients slowly and cool at room temperature rather than in the fridge. You can also gently re-melt and re-whip if graininess develops.
Can I add aloe vera gel to my body butter?
No — adding water-based ingredients like aloe vera to an oil-based body butter creates a risk of mold and bacterial growth without a proper preservative system. Keep your body butter water-free.
What’s the best essential oil for a body butter that helps with dry skin?
Lavender, frankincense, and geranium are all good choices. Frankincense is particularly popular for mature or very dry skin. Use 15-20 drops total per 8 oz batch.
Can I use this recipe for a body butter for kids?
Yes, with modifications. Skip essential oils entirely or use only lavender at half the dose (7-8 drops). The base recipe without essential oils is gentle enough for most children’s skin.
Conclusion
A fluffy, non-greasy whipped body butter really does come down to a few key decisions: choosing lightweight oils, adding arrowroot powder, and letting the mixture cool properly before whipping. None of these steps are complicated, but skipping any one of them is usually why homemade body butter ends up feeling heavy or greasy.
Your action plan:
- Gather your ingredients — shea butter, cocoa butter, coconut oil, jojoba oil, arrowroot powder, and vitamin E oil
- Melt, combine, and cool the mixture to semi-solid before whipping
- Whip for a full 3-5 minutes on high speed until white and fluffy
- Add arrowroot and essential oils during the last minute of whipping
- Store in a clean glass jar and apply a small amount to slightly damp skin
Once you’ve made this once, you’ll never go back to store-bought. And if you want to build out your full natural skincare routine, try pairing this body butter with a DIY rice powder body scrub for dry, dull skin for a complete at-home spa experience. You can also explore more natural body care ideas in the DIY skincare guides at The Herbal Handbook.
References
[1] DIY Whipped Body Butter Recipe – https://homesteadandchill.com/diy-whipped-body-butter-recipe/
[2] Homemade Whipped Body Butter Non Greasy – https://thecrunchyginger.com/homemade-whipped-body-butter-non-greasy/
[3] How To Make Body Butter That Doesn’t Feel Greasy – https://www.modernhippiehw.com/blog/how-to-make-body-butter-that-doesnt-feel-greasy
[4] Non Greasy Whipped Body Butter Recipe – https://www.beautyrove.com/non-greasy-whipped-body-butter-recipe/
[5] How To Make Easy Body Butter – https://livesimply.me/how-to-make-easy-body-butter/