Quick Answer: A DIY Pretty Legs Cream made from natural ingredients like shea butter, coconut oil, and essential oils can give you visibly softer, smoother legs in as little as one to two weeks of consistent use. The routine takes about five minutes a day and costs a fraction of what commercial leg creams charge. It works best when paired with regular exfoliation and applied to damp skin right after a shower.
Key Takeaways
- A simple DIY Pretty Legs Cream needs just three to five base ingredients you likely already have at home.
- Exfoliating before applying your cream makes a noticeable difference in how well ingredients absorb.
- Applying moisturizer to damp (not dry) skin locks in hydration far more effectively. [3]
- Shea butter, coconut oil, and almond oil are the most skin-friendly bases for a homemade leg cream.
- Essential oils like lavender or rosemary add scent and skin benefits, but always dilute them properly.
- Consistency matters more than the recipe itself: daily use beats occasional deep treatments.
- Store your homemade cream in a clean glass jar, away from heat and direct sunlight, for up to four weeks.
- People with eczema, psoriasis, or open skin irritation should patch-test any new cream and consult a doctor first.
What Ingredients Make the Best DIY Pretty Legs Cream?
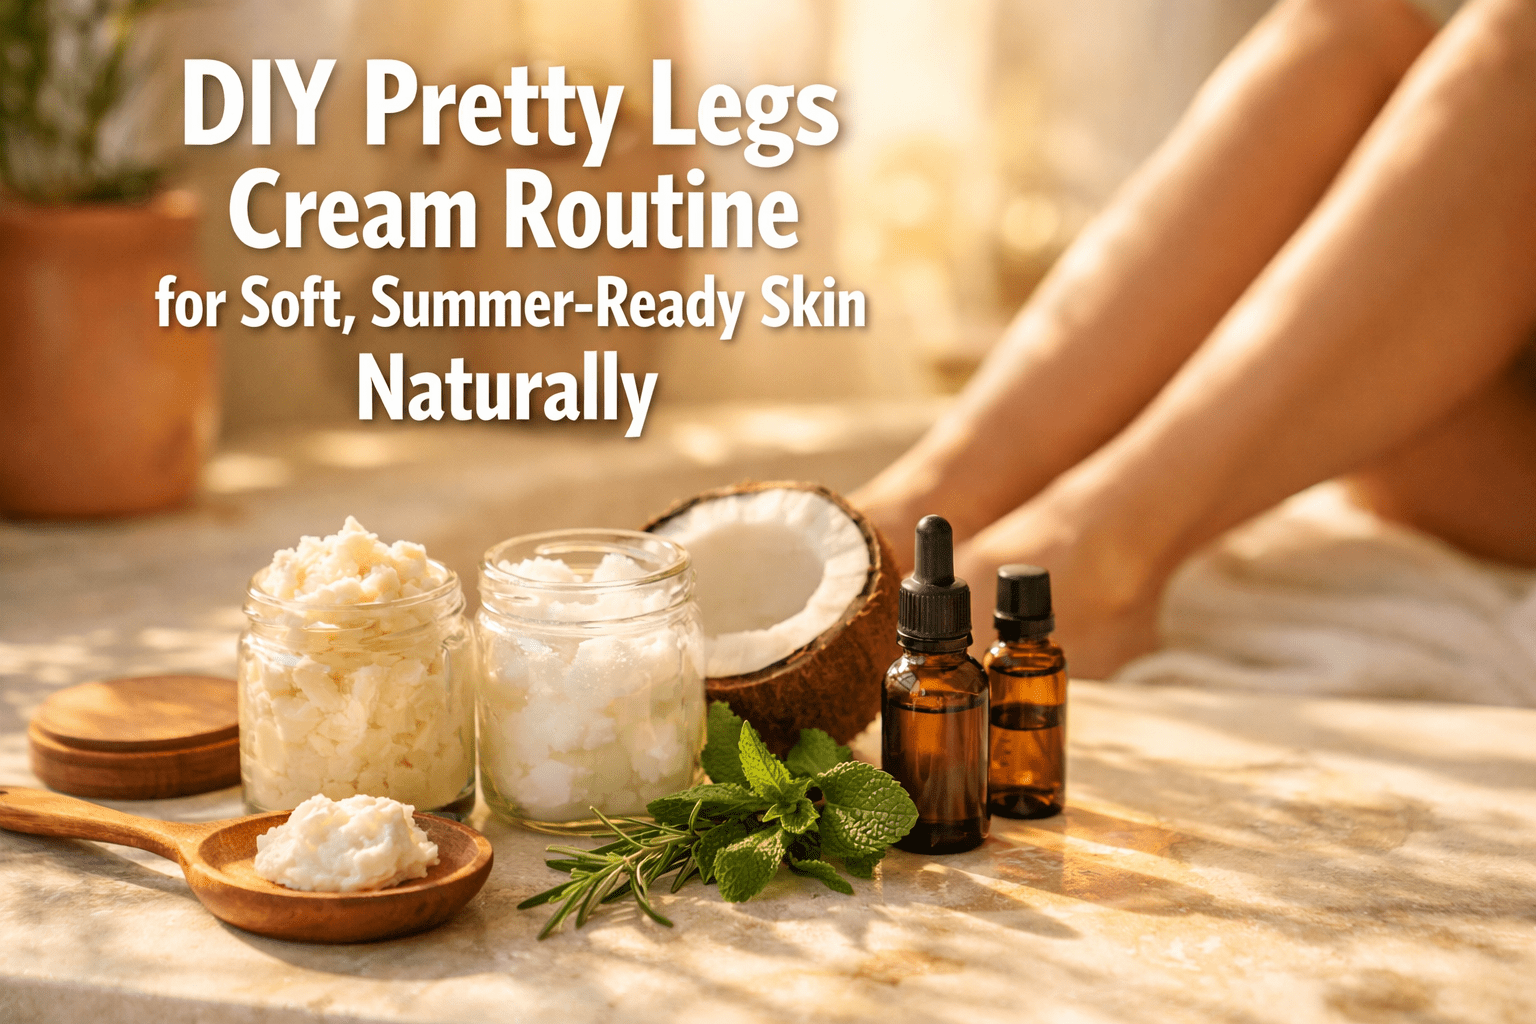
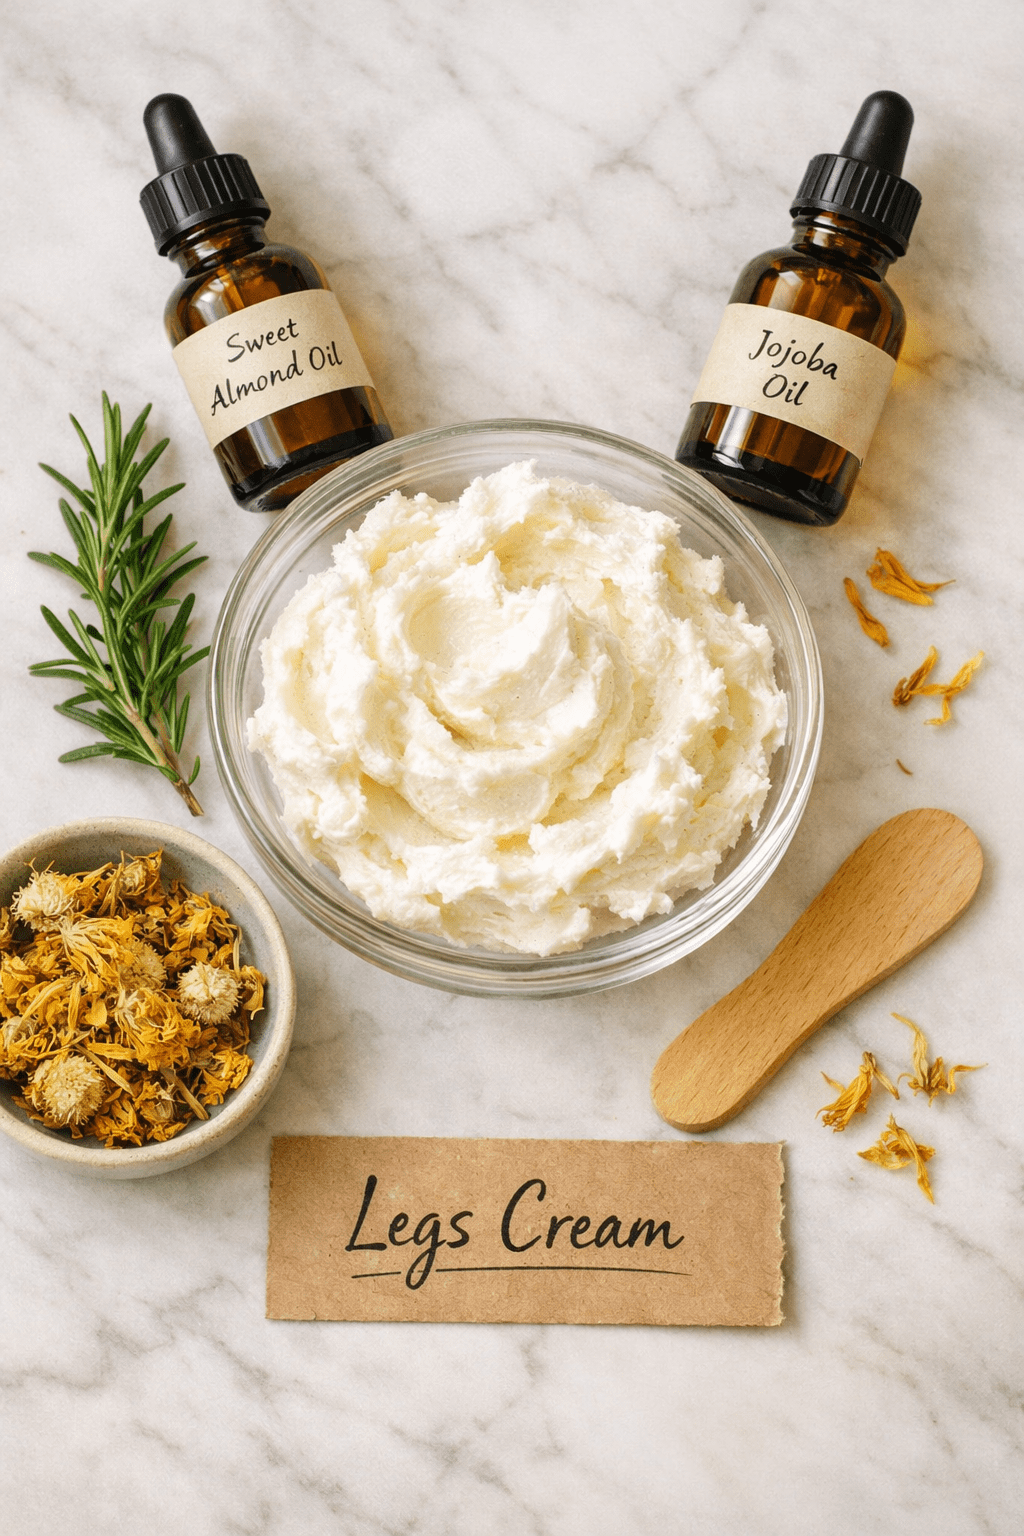
The best base ingredients for a DIY Pretty Legs Cream are shea butter, coconut oil, and a lightweight carrier oil like sweet almond or jojoba. These three work together to soften, nourish, and seal moisture into the skin on your legs, which tends to be drier than skin on your face or arms. [2]
Here’s a breakdown of the most useful ingredients and what each one does:
| Ingredient | Skin Benefit | Best For |
|---|---|---|
| Shea butter | Deep moisture, softens rough patches | Dry, flaky skin |
| Coconut oil | Antibacterial, smoothing | Normal to dry skin |
| Sweet almond oil | Lightweight hydration, improves tone | All skin types |
| Jojoba oil | Balances oil, absorbs fast | Oily or combination skin |
| Lavender essential oil | Calming, light antiseptic | Sensitive skin |
| Rosemary essential oil | Circulation boost, firming feel | Dull or tired-looking skin |
| Vitamin E oil | Antioxidant, fades dark spots | Uneven skin tone |
Choose sweet almond oil if your skin feels tight but not flaky. Choose jojoba if your legs tend to feel greasy after heavy creams. Skip coconut oil if you’re prone to body acne or clogged pores, as it’s comedogenic for some people.
“Legs are often the most neglected part of a skincare routine, yet they’re the first thing we show off in summer.” — Legology Wellness Blog [3]
How Do You Make a DIY Pretty Legs Cream at Home?
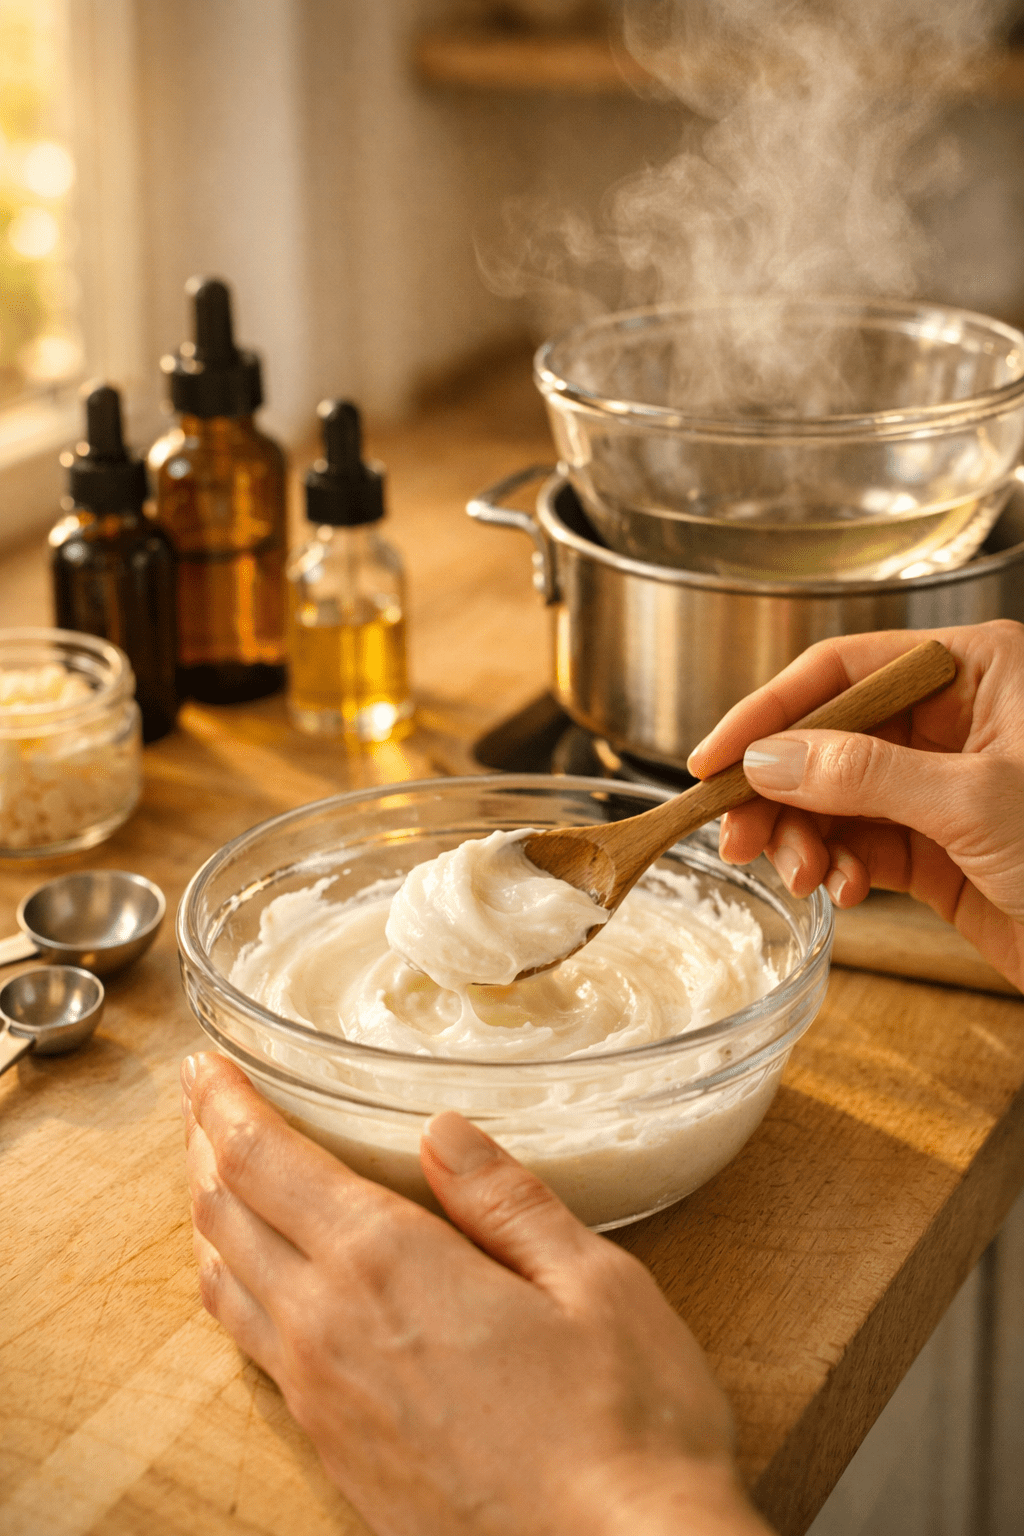
Making a DIY Pretty Legs Cream at home takes about 15 minutes and requires no special equipment beyond a double boiler or a heatproof bowl set over a pot of hot water. The basic recipe below makes roughly a 4-oz jar, which lasts about three to four weeks with daily use.
Basic DIY Pretty Legs Cream Recipe
You’ll need:
- 3 tbsp shea butter (raw, unrefined)
- 2 tbsp coconut oil
- 1 tbsp sweet almond oil
- 10 drops lavender essential oil
- 5 drops vitamin E oil
- A clean glass jar with a lid
Steps:
- Melt the shea butter and coconut oil together in a double boiler over low heat. Stir gently until just melted, then remove from heat.
- Add the almond oil and vitamin E oil. Stir to combine.
- Let the mixture cool at room temperature for about 20 minutes, until it starts to look slightly opaque around the edges.
- Add the essential oils now (adding them while the mixture is too hot reduces their effectiveness).
- Whip the mixture with a hand mixer or fork for two to three minutes until it becomes fluffy and cream-like.
- Spoon into your glass jar and let it set fully before closing the lid (about one hour).
Common mistake: Skipping the cooling step before whipping. If you whip the mixture while it’s still warm, it won’t hold a fluffy texture and will melt back into an oily liquid.
If you enjoy making your own body care products, you might also like this DIY natural stretch mark cream recipe that uses similar ingredients.
What’s the Best Daily Routine to Use Your DIY Pretty Legs Cream?
The most effective routine applies your DIY Pretty Legs Cream to slightly damp skin immediately after showering, because damp skin absorbs moisture more readily than completely dry skin. [3] Doing this daily, rather than a few times a week, produces noticeably better results within two weeks.
Your 5-Minute Daily Leg Routine:
- Shower or bathe as normal.
- Pat legs lightly with a towel, leaving skin slightly damp.
- Scoop a small amount of your DIY cream (about a dime to quarter size per leg).
- Massage upward from ankles toward the thighs, using firm circular strokes. This supports circulation and helps the cream absorb. [4]
- Let it absorb for two to three minutes before dressing.
Add exfoliation twice a week: Before applying your cream, use a gentle scrub to remove dead skin cells. This step makes a real difference in how smooth your legs feel and how well the cream penetrates. A simple DIY lemon sugar scrub works perfectly for this step.
Choose this routine if you’re targeting general dryness and dullness. If you’re also dealing with rough texture or bumpy skin (keratosis pilaris), increase exfoliation to three times a week and use a slightly thicker layer of cream.
Can You Customize Your DIY Pretty Legs Cream for Specific Skin Concerns?
Yes, and it’s one of the biggest advantages of making your own cream. You can swap or add ingredients based on exactly what your legs need, without paying for a specialty product. [2]
For uneven skin tone or dark spots:
Add 5 drops of lemon essential oil (photosensitizing, so apply at night) or increase vitamin E oil to 10 drops. You can also explore a DIY turmeric butter for skin as an add-in for brightening.
For cellulite-prone skin:
Add 5 drops of grapefruit or cypress essential oil, and massage more vigorously in circular motions. For a dedicated formula, see this DIY anticellulite cream recipe.
For very dry or cracked skin:
Increase shea butter to 4 tablespoons and add one teaspoon of castor oil for extra barrier support.
For sensitive skin:
Skip essential oils entirely, or use only chamomile. Calendula-infused oil is an excellent base swap. For more ideas, check out these calendula recipes for skin care.
Edge case: If your skin is currently sunburned, broken, or actively irritated, hold off on any new cream until it heals. Oils and butters can trap heat in sunburned skin and make irritation worse.
How Long Does It Take to See Results?
Most people notice softer skin within three to five days of daily use, with more significant smoothing and tone improvement visible after two to four weeks. [4] Results depend on how dry your skin was to start, how consistently you apply the cream, and whether you’re also exfoliating regularly.
Realistic timeline:
- Days 1–3: Skin feels immediately softer after application.
- Week 1–2: Rough patches start to reduce; skin holds moisture longer between applications.
- Week 3–4: Visible improvement in smoothness and overall skin tone. [2]
If you’re not seeing improvement after four weeks, check whether you’re applying to damp skin, exfoliating regularly, and drinking enough water. Hydration from the inside matters too.
What Mistakes Should You Avoid With a Homemade Leg Cream?
The most common mistake is applying the cream to completely dry skin, which significantly reduces how much moisture actually gets absorbed. [3] Here are the other pitfalls worth knowing before you start.
Mistakes to avoid:
- Skipping the patch test. Apply a small amount to your inner arm and wait 24 hours before using it all over your legs, especially if you’ve added essential oils.
- Using too much essential oil. The safe dilution for body products is generally 1–2% (about 10–20 drops per 100ml of base). More is not better and can cause irritation.
- Storing in a bathroom. Heat and humidity shorten the shelf life of natural creams. Store in a cool, dry place or in the fridge.
- Using a wet spoon. Water contamination causes mold growth. Always use dry, clean tools when scooping from your jar.
- Expecting overnight miracles. Natural ingredients work gently and cumulatively, not dramatically overnight.
If you’re new to making your own skincare products, the Natural Remedies for Beginners guide is a great starting point for understanding ingredient safety and basic formulation.
FAQ
Q: How long does a homemade leg cream last?
A: A water-free cream made with oils and butters typically lasts three to four weeks at room temperature, or up to eight weeks when stored in the refrigerator. Discard it if it smells rancid or changes color.
Q: Can I use olive oil instead of almond oil?
A: Yes, but olive oil has a stronger scent and heavier texture. It works well for very dry skin but may feel greasy on normal skin. Jojoba or grapeseed oil are closer substitutes to almond oil.
Q: Is coconut oil safe for all skin types on the body?
A: Coconut oil is safe for most people on body skin, but it can clog pores for those prone to body acne. If you break out easily on your legs or thighs, swap it for jojoba or sunflower oil instead.
Q: Do I need a preservative in my DIY leg cream?
A: If your recipe contains no water, you don’t strictly need a preservative, as bacteria need water to grow. However, always use clean, dry utensils and store properly to extend shelf life.
Q: Can I use this cream on my feet too?
A: Absolutely. Apply a thicker layer to heels and rough patches on your feet before bed, then put on cotton socks to let it absorb overnight. You might also enjoy these DIY foot soak recipes to prep feet before moisturizing.
Q: Is this routine safe during pregnancy?
A: The base recipe (shea butter, almond oil, coconut oil) is generally considered safe during pregnancy. However, some essential oils are not recommended during pregnancy. Check with your midwife or doctor before adding any essential oils to your formula.
Q: Can I add SPF to my homemade leg cream?
A: Homemade SPF is not reliable or recommended. The protection level depends on precise formulation and testing. Apply a separate, tested sunscreen over your leg cream before sun exposure.
Q: Why does my cream melt in summer?
A: Coconut oil and shea butter both melt at relatively low temperatures. Store your jar in the fridge during warm months, or reduce the coconut oil and increase the shea butter ratio for a more heat-stable formula.
Conclusion
A DIY Pretty Legs Cream routine doesn’t need to be complicated or expensive to work well. The core recipe takes 15 minutes to make, uses five simple ingredients, and costs a fraction of most store-bought options. The real secret is consistency: apply to damp skin daily, exfoliate twice a week, and give it at least two to four weeks before judging the results.
Your next steps:
- Gather your ingredients this week (shea butter, coconut oil, almond oil, vitamin E, and lavender essential oil).
- Make your first batch using the recipe above.
- Do a patch test before full use.
- Start your daily routine the morning after your patch test clears.
- Add exfoliation twice a week with a simple sugar scrub.
Soft, smooth, summer-ready legs are absolutely achievable with natural ingredients. You just need to show up for your skin consistently, and your skin will show up for you. 🌿
References
[1] Skincare For Your Legs – https://www.elle.com/beauty/makeup-skin-care/a44814/skincare-for-your-legs/
[2] How To Get Silky Smooth Legs – https://www.trulybeauty.com/blogs/vegan/how-to-get-silky-smooth-legs
[3] The Best Skincare Routine For Your Legs – https://legology.co/blogs/wellness/the-best-skincare-routine-for-your-legs
[4] How To Get Your Lovely Legs Summer-Ready With Skin Care – https://www.skinelite.com/blog/how-to-get-your-lovely-legs-summerready-with-skin-care/