
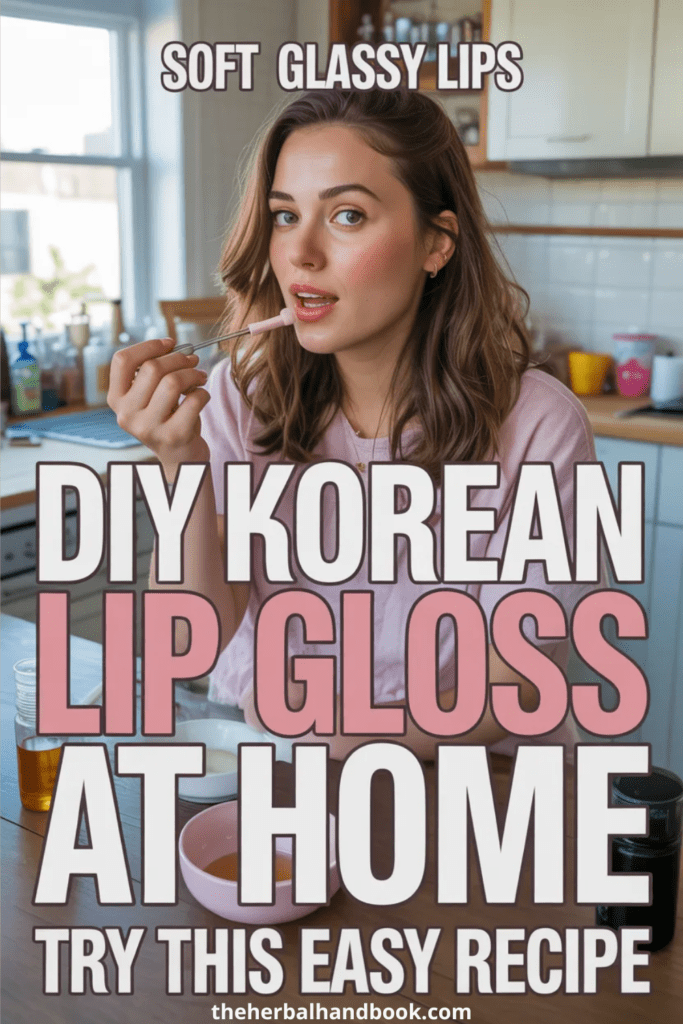
Quick Answer
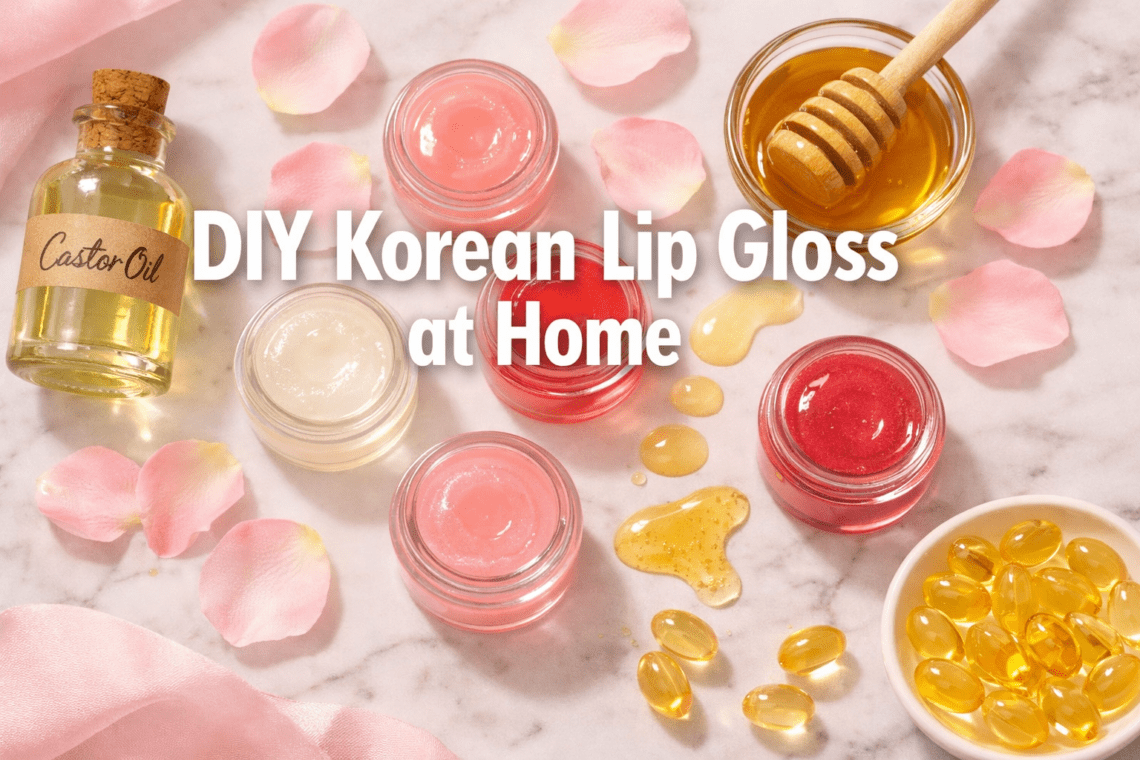
You can make a DIY Korean lip gloss at home using just 3 to 5 kitchen and pharmacy ingredients: castor oil, beeswax, vitamin E oil, and an optional tint like beetroot powder. The result is a clear, high-shine gloss that gives lips that signature Korean “glass lip” look — plump, hydrated, and naturally luminous — without any synthetic chemicals or a high price tag.
Key Takeaways 🌿
- The glass lip look from Korean beauty is all about high shine, hydration, and a natural plump effect — not heavy color.
- Core ingredients are castor oil (shine + volume), beeswax (structure), and vitamin E oil (moisture + healing).
- Peppermint essential oil adds a mild plumping tingle when used in tiny amounts (1–2 drops max).
- Beetroot powder or raspberry powder gives a natural tint without synthetic dyes.
- Total cost to make a small batch at home is typically under $10 if you already have basic oils on hand.
- Shelf life is roughly 6 months when stored in a clean, airtight container away from heat.
- Chapped or dry lips should be treated first — gloss looks best on a smooth base. See our guide on how to heal chapped lips naturally overnight.
- Patch test any new ingredient, especially essential oils, before applying to lips.
- This recipe is suitable for most adults; avoid peppermint oil in recipes for children.
What Is the Korean “Glass Lip” Look and Why Is Everyone Obsessed?
The Korean glass lip look is a beauty trend focused on making lips appear glossy, dewy, and slightly fuller — like they’ve been kissed with a light coat of clear gel. It’s not about bold color. It’s about that wet, reflective shine that makes lips look naturally healthy and plump [1].
Unlike Western lip gloss trends that often lean thick and sticky, the Korean version prioritizes a lightweight, comfortable feel with serious shine payoff. The trend has driven massive interest in minimalist lip care routines, and it translates perfectly into a DIY Korean lip gloss at home because the ingredients are simple and the effect is surprisingly achievable.
Why it works so well at home:
- The formula relies on oils and waxes, not complex lab chemistry.
- Natural ingredients like castor oil already deliver that high-gloss finish on their own.
- You control the tint level, scent, and texture to match your preferences.
What Ingredients Do You Need for DIY Korean Lip Gloss at Home?
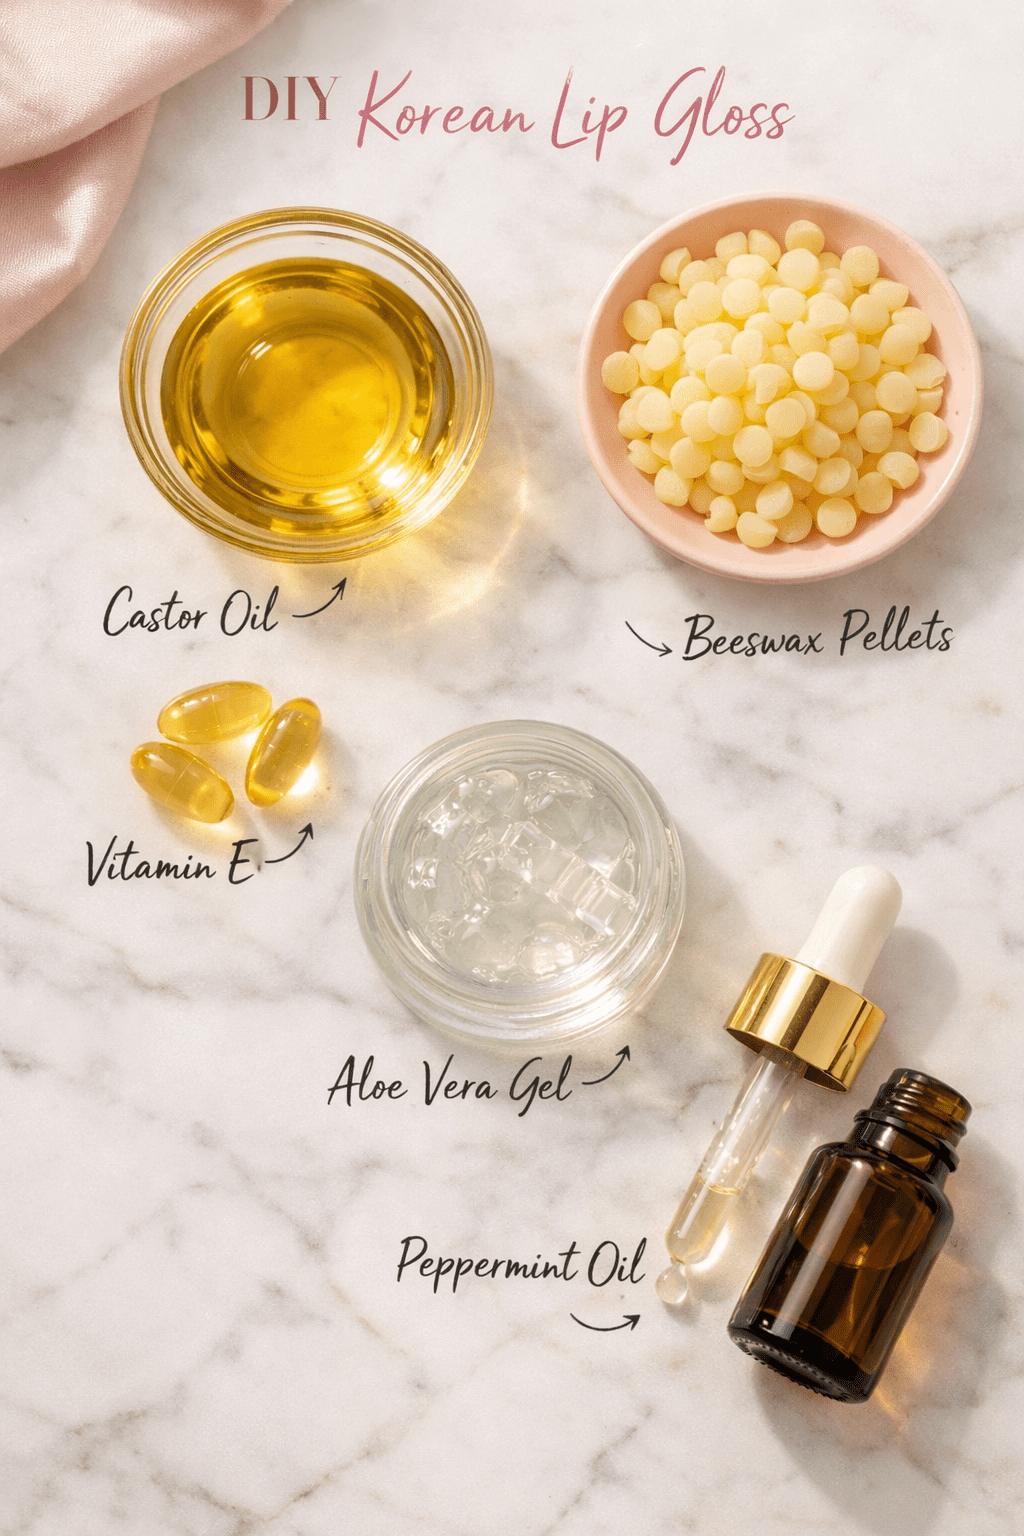
The base of any homemade Korean-style gloss needs three things: a high-shine carrier oil, a wax for body, and a moisturizing agent. Everything else is optional but fun.
The Core Ingredient List
| Ingredient | Role | Where to Find It |
|---|---|---|
| Castor oil | High shine, slight volume effect | Pharmacy, health food store |
| Beeswax pellets | Gives the gloss structure | Online, craft stores |
| Vitamin E oil | Deep moisture, extends shelf life | Pharmacy |
| Coconut oil | Softness, smooth application | Grocery store |
| Peppermint essential oil | Mild plumping tingle | Health food store |
| Beetroot powder | Natural pink/red tint | Online, health stores |
| Aloe vera gel (pure) | Light, cooling hydration | Pharmacy |
Castor oil is the star here. It has a naturally thick, viscous texture that creates that glassy shine effect. It also sits on the surface of lips in a way that catches light beautifully, which is exactly what the Korean glass lip look needs [2].
Choose beeswax if you want a firmer gloss that stays in a pot or tube. Choose more castor oil if you prefer a looser, glossier texture closer to a liquid lip gloss.
Common mistake: Adding too much beeswax makes the gloss stiff and matte-looking. Keep beeswax to no more than 15–20% of the total formula.
How Do You Actually Make DIY Korean Lip Gloss at Home? (Step-by-Step)
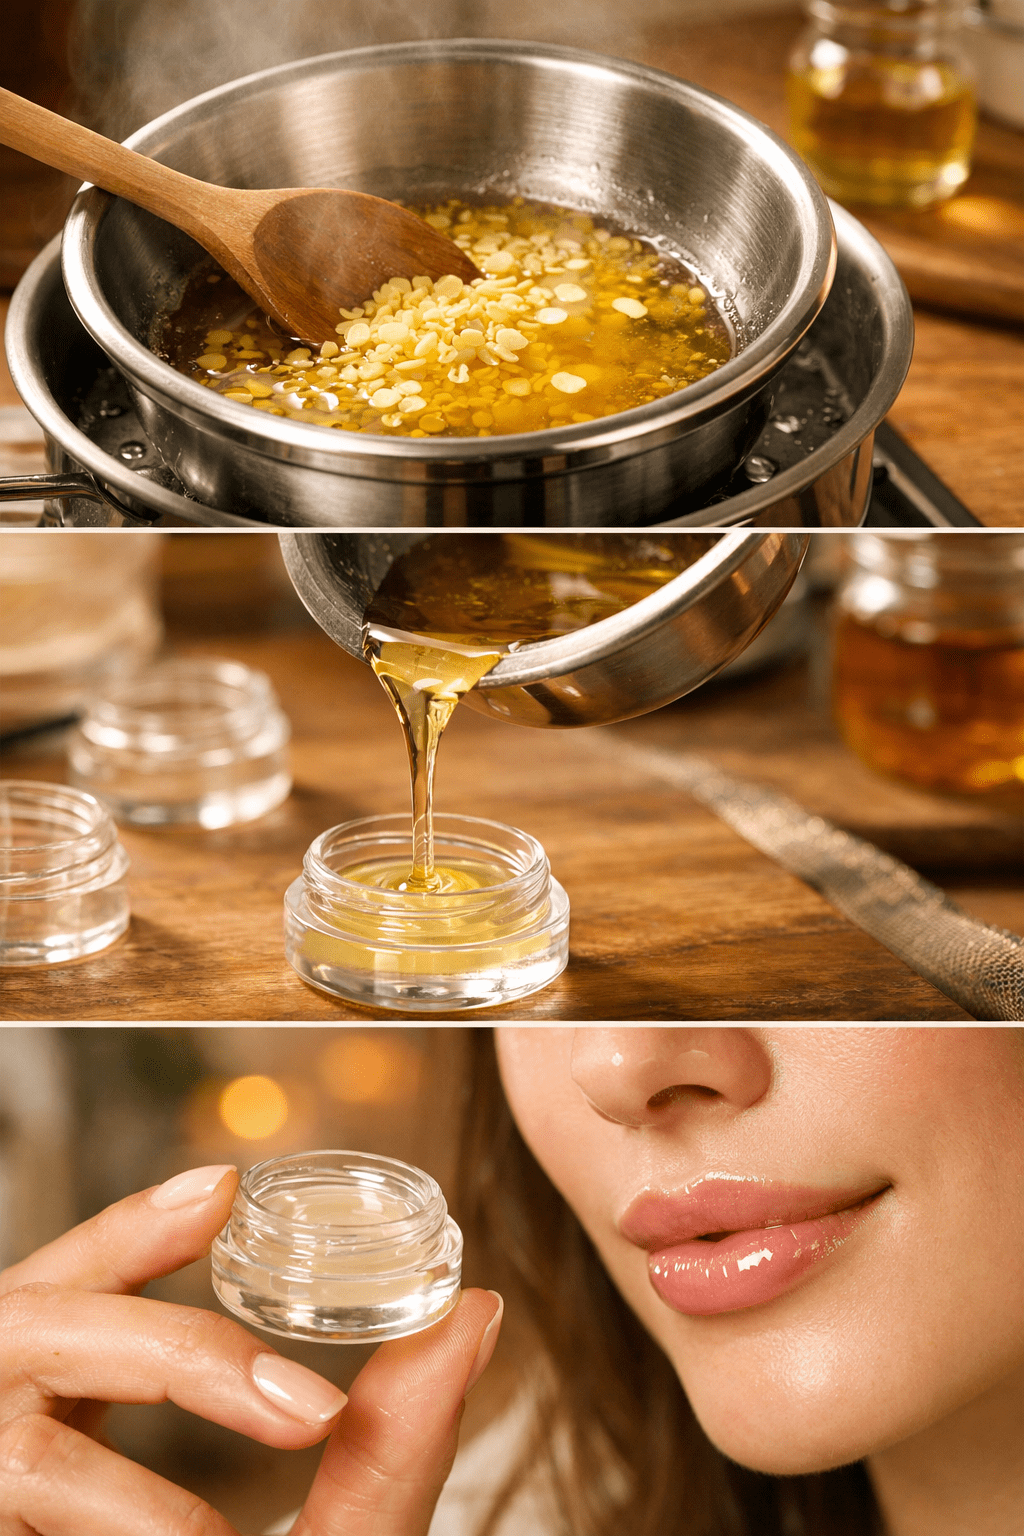
This recipe makes roughly 2 small lip gloss pots (about 10ml each) and takes under 20 minutes [3].
Basic Clear Glass Lip Gloss Recipe
You’ll need:
- 1 tablespoon castor oil
- 1 teaspoon beeswax pellets
- 1 teaspoon coconut oil
- 1/2 teaspoon vitamin E oil (pierce 2 capsules)
- 1–2 drops peppermint essential oil (optional, for plumping)
Steps:
- Set up a double boiler. Place a small heat-safe glass bowl over a pot of simmering water. Don’t let the bowl touch the water directly.
- Melt the beeswax first. Add beeswax pellets to the bowl and stir gently until fully melted (about 3–5 minutes).
- Add castor oil and coconut oil. Stir everything together until smooth and combined.
- Remove from heat. Take the bowl off the double boiler and let it cool for 60 seconds.
- Add vitamin E oil and peppermint. Stir in vitamin E and your optional peppermint drops. If you’re adding beetroot powder for tint, add a tiny pinch now and mix well.
- Pour into containers. Carefully pour the mixture into clean lip gloss pots or small tins. Work quickly before it sets.
- Let it cool completely. Leave undisturbed for at least 30 minutes at room temperature before using.
For a tinted version: Add 1/4 teaspoon of beetroot powder for a soft pink, or raspberry powder for a berry tint. Mix thoroughly to avoid streaks.
💡 Pro tip: Warm your empty gloss pot slightly with your hands before pouring. This helps the gloss settle without air bubbles.
If you enjoy making natural beauty products at home, you might also love this DIY lip lightening balm for softer, brighter lips — it pairs beautifully with this gloss recipe.
How Do You Get That Plump, Glassy Finish Like Korean Beauty Brands?
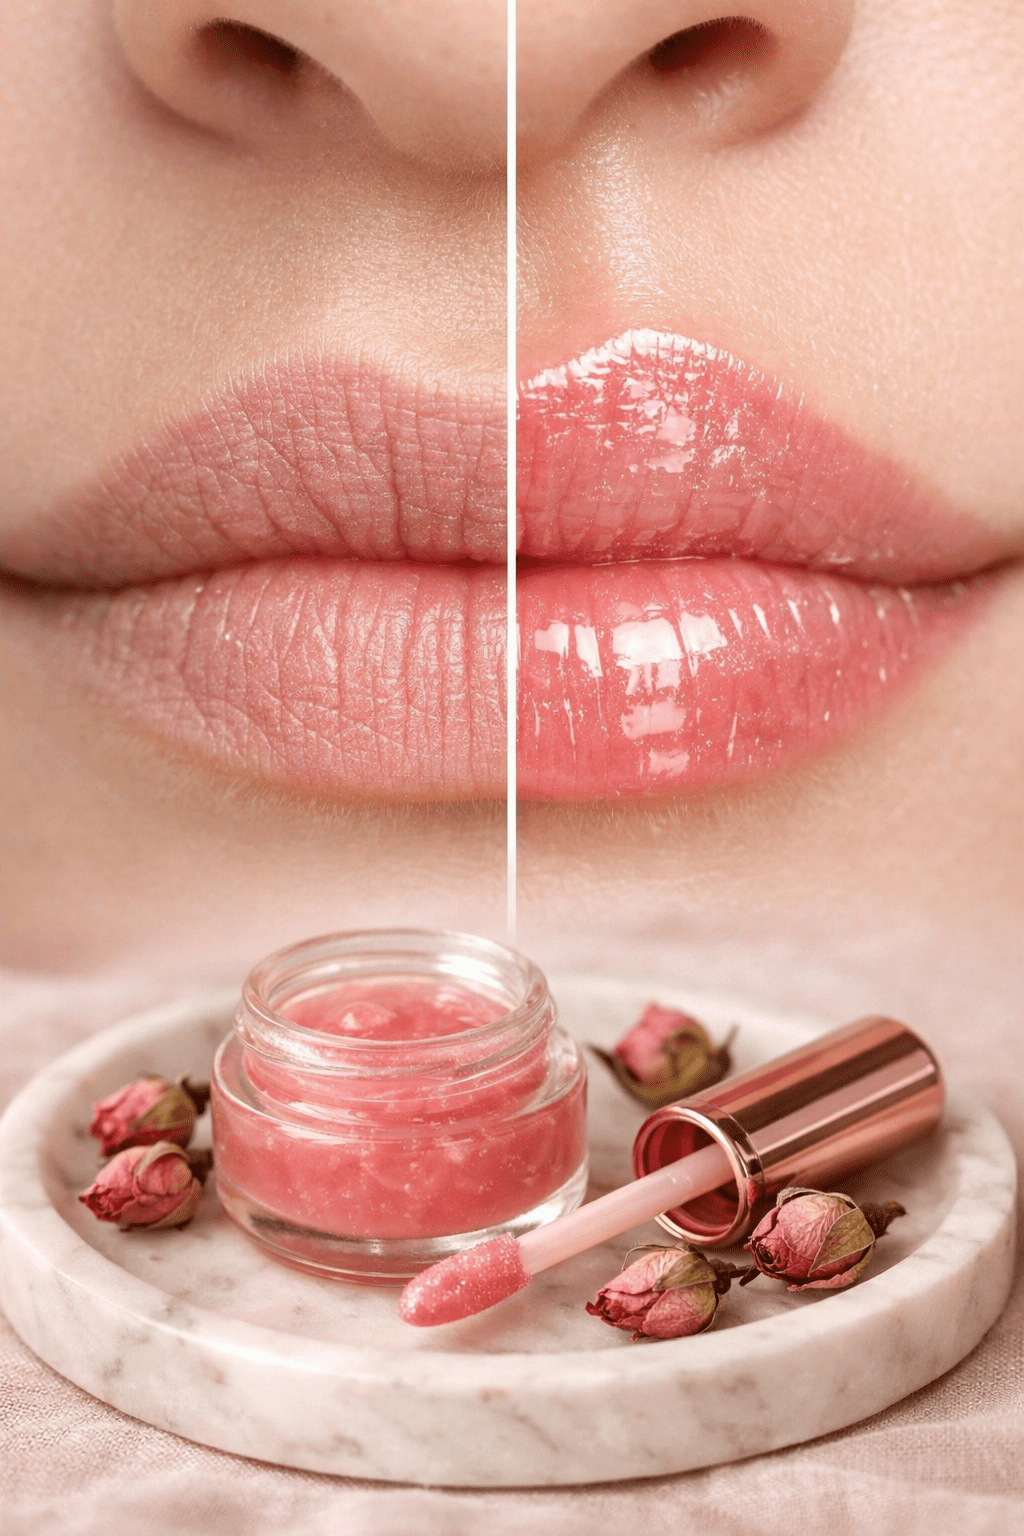
The plump, glassy effect comes from two things working together: ingredient choice and application technique. Getting both right is what separates a truly Korean-inspired result from just a regular homemade lip balm.
Ingredient Tricks for Maximum Gloss and Plump
- Castor oil ratio matters. The higher the castor oil percentage, the shinier and glossier the result. Aim for castor oil to make up at least 50–60% of your formula.
- Peppermint oil creates a temporary plumping effect by mildly increasing blood flow to the lip surface. Use only 1–2 drops per batch — more can cause irritation.
- Vitamin E adds a slight sheen on its own and helps the gloss feel silky rather than sticky.
- Skip heavy butters like shea or cocoa butter in this formula. They make the gloss feel heavier and reduce the glassy finish.
Application Technique for the Glass Lip Look [1]
- Exfoliate first. Use a gentle lip scrub or a damp cloth to remove any dry skin. Gloss on smooth lips looks dramatically better. For a quick natural scrub, check out this DIY vanilla sugar scrub recipe — it works on lips too.
- Apply a thin base layer. Dab a small amount of gloss on the center of both lips.
- Build toward the edges. Blend outward with your fingertip or a lip brush, keeping the center slightly thicker for a natural fullness effect.
- Add a second coat to the center only. This is the K-beauty gradient technique — more product in the center makes lips look naturally fuller.
- Don’t rub lips together. Press them gently instead to keep the gloss evenly distributed.
The gradient application is key. Concentrating gloss in the center of the lips creates an optical illusion of depth and fullness — it’s the same principle behind the Korean gradient lip technique [1].
How Long Does Homemade Korean Lip Gloss Last and How Should You Store It?
Homemade lip gloss made with beeswax, castor oil, and vitamin E typically lasts 4 to 6 months when stored correctly. Vitamin E acts as a natural preservative, which is one reason it’s included even in small amounts.
Storage tips:
- Keep in a cool, dry place away from direct sunlight.
- Avoid storing in the bathroom where heat and humidity fluctuate.
- Use clean hands or a spatula to scoop from a pot — fingers introduce bacteria.
- If the gloss starts to smell off or changes color or texture, discard it.
Signs your gloss has gone bad:
- Rancid or sour smell
- Color change (especially in tinted versions)
- Separation that won’t re-mix with gentle warming
- Grainy or gritty texture
For a small batch made for personal use, 2 months is a realistic use window. Making smaller batches more frequently is better than making a large batch that sits unused.
What Are Common Mistakes When Making DIY Korean Lip Gloss at Home?
Even simple recipes go wrong. Here are the most common issues and how to fix them.
| Problem | Likely Cause | Fix |
|---|---|---|
| Gloss is too stiff | Too much beeswax | Remelt and add more castor oil |
| Gloss is too runny | Too little beeswax | Remelt and add a few more beeswax pellets |
| Gloss feels sticky | Too much castor oil without enough wax | Add a small amount of coconut oil to balance |
| Tint is streaky | Powder not fully mixed | Remelt and whisk vigorously before pouring |
| Gloss has bubbles | Poured while too hot | Let mixture cool 60–90 seconds before pouring |
| Peppermint burns | Too many drops used | Use only 1 drop per batch; patch test first |
Edge case: If you have a known allergy to bee products, swap beeswax for candelilla wax (a plant-based alternative). Use slightly less candelilla wax than the beeswax amount called for, as it sets firmer.
For anyone who loves making natural beauty and wellness products from scratch, our broader collection of DIY skincare recipes is a great next step.
Is DIY Korean Lip Gloss Safe for Sensitive Skin or Everyday Use?
For most people, yes. The ingredients in this recipe are well-tolerated and commonly used in commercial cosmetics. Castor oil, beeswax, coconut oil, and vitamin E are all considered safe for lip use by dermatologists in general.
Who should be cautious:
- People with nut allergies (coconut oil can sometimes be a concern — swap for jojoba oil).
- Anyone sensitive to peppermint or menthol — skip the essential oil entirely.
- Those with very reactive or broken skin on the lips — let lips heal first. Our guide on how to heal chapped lips naturally overnight can help.
- Children under 6 — avoid peppermint essential oil entirely in any recipe for kids.
Always do a patch test before full application: dab a small amount on the inside of your wrist, wait 24 hours, and check for any reaction.
If you enjoy natural skincare beyond just lips, you might also want to try this DIY face mask for glowing skin to complete your at-home K-beauty routine.
FAQ: DIY Korean Lip Gloss at Home
Q: Can I use petroleum jelly instead of beeswax?
Yes, petroleum jelly (Vaseline) can replace beeswax for a softer, more jelly-like texture. The result won’t hold shape in a pot as well, but it works fine as a gloss.
Q: Can I add shimmer or glitter?
Use only cosmetic-grade mica powder for shimmer — never craft glitter, which is not safe for lips. Add 1/4 teaspoon of mica powder when mixing in the vitamin E step.
Q: Does castor oil actually plump lips?
Castor oil doesn’t physically enlarge lips, but its thick, light-reflecting texture creates a visual plumping effect. Peppermint oil provides a temporary mild tingle that slightly increases blood flow, giving a subtle real plump effect.
Q: How do I make it more tinted?
Increase beetroot powder to 1/2 teaspoon for a deeper pink. For a red tint, add a tiny pinch of hibiscus powder alongside the beetroot.
Q: Can I use this gloss over lipstick?
Yes. Apply lipstick first, let it set for 30 seconds, then dab the gloss on top, focusing on the center of the lips for the Korean gradient effect [1].
Q: What containers work best?
Small 5ml or 10ml lip gloss pots with screw-top lids work best. You can also use clean, empty lip gloss tubes if you have a small funnel.
Q: Is this recipe vegan?
Not as written, because it uses beeswax and honey-derived vitamin E. Swap beeswax for candelilla wax and use a plant-derived vitamin E (tocopherol from sunflower) to make it fully vegan.
Q: How much does it cost to make?
A single batch costs roughly $3–8 in ingredients, depending on what you already have. Castor oil and beeswax are the main purchases, and both last through many batches.
Conclusion: Your Next Steps for Glassy, Plump Lips at Home
Making a DIY Korean lip gloss at home is genuinely one of the easiest natural beauty projects you can try. The ingredients are affordable, the process takes under 20 minutes, and the result — that glassy, plump, healthy-looking lip effect — is something you’d normally pay $20+ for at a K-beauty counter.
Here’s what to do next:
- Gather your ingredients — castor oil, beeswax pellets, coconut oil, and vitamin E are your starting point.
- Make the basic clear recipe first before experimenting with tints or plumping oils.
- Focus on application technique — the center-heavy gradient application makes the biggest difference in achieving that Korean glass lip look.
- Pair your gloss with a lip scrub for the smoothest, glossiest base possible.
- Store it properly and make fresh batches every 2–3 months for best results.
If you want to go deeper into natural lip care, check out our guide on how to heal chapped lips naturally overnight and our DIY lip lightening balm recipe for a complete natural lip care routine you can do entirely at home.
References
[1] How To Achieve Perfect Korean Gradient Lips At Home – https://smytten.com/blogs/makeup/how-to-achieve-perfect-korean-gradient-lips-at-home
[2] Watch – https://www.youtube.com/watch?v=ulGdWQ9PWB8
[3] Clear Lip Gloss Recipe – https://shop.tiktok.com/us/k/clear-lip-gloss-recipe