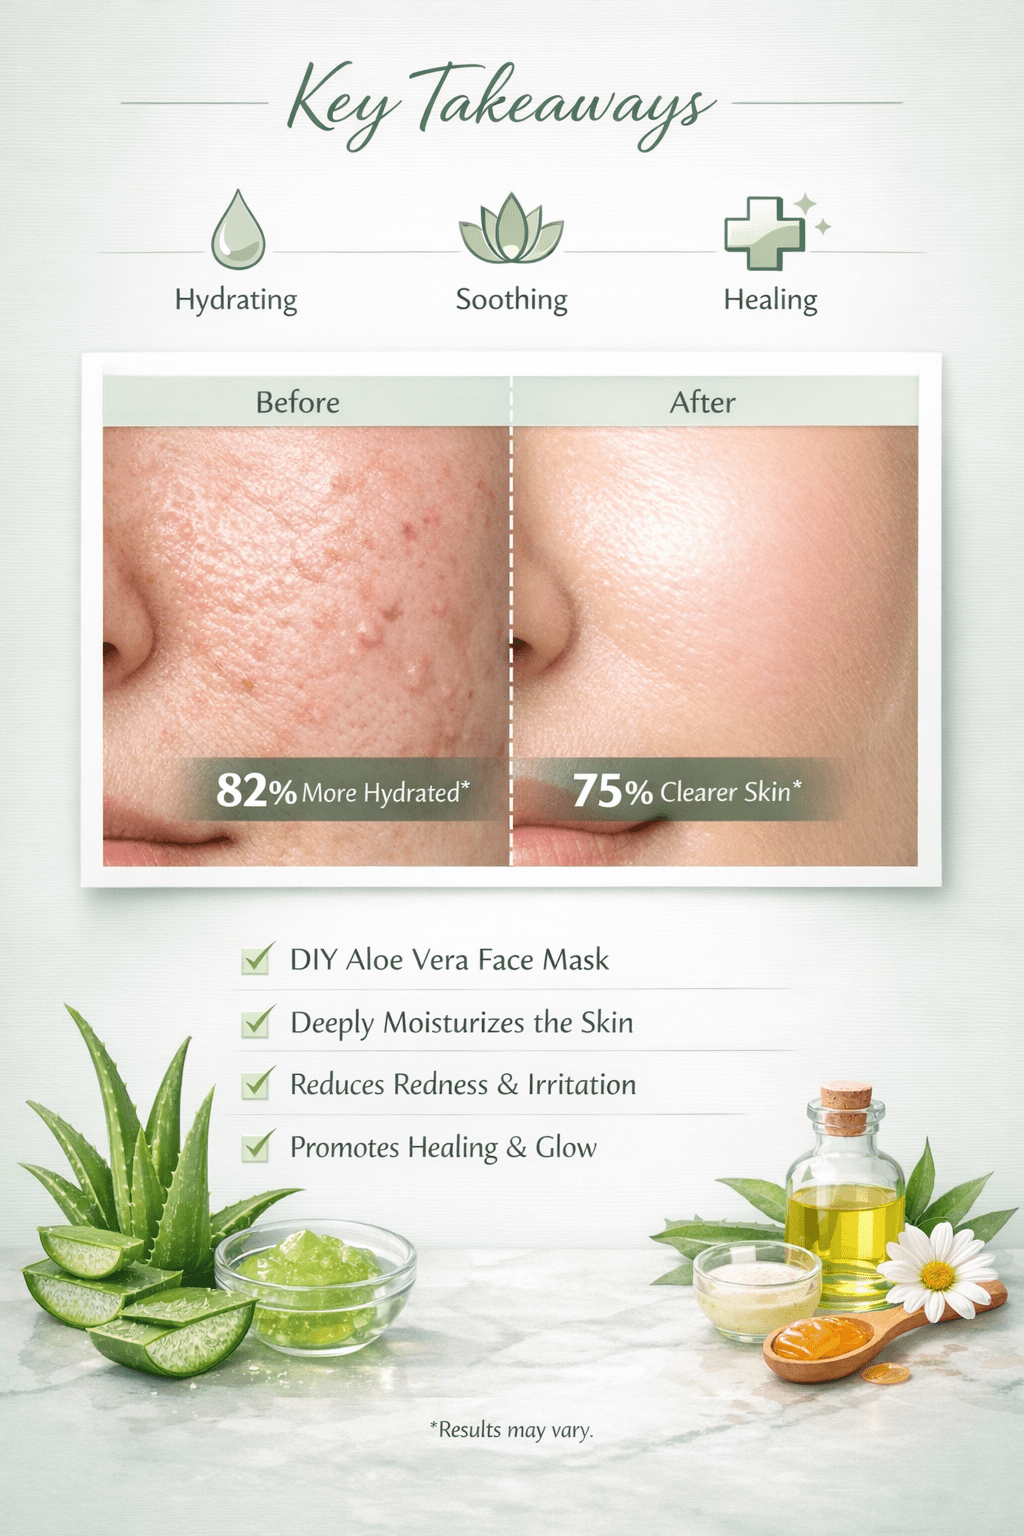
Key Takeaways
- A simple DIY Aloe Vera Face Mask combines fresh aloe gel with ingredients like honey or yogurt to calm irritated skin and boost hydration overnight
- Aloe vera contains 99% water plus vitamins A, C, E, and enzymes that reduce inflammation and protect against UV damage
- The basic recipe takes under 5 minutes to prepare and works for all skin types when customized with the right add-ins
- Leaving the mask on overnight (instead of the standard 10-20 minutes) can intensify hydration and glow for special occasions
- Fresh aloe gel extracted directly from the plant provides more active enzymes than store-bought versions
- Common mistakes include using too much lemon juice (which can irritate) or skipping a patch test before overnight application
- You can store leftover aloe vera face mask in the fridge for up to 3 days in an airtight container
Quick Answer
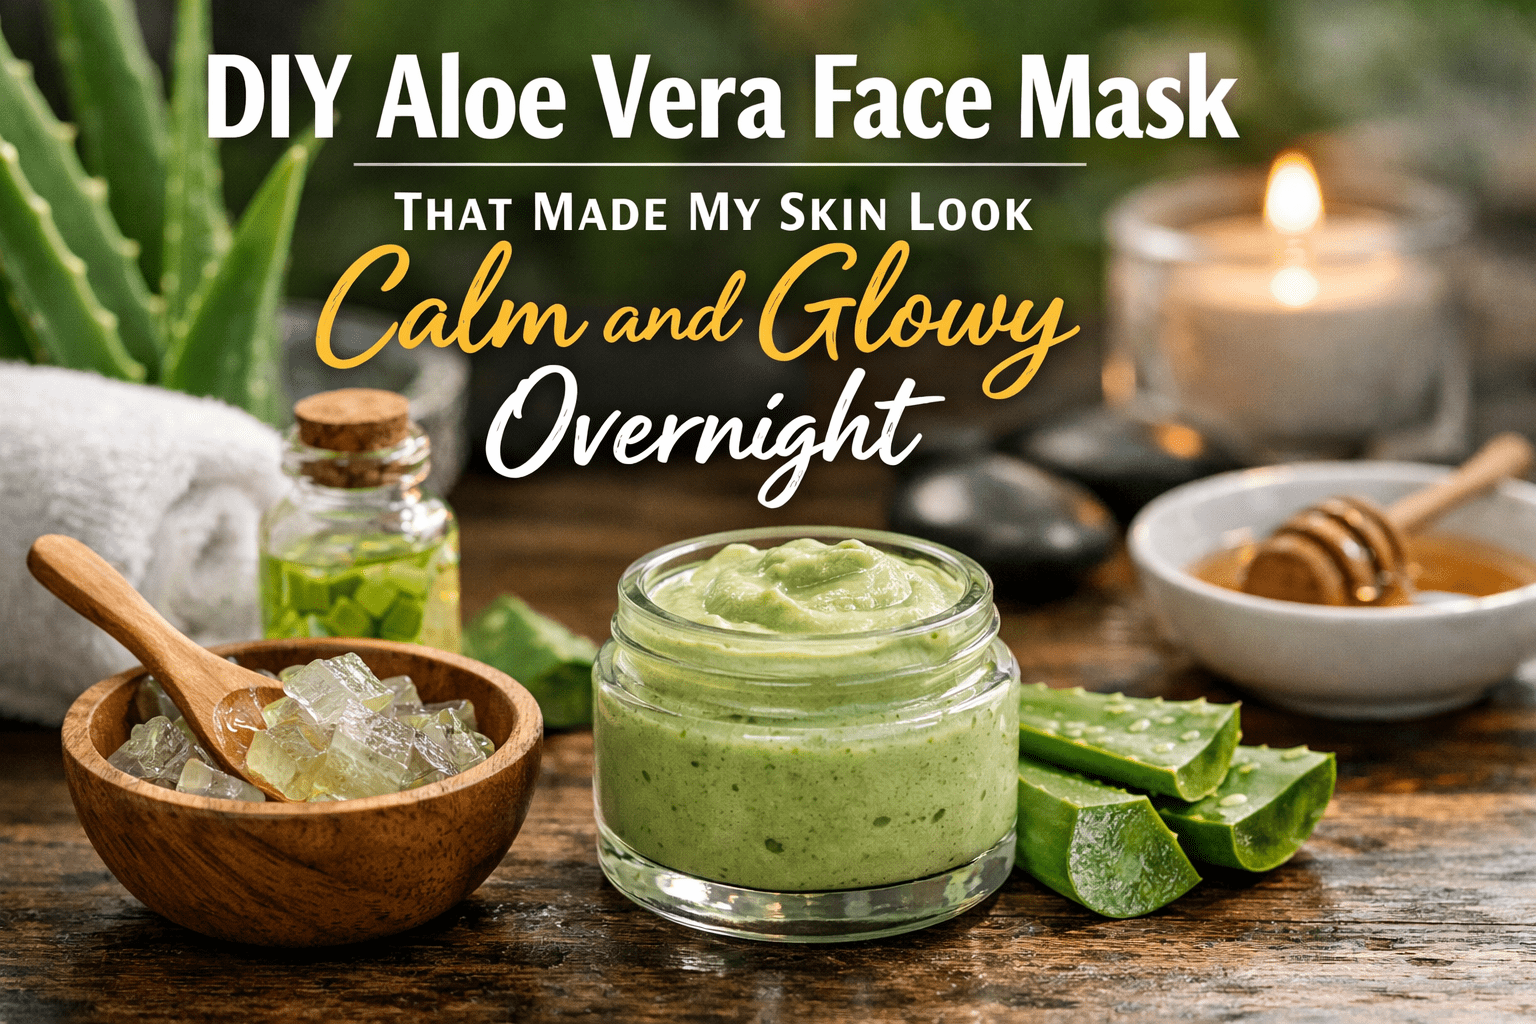
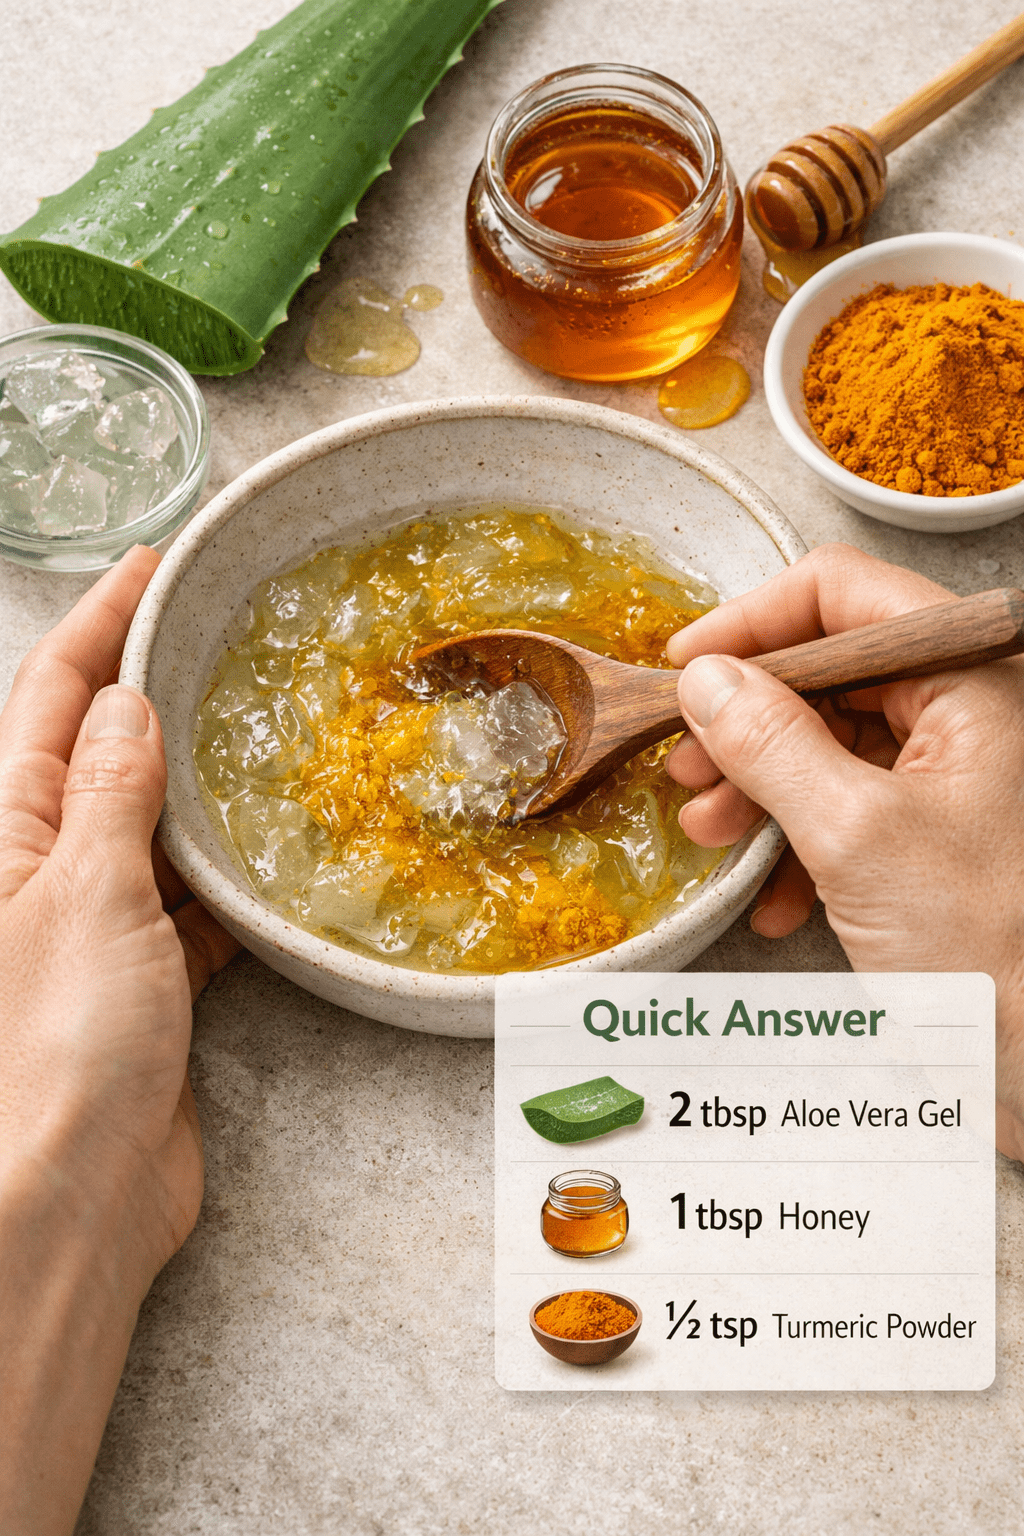
A DIY Aloe Vera Face Mask made with fresh aloe gel and honey calmed my redness and gave me noticeably glowing skin by morning. I mixed 2 tablespoons of pure aloe vera gel with 1 tablespoon of raw honey, applied it to clean skin, and left it on overnight instead of rinsing after 20 minutes. The aloe’s anti-inflammatory properties and the honey’s antibacterial benefits worked together while I slept, and I woke up with hydrated, even-toned skin that looked like I’d had a professional facial.
What Makes a DIY Aloe Vera Face Mask So Effective for Calm, Glowing Skin?
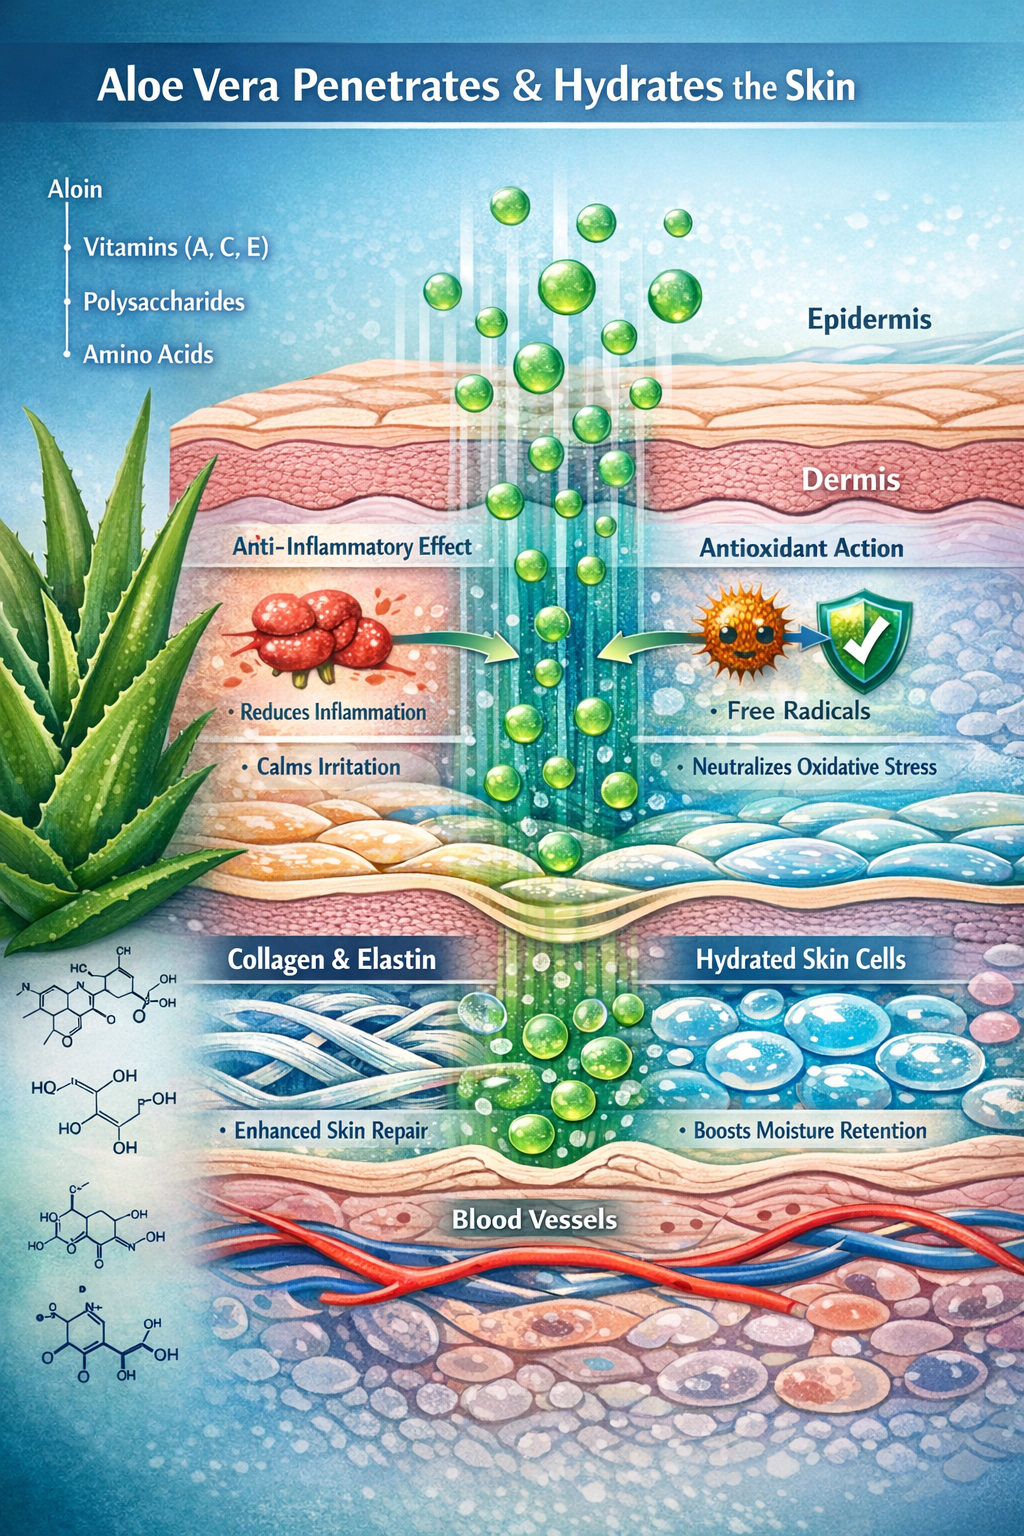
Aloe vera gel works as a face mask base because it delivers intense hydration while fighting inflammation and protecting skin from environmental damage. The plant contains 99% water plus active compounds including vitamins A, C, and E, minerals like calcium and magnesium, and the enzyme bradykinase that reduces skin inflammation[1].
Key benefits that create visible results:
- Deep moisturization from humectant sugars that pull water into skin cells
- Anti-inflammatory action that calms redness, irritation, and acne
- Antioxidant protection that neutralizes free radicals and prevents premature aging[1][2]
- Collagen stimulation that improves skin firmness and elasticity
- Antibacterial properties that fight acne-causing bacteria when combined with honey[2]
The reason my skin looked so different overnight was because aloe vera doesn’t just sit on the surface. It penetrates the skin barrier to deliver nutrients and moisture at a deeper level, which is why extended contact time (like overnight application) can produce more dramatic results than a quick 10-minute mask.
Choose an overnight application if you have very dry or dehydrated skin, you’re preparing for a special event, or your skin tolerates rich textures well. Stick with shorter 15-20 minute applications if you have oily or acne-prone skin that might feel congested from too much moisture.
How Do I Make the Basic DIY Aloe Vera Face Mask?
The simplest effective DIY Aloe Vera Face Mask requires just two ingredients and takes less than 5 minutes to prepare. I use fresh aloe vera gel extracted directly from the plant because it contains more active enzymes than processed store-bought versions, though pure store-bought aloe gel (without added ingredients) works too.
Basic Recipe (for one application):
- 2 tablespoons fresh aloe vera gel
- 1 tablespoon raw honey
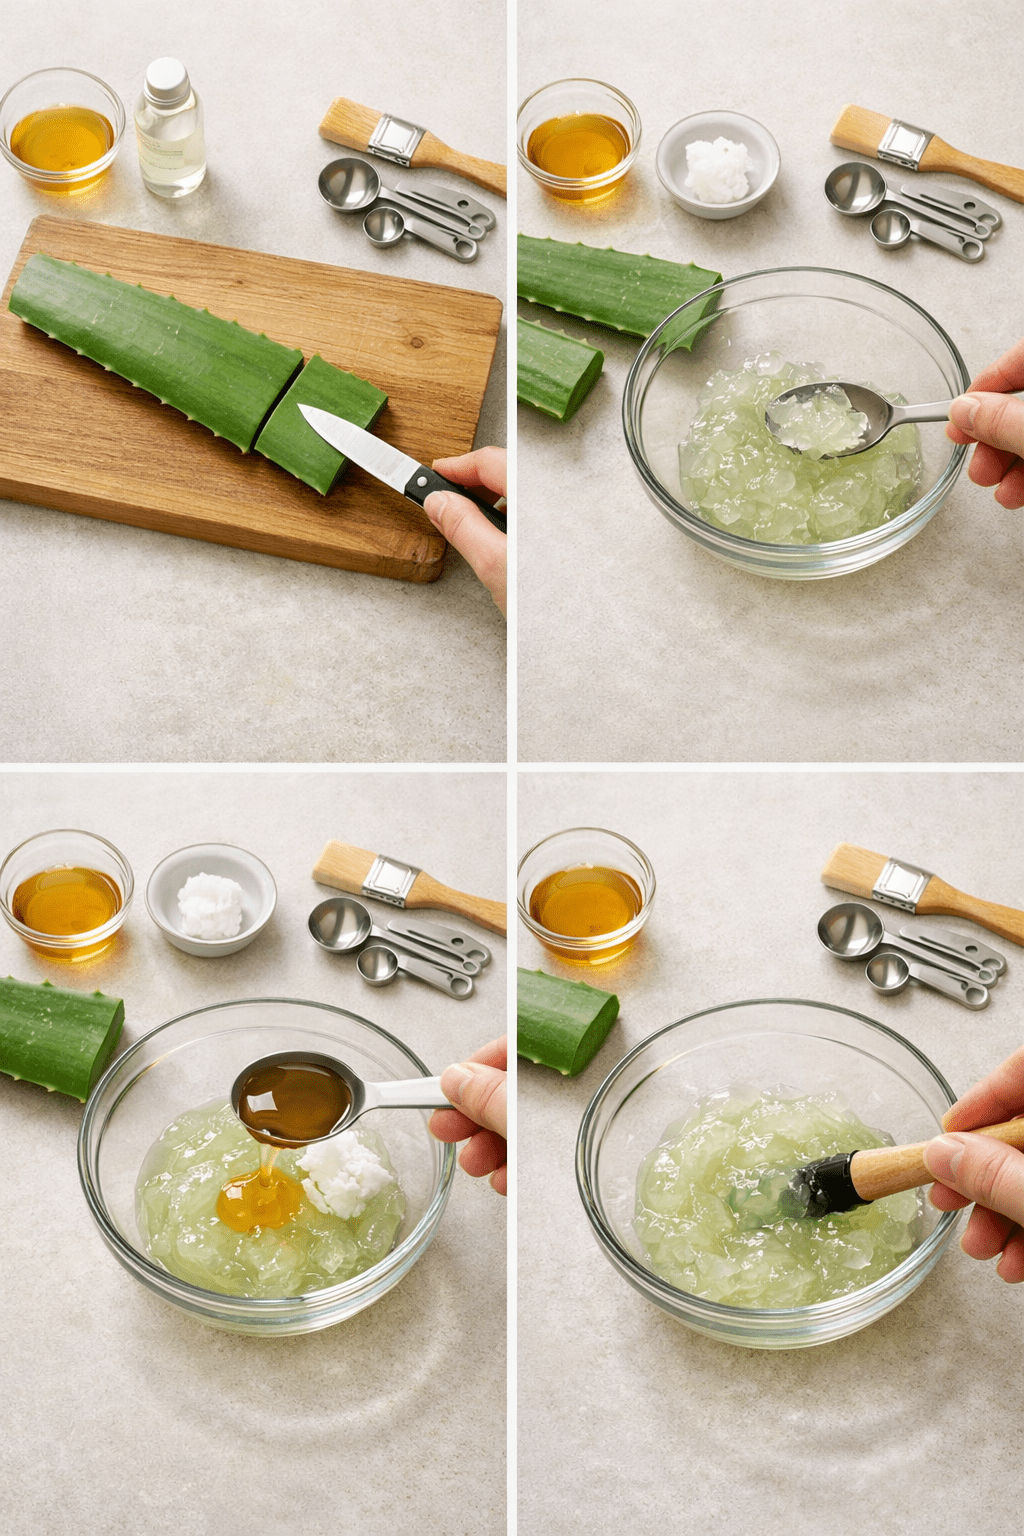
Step-by-step preparation:
- Extract the gel: Cut an aloe vera leaf and scoop out the clear gel with a spoon, avoiding the yellow latex layer just under the skin
- Blend until smooth: Mix the gel in a small bowl until it reaches an even consistency (no chunks)
- Add honey: Stir in raw honey until fully combined
- Apply immediately: Use clean fingers or a brush to spread an even layer across your face, avoiding the eye area
The mixture should feel cool and slightly sticky. If it’s too thick, add a few drops of water. If it’s too runny, add more aloe gel.
Common mistake to avoid: Don’t use aloe gel that looks brown or has a strong odor, which indicates oxidation. Fresh gel should be clear or slightly cloudy and smell mild or grassy.
For more face mask recipes using natural ingredients, check out our guide to 5 DIY Face Masks for Glowing Skin.
What Ingredients Can I Add to Customize My DIY Aloe Vera Face Mask?
You can customize your DIY Aloe Vera Face Mask by adding ingredients that target your specific skin concerns. I’ve tested several combinations, and each one delivers different benefits depending on what your skin needs.
For dry or mature skin:
- Yogurt (1 tablespoon): Adds lactic acid for gentle exfoliation and extra moisture[2]
- Avocado (1 tablespoon mashed): Provides healthy fats and vitamin E
- Oatmeal (1 teaspoon ground): Soothes and calms irritation
For oily or acne-prone skin:
- Lemon juice (½ teaspoon max): Brightens and controls oil, but use sparingly to avoid irritation
- Tea tree oil (2-3 drops): Fights bacteria and reduces breakouts
- Cucumber (1 tablespoon blended): Cools and reduces inflammation[2]
For anti-aging benefits:
- Egg white (1 egg): Tightens pores and firms skin[4]
- Vitamin E oil (3-4 drops): Boosts antioxidant protection
- MSM powder (¼ teaspoon): Supports collagen production[1]
Choose cucumber and aloe if you want cooling, anti-inflammatory effects perfect for overnight wear[2]. Choose egg white and aloe if you need temporary firming for an event, but rinse after 15 minutes instead of leaving overnight[4].
The DIY Anti-Age Face Mask guide offers more ingredient combinations for targeting specific aging concerns.
How Should I Apply the DIY Aloe Vera Face Mask for Best Results?
Proper application makes the difference between mediocre and amazing results. I learned this after my first attempt left patches of dry skin because I applied the mask unevenly.
Application steps for overnight glow:
- Cleanse thoroughly: Wash your face with a gentle cleanser and pat dry
- Do a patch test: If it’s your first time using this combination, test a small amount on your inner wrist and wait 24 hours
- Apply evenly: Use clean fingers or a clean brush to spread a medium-thick layer across your entire face, avoiding eyes and lips
- Don’t forget your neck: The skin on your neck ages faster and benefits from the same treatment
- Leave on for 20 minutes OR overnight: For standard results, rinse after 20 minutes[2]. For intense hydration and glow, leave on overnight
- Rinse gently: Use lukewarm water and soft circular motions to remove the mask
- Follow with moisturizer: Lock in the benefits with your regular moisturizer (skip this step if leaving on overnight)
For overnight application specifically: Apply a thinner layer than you would for a 20-minute mask. The goal is enough product to stay moist but not so much that it transfers onto your pillowcase. I sleep on my back when doing overnight masks, or I use an old pillowcase I don’t mind staining slightly green.
Edge case: If you have very sensitive skin, start with just 10 minutes and gradually increase the time as your skin builds tolerance. Some people experience mild tingling from fresh aloe, which is normal, but burning or intense redness means you should rinse immediately.
What Results Can I Expect from Using a DIY Aloe Vera Face Mask?
Visible results depend on your skin type, the ingredients you use, and how long you leave the mask on. When I used my aloe-honey mask overnight, I noticed three immediate changes the next morning.
Immediate results (within 12-24 hours):
- Reduced redness: Inflammation visibly decreased, especially around my nose and cheeks
- Increased hydration: My skin felt plump and bouncy instead of tight
- Natural glow: Light reflected off my skin differently, giving that “lit from within” look
- Smoother texture: Small bumps and rough patches felt softer
Results with consistent use (2-3 times per week for 2-4 weeks):
- More even skin tone: Dark spots and post-acne marks faded gradually
- Fewer breakouts: Antibacterial properties from honey reduced new pimples[2]
- Improved skin barrier: Less sensitivity to weather changes and products
- Better product absorption: My regular skincare products worked more effectively
Choose overnight application if you need dramatic results for a specific event happening the next day. Use 20-minute applications 2-3 times weekly if you’re building long-term skin health and don’t need immediate transformation.
The glow I experienced came from two factors: intense hydration that plumped fine lines and made skin reflect light better, plus reduced inflammation that evened out my skin tone. Your results might vary based on your starting point, but most people notice at least improved hydration and calmer skin.
For more natural skincare approaches, explore our DIY Skincare category for additional recipes and techniques.
How Do I Store and Preserve My DIY Aloe Vera Face Mask?
Fresh DIY Aloe Vera Face Mask lasts 3-5 days when stored properly, though I prefer making small batches for each use to maintain maximum potency. The active enzymes in fresh aloe start breaking down quickly once exposed to air.
Storage guidelines:
- Container: Use a clean, airtight glass jar or container (plastic can leach chemicals)
- Temperature: Store in the refrigerator immediately after mixing
- Shelf life: Use within 3 days for masks with honey, within 2 days for masks with yogurt or egg
- Signs of spoilage: Discard if you see mold, smell sour odors, or notice color changes to brown or gray
To extend freshness:
- Add 1-2 drops of vitamin E oil as a natural preservative
- Keep a clean spoon in the container and never double-dip
- Store fresh aloe leaves (uncut) in the fridge for up to 2 weeks, then extract gel as needed
Batch size recommendation: I make exactly enough for one application (about 3 tablespoons total) because fresh masks work better than stored ones. If you extract gel from a whole aloe leaf, you can freeze the extra gel in ice cube trays and thaw one cube at a time.
Common mistake: Don’t add water to thin your mask if you plan to store it. Water introduces bacteria that cause faster spoilage. Instead, adjust consistency during mixing or add a drop of water right before application.
What Are Common Mistakes to Avoid with DIY Aloe Vera Face Masks?
I made several mistakes when I first started making aloe vera face masks, and they either reduced effectiveness or caused mild irritation. Here’s what to avoid based on my experience and common issues others report.
Top mistakes and how to fix them:
Using aloe gel with additives: Many store-bought aloe gels contain alcohol, fragrance, or coloring that can irritate skin. Read labels carefully and choose 100% pure aloe vera gel, or better yet, use fresh gel from the plant[1].
Applying too much lemon juice: More than ½ teaspoon of lemon juice can disrupt your skin’s pH and cause redness or sensitivity. If you want brightening benefits, use less lemon and leave it on for shorter periods.
Skipping the patch test: Even natural ingredients can cause reactions. Always test new combinations on a small area first, especially if you have sensitive skin or allergies.
Leaving it on too long initially: Start with 10-15 minutes before attempting overnight application. Your skin needs time to adjust to new ingredients.
Not cleansing first: Applying a mask to dirty skin traps oil and bacteria underneath, which can cause breakouts instead of preventing them.
Using brown or oxidized aloe: Fresh aloe gel turns brown when exposed to air for too long, losing beneficial enzymes. Only use clear or slightly cloudy gel.
Choose shorter application times if you have oily skin, you’re using acidic ingredients like lemon, or you’re trying a new ingredient combination for the first time.
Comparison: Fresh Aloe vs. Store-Bought Aloe Gel
| Factor | Fresh Aloe Vera Gel | Store-Bought Aloe Gel |
|---|---|---|
| Active enzymes | Maximum potency, full enzyme activity | Reduced due to processing and preservation |
| Cost | $3-5 per plant (multiple uses) | $5-15 per bottle |
| Convenience | Requires extraction (5 minutes) | Ready to use immediately |
| Shelf life | 1-2 weeks refrigerated | 6-12 months unopened |
| Purity | 100% pure, no additives | May contain preservatives, alcohol, fragrance |
| Best for | Maximum benefits, sensitive skin | Quick application, travel, convenience |
I use fresh aloe for my most important skin treatments and keep store-bought gel as a backup for busy days or travel.
FAQ
How often should I use a DIY Aloe Vera Face Mask?
Use a DIY Aloe Vera Face Mask 2-3 times per week for best results. Daily use can work for very dry skin, but most skin types benefit more from consistent twice-weekly application that allows skin to absorb and respond to the treatment.
Can I use a DIY Aloe Vera Face Mask on sensitive skin?
Yes, aloe vera is generally safe for sensitive skin because of its anti-inflammatory properties. Start with pure aloe gel alone (no additives) for 10 minutes, then gradually add gentle ingredients like honey once you confirm your skin tolerates it well.
Will a DIY Aloe Vera Face Mask help with acne?
Aloe vera face masks can help reduce acne through antibacterial and anti-inflammatory action, especially when combined with honey[2]. The mask won’t cure severe acne but can calm active breakouts and reduce redness around pimples.
Is it safe to leave a DIY Aloe Vera Face Mask on overnight?
Leaving an aloe vera face mask on overnight is safe for most people and can boost hydration. Test this approach on a night when you don’t have important plans the next day, and apply a thinner layer than you would for a rinse-off mask to avoid pillow transfer.
Can I use aloe vera gel from the store instead of fresh aloe?
Store-bought aloe gel works if it’s 100% pure without added alcohol, fragrance, or coloring[1]. Fresh aloe provides more active enzymes, but quality store-bought gel is a convenient alternative that still delivers benefits.
What’s the best time of day to apply a DIY Aloe Vera Face Mask?
Evening application works best because your skin repairs itself overnight and can fully absorb the nutrients. If you’re doing a 20-minute mask instead of overnight, apply it 30-60 minutes before bed as part of your nighttime routine.
Can I use a DIY Aloe Vera Face Mask if I have oily skin?
Yes, aloe vera is lightweight and won’t clog pores, making it suitable for oily skin[2]. For oily skin specifically, keep application time to 15-20 minutes instead of overnight, and consider adding cucumber or a few drops of tea tree oil.
How long does it take to see results from a DIY Aloe Vera Face Mask?
You’ll notice immediate hydration and calming effects within hours of application. For improvements in skin tone, texture, and reduced breakouts, expect to see changes after 2-3 weeks of consistent use (2-3 times weekly).
Can I mix aloe vera with vitamin C serum in a face mask?
Don’t mix aloe vera directly with vitamin C serum because the pH difference can reduce the effectiveness of both ingredients. Instead, apply your vitamin C serum after removing and rinsing off the aloe mask.
Will a DIY Aloe Vera Face Mask stain my pillowcase?
Pure aloe vera gel is clear and won’t stain, but if you add ingredients like turmeric or spirulina, slight staining can occur. Use an old pillowcase when doing overnight masks with colored ingredients, or apply a thinner layer that absorbs fully.
Can pregnant women use DIY Aloe Vera Face Masks?
Topical application of aloe vera face masks is generally considered safe during pregnancy. Avoid adding essential oils or other ingredients you wouldn’t normally use while pregnant, and stick to simple combinations like aloe and honey.
What should I do if my skin feels tight after using an aloe vera mask?
Tightness usually means the mask dried completely on your skin. Rinse it off sooner next time (before it dries), apply a thinner layer, or mist your face with water while the mask is on to keep it hydrated during application.
Conclusion
Making a DIY Aloe Vera Face Mask transformed my skin overnight, and it’s become my go-to treatment whenever I need quick, visible results. The combination of fresh aloe vera gel and raw honey delivered exactly what I needed: calm, hydrated, glowing skin that looked like I’d invested in an expensive facial.
Your next steps to get started:
- Source your ingredients: Buy a fresh aloe vera plant or high-quality 100% pure aloe gel, plus raw honey
- Start simple: Try the basic two-ingredient recipe (2 tablespoons aloe + 1 tablespoon honey) before experimenting with add-ins
- Test first: Do a patch test on your inner wrist 24 hours before your first full-face application
- Choose your timing: Decide whether you want a standard 20-minute mask or overnight application based on your skin type and schedule
- Be consistent: Use the mask 2-3 times per week for 2-4 weeks to see cumulative benefits beyond the immediate glow
The beauty of this DIY approach is that you control exactly what goes on your skin, you save money compared to professional treatments, and you can customize the recipe as your skin’s needs change. Whether you’re dealing with redness, dryness, dullness, or just want that special-occasion glow, a simple aloe vera face mask delivers real results.
For more natural skincare recipes and techniques, explore our complete DIY Skincare collection where you’ll find additional masks, treatments, and guides for every skin type.
References
[1] Diy Aloe Vera Face Mask – https://alifeadjacent.com/diy-aloe-vera-face-mask/
[2] 3 Aloe Vera Face Mask Recipes To Whip Up At Home – https://www.lorealparis.co.in/beauty-magazine/skin-care-blogs/3-aloe-vera-face-mask-recipes-to-whip-up-at-home
[4] Aloe Vera Face Masks – https://www.siobeauty.com/blogs/resource-center/aloe-vera-face-masks