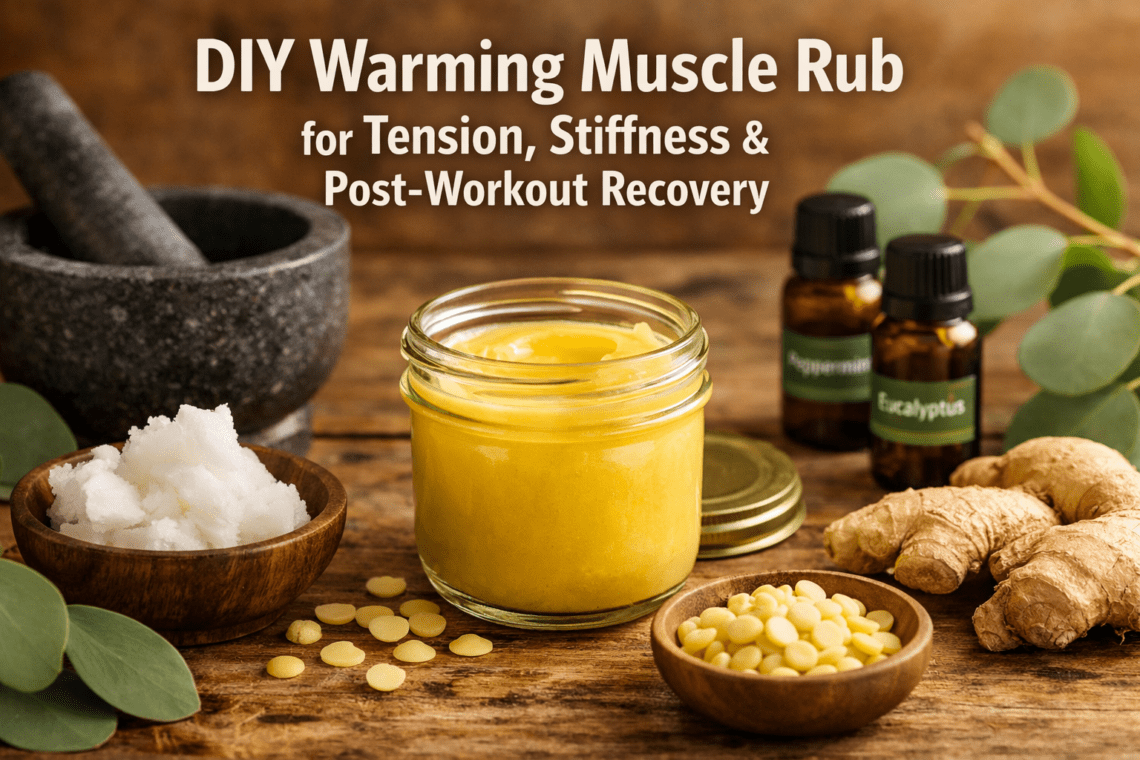

Sore muscles don’t stand a chance against a homemade warming rub made with natural ingredients you can trust. A DIY warming muscle rub combines therapeutic essential oils, anti-inflammatory compounds, and warming agents to ease tension, reduce stiffness, and speed up post-workout recovery without the mystery ingredients found in commercial products.
Key Takeaways
- A basic DIY warming muscle rub requires just coconut oil, beeswax, and 4-5 essential oils
- Cayenne powder and menthol crystals create the warming sensation that increases blood flow
- The double-boiler method preserves essential oil potency during preparation
- Homemade muscle rubs cost less than commercial versions and contain no synthetic additives
- Store in airtight glass containers for up to 6 months in a cool, dark place
- Apply to sore muscles, stiff joints, and areas of tension 2-3 times daily
- Always perform a patch test before full application to check for skin sensitivity
Quick Answer
A DIY warming muscle rub combines carrier oils (coconut and olive oil), beeswax for consistency, and therapeutic essential oils like peppermint, eucalyptus, and wintergreen with warming agents such as cayenne or menthol crystals. The mixture is heated using a double-boiler method, cooled slightly, then poured into containers where it solidifies into a balm that relieves muscle tension, stiffness, and post-workout soreness naturally.
What Makes a DIY Warming Muscle Rub Effective?
A warming muscle rub works by combining essential oils that act as natural analgesics with compounds that increase blood flow to sore areas. Peppermint oil functions as a natural muscle relaxant with stimulating properties, while eucalyptus oil acts as a vasodilator to open blood vessels and improve circulation.[1] Clove, ginger, and black pepper oils provide anti-inflammatory and analgesic benefits that target the root causes of muscle discomfort.[1]
The warming sensation comes from ingredients like cayenne powder or menthol crystals, which trigger thermoreceptors in your skin. This creates a gentle heat that:
- Increases blood flow to the affected area
- Relaxes tight muscle fibers
- Reduces inflammation and swelling
- Provides a counter-irritant effect that distracts from deeper pain
Choose a warming rub if you’re dealing with chronic muscle tension, post-workout soreness, or stiffness from overuse. For respiratory issues instead, try a natural sinus chest rub recipe that focuses on decongestion.
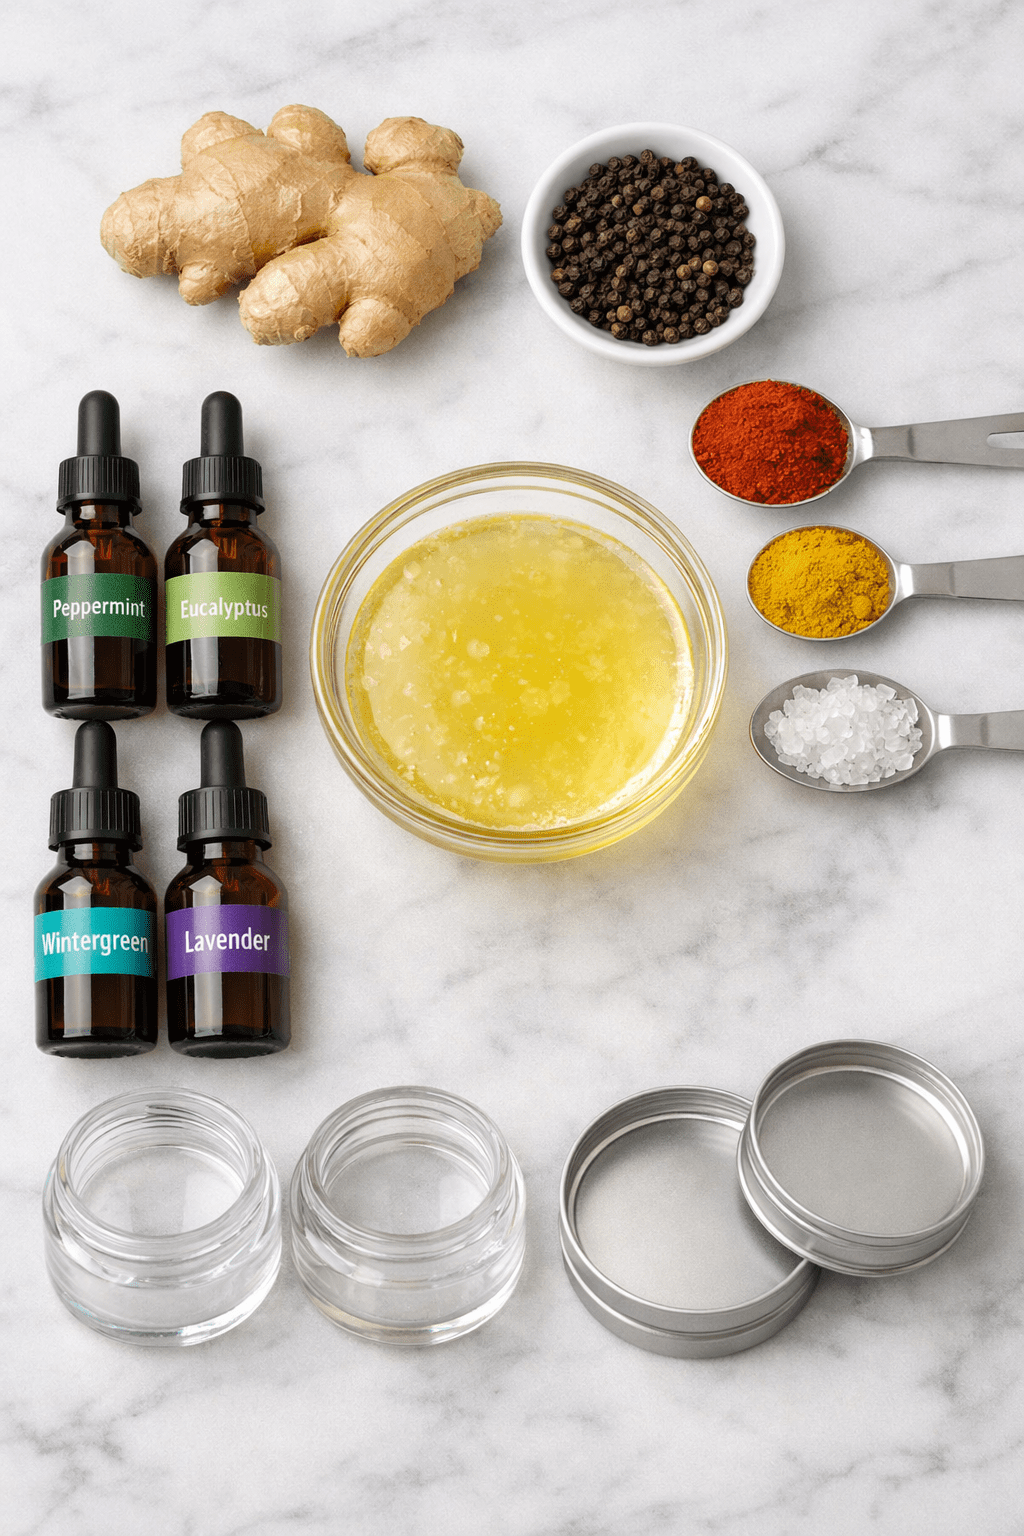
Essential Ingredients for Your DIY Warming Muscle Rub
The foundation of any effective muscle rub starts with quality carrier oils and beeswax. Here’s what you’ll need:
Base ingredients:
- ¼ to ½ cup coconut oil (solid at room temperature)
- ¼ cup olive oil or sweet almond oil
- 1 to 3 ounces beeswax pellets (for firmness)[1][2][4]
Warming agents (choose one or combine):
- 4-6 tablespoons menthol crystals
- 2 teaspoons cayenne powder
- 2 teaspoons ginger powder[2][4]
Essential oils (15-20 drops each):
- Peppermint (cooling and analgesic)
- Eucalyptus (circulation booster)
- Wintergreen (natural pain reliever)
- Lavender (anti-inflammatory and calming)[1][2][4]
Common mistake: Adding essential oils while the mixture is too hot destroys their therapeutic compounds. Always wait 3 minutes after removing from heat before adding oils.[1]
If you’re new to making herbal remedies, check out our complete guide to natural remedies for beginners for foundational techniques.
How to Make Your Own Warming Muscle Rub (Step-by-Step)
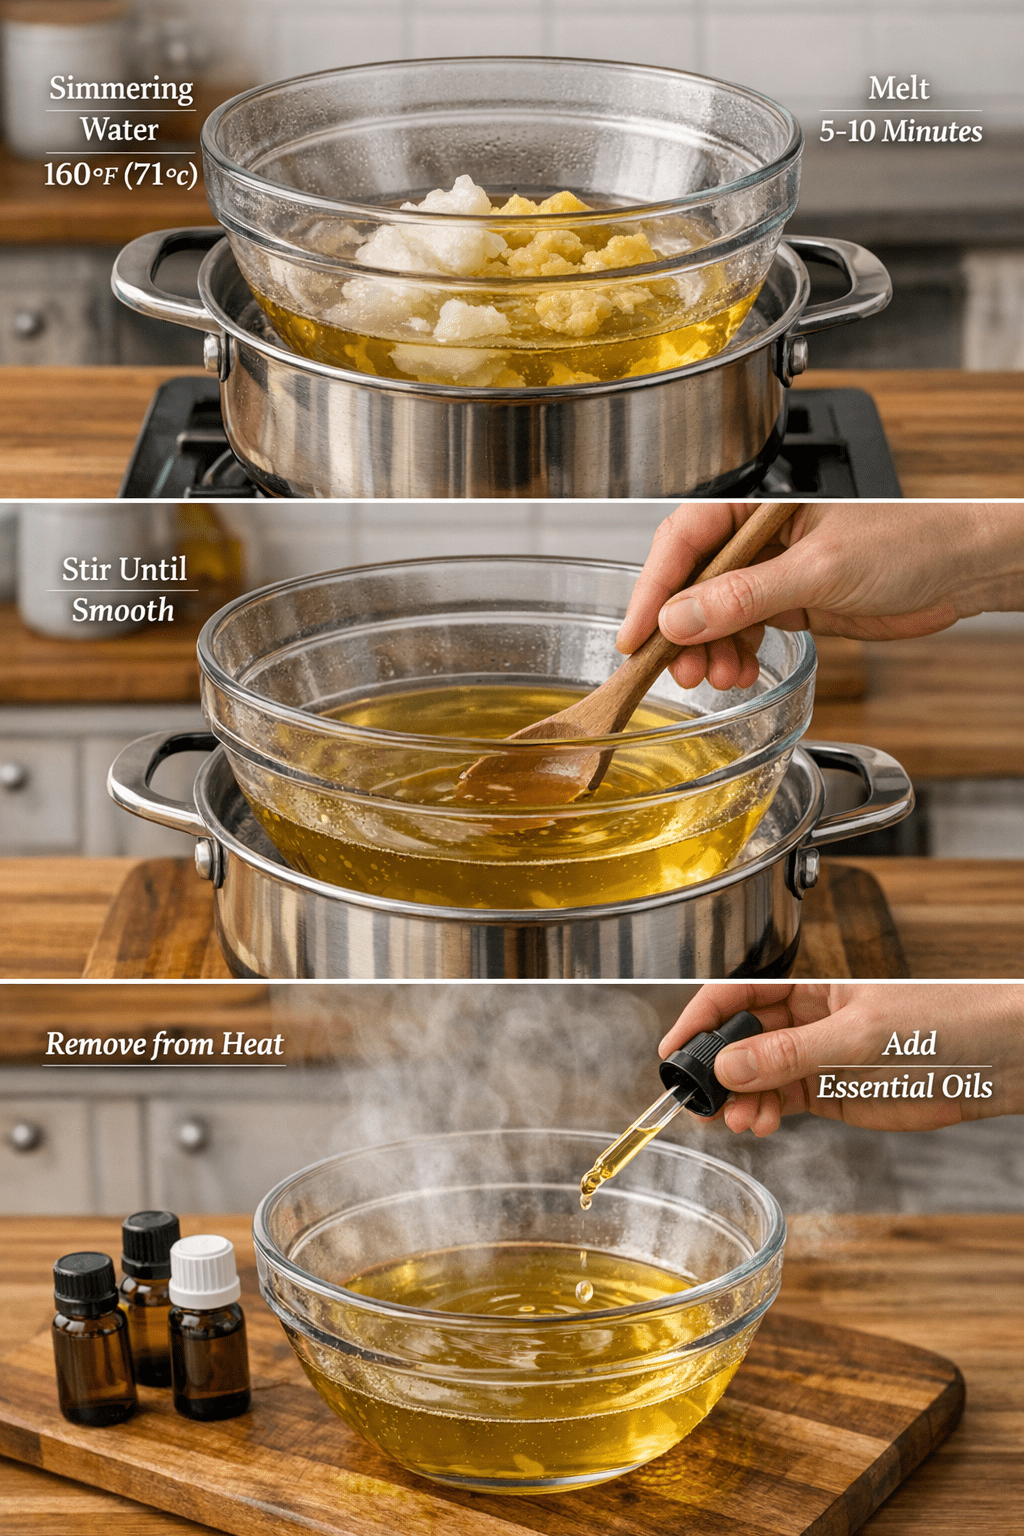
The double-boiler method ensures gentle, even heating that preserves the potency of your ingredients. Here’s the complete process:
Step 1: Set up your double boiler
Fill a medium pot with 2 inches of water and bring to a simmer. Place a heat-safe glass bowl on top, ensuring the bottom doesn’t touch the water.
Step 2: Melt the base
Add coconut oil, olive oil, and beeswax to the bowl. Stir occasionally until completely melted and combined (about 5-7 minutes).
Step 3: Add warming agents
If using cayenne, turmeric, or ginger powder, stir them in now while the mixture is still hot. For menthol crystals, add them and stir until dissolved.[2][4]
Step 4: Cool and add essential oils
Remove the bowl from heat and wait exactly 3 minutes. Add your essential oils (15-20 drops each of peppermint, eucalyptus, wintergreen, and lavender), stirring gently to distribute evenly.[1]
Step 5: Pour and store
Quickly pour the mixture into small glass jars or tins before it begins to solidify. Leave lids off until completely cool (2-3 hours), then seal tightly.[1][3]
The rub will harden at room temperature and develop a balm-like consistency perfect for massage application.
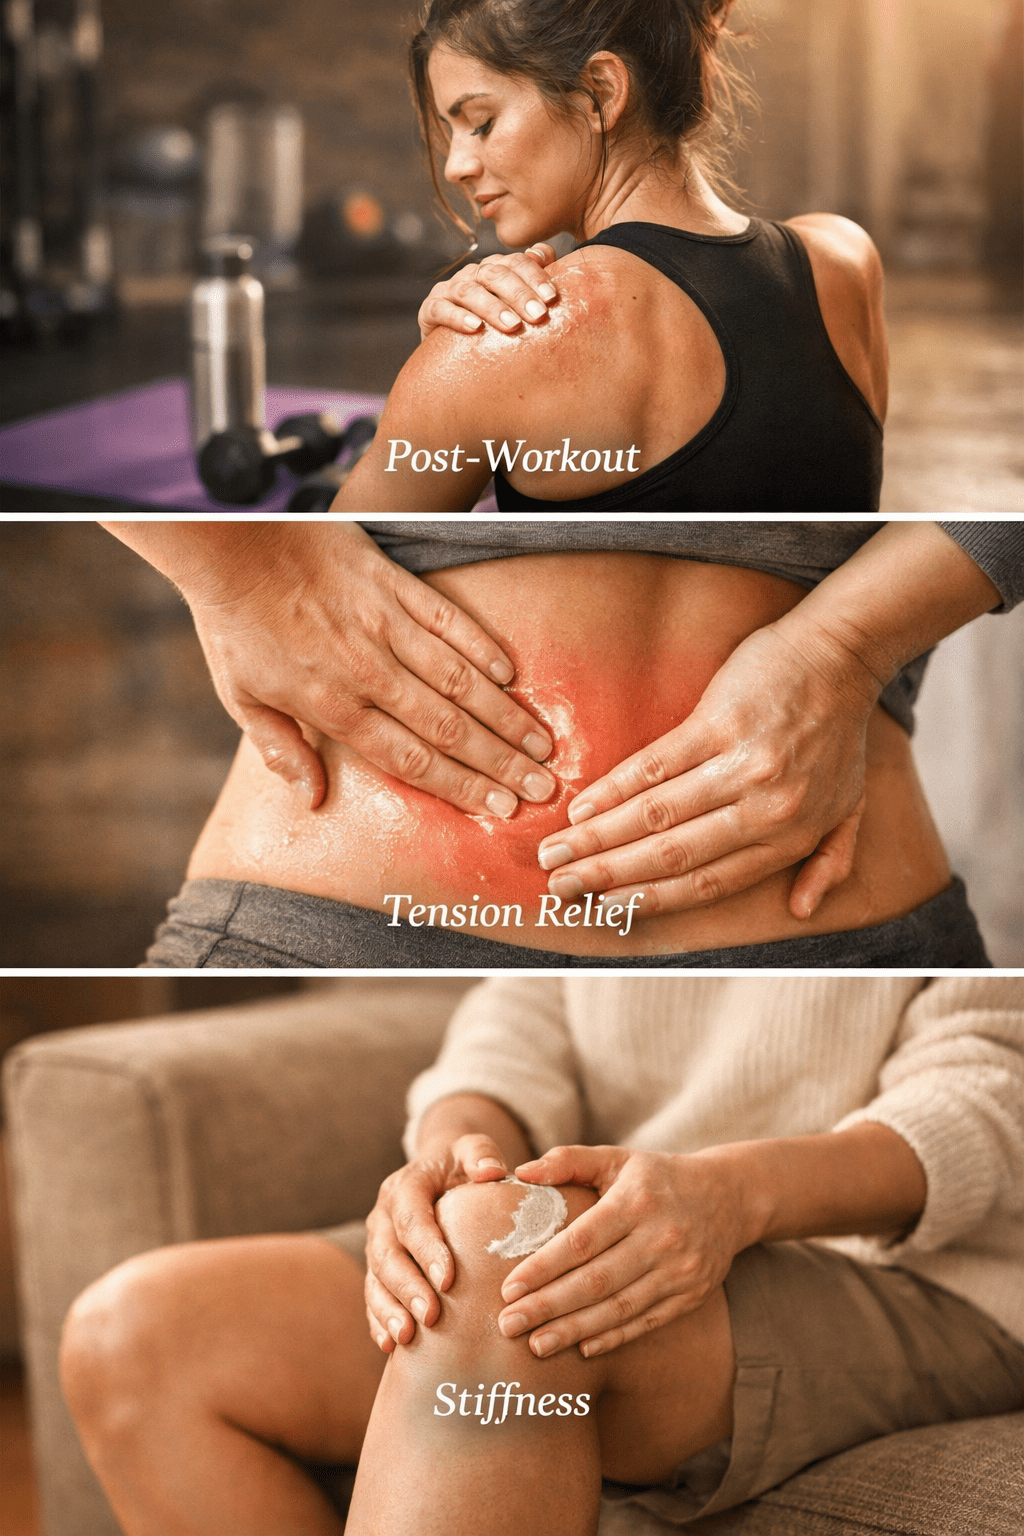
When and How to Apply DIY Warming Muscle Rub
Apply your homemade muscle rub directly to areas of tension, stiffness, or soreness for maximum benefit. The best times to use it are immediately after workouts, before bed for chronic tension, or whenever acute muscle pain strikes.
Application technique:
- Scoop a dime-sized amount with clean fingers
- Warm between your palms for 5-10 seconds
- Massage into the affected area using firm, circular motions
- Continue for 2-3 minutes until fully absorbed
- Wash hands thoroughly afterward (avoid touching eyes)
Target areas:
- Lower back and shoulders (tension and stiffness)
- Calves and thighs (post-workout recovery)
- Neck and upper back (desk work strain)
- Knees and elbows (joint stiffness)
- Any area with muscle soreness or minor sprains[2]
Important: Always perform a patch test on your inner forearm before first use. Apply a small amount and wait 24 hours to check for redness, itching, or irritation. If you have sensitive skin, reduce the cayenne powder by half or omit it entirely.
Benefits of Making Your Own Muscle Rub vs. Buying Commercial Products
Homemade muscle rubs offer complete transparency of ingredients as an alternative to commercial products that often contain methyl salicylate and synthetic fragrances.[2] When you make your own, you control exactly what touches your skin.
| Factor | DIY Muscle Rub | Commercial Products |
|---|---|---|
| Cost per ounce | $2-4 | $8-15 |
| Ingredient transparency | 100% known | Partial (proprietary blends) |
| Customization | Fully adjustable | Fixed formula |
| Shelf life | 6 months | 2-3 years (preservatives) |
| Synthetic additives | None | Often present |
| Batch size control | Make as needed | Fixed container sizes |
Choose DIY if you want natural ingredients, have sensitive skin, or use muscle rubs frequently enough that cost savings matter. Commercial products work better if you need maximum convenience or rarely use muscle rubs.
The cost savings add up quickly. A single batch using the recipe above yields about 8 ounces and costs approximately $15-20 in materials, while equivalent commercial products run $60-120 for the same amount.
Storage Tips and Shelf Life for Your DIY Warming Muscle Rub
Proper storage extends the life of your muscle rub and maintains its therapeutic potency. Store finished rubs in small airtight glass containers in a cool, dark place, with hardening occurring at room temperature within a few hours.[1][3]
Best storage practices:
- Use amber or cobalt blue glass jars to block light
- Keep away from heat sources (radiators, sunny windowsills)
- Store in bathroom cabinets or bedroom drawers
- Label with ingredients and date made
- Keep lids tightly sealed between uses
Shelf life indicators:
- Fresh rub: firm consistency, strong essential oil aroma
- Aging rub (4-6 months): slightly softer, fading scent
- Expired rub (6+ months): rancid smell, separation, discoloration
Coconut oil-based rubs typically last 6 months when stored properly. If you notice any off-smells, color changes, or mold growth, discard immediately and make a fresh batch.
Pro tip: Make smaller batches (4 ounces) if you don’t use muscle rub daily. This ensures you’re always working with fresh, potent ingredients.
Common Mistakes to Avoid When Making DIY Warming Muscle Rub

Even simple recipes can go wrong without attention to detail. Here are the most common errors and how to prevent them:
Overheating essential oils: Adding oils to a mixture above 120°F destroys their therapeutic compounds. Always wait 3 minutes after removing from heat, or use a thermometer to verify the temperature is below 110°F.[1]
Using too much cayenne: More isn’t better with warming agents. Start with 1 teaspoon of cayenne powder per batch and increase gradually if needed. Too much creates burning rather than warming.
Skipping the patch test: Even natural ingredients cause reactions in some people. Test on a small skin area 24 hours before full application, especially if you have sensitive skin or allergies.
Wrong container materials: Plastic containers can leach chemicals when exposed to essential oils. Always use glass jars or metal tins for storage.[3]
Inconsistent measurements: Beeswax controls firmness. Too little creates an oily mess; too much makes the rub too hard to spread. Stick to the 1-3 ounce range for a ½ cup oil base.[1][4]
Not labeling batches: If you make variations with different essential oils or warming agents, label each jar clearly. This prevents confusion and helps you identify which formula works best for your needs.
FAQ
How long does DIY warming muscle rub take to work?
Most people feel the warming sensation within 2-3 minutes of application, with pain relief building over 10-15 minutes as circulation increases and essential oils penetrate the skin. Reapply every 4-6 hours as needed.
Can I use the muscle rub if I’m pregnant or nursing?
Avoid using muscle rubs containing wintergreen, peppermint, or cayenne during pregnancy without consulting your healthcare provider. These ingredients can affect circulation and may not be safe for all stages of pregnancy.
What’s the difference between warming and cooling muscle rubs?
Warming rubs use cayenne or ginger to increase blood flow and relax muscles, while cooling rubs rely heavily on menthol and peppermint for a chilling effect that numbs pain. Choose warming for stiffness and tension, cooling for acute injuries or inflammation.
Can I substitute ingredients if I don’t have everything?
Yes, but maintain the oil-to-beeswax ratio. You can swap olive oil for sweet almond or jojoba oil, or use different essential oils like rosemary or clove. The warming agent (cayenne or menthol) is essential for the heating effect.
Is DIY warming muscle rub safe for children?
Not recommended for children under 12 due to the strength of essential oils and warming agents. For older children, dilute the recipe by half and always perform a patch test first.
How much should I apply per use?
A dime-sized amount (about ½ teaspoon) covers a 4-6 inch area adequately. Start small and add more if needed rather than over-applying, which wastes product without increasing benefits.
Can I use this on open wounds or broken skin?
Never apply muscle rub to open cuts, wounds, or broken skin. The essential oils and cayenne will cause severe burning and may lead to infection. Wait until skin is fully healed.
Why did my muscle rub turn out too soft or too hard?
Consistency issues stem from the beeswax-to-oil ratio. Too soft means you need more beeswax (add 1 ounce at a time). Too hard means you used too much beeswax (remelt and add more carrier oil).
Can I add other essential oils not listed in the recipe?
Yes, rosemary, clove, and black pepper oils work well in muscle rubs. Keep the total essential oil count to 60-80 drops per batch to avoid skin irritation.
How do I remove muscle rub from fabric if it stains?
Treat stains immediately with dish soap or a degreaser, as the oil base can set into fabric. Wash in hot water with an extra rinse cycle. Avoid getting the rub on clothing by letting it absorb fully before dressing.
Does the rub work for arthritis pain?
Many users report relief from arthritis-related stiffness and pain, though results vary. The anti-inflammatory properties of ginger and the circulation boost from cayenne may help reduce joint discomfort when applied regularly.
Can I make a larger batch to save time?
Yes, but remember that shelf life remains 6 months regardless of batch size. Only scale up if you’ll use the entire amount within that timeframe, or plan to give some away as gifts.
Conclusion
Making your own DIY warming muscle rub puts powerful, natural relief right at your fingertips. With just a handful of ingredients and 20 minutes of prep time, you’ll have a therapeutic balm that rivals expensive commercial products without the mystery ingredients or synthetic additives.
Start with the basic recipe using coconut oil, beeswax, and four essential oils, then customize based on your specific needs. Add extra cayenne for deeper warming, increase lavender for more anti-inflammatory benefits, or adjust the beeswax for your preferred consistency.
Your next steps:
- Gather your ingredients (start with small quantities to test the recipe)
- Set aside 30 minutes for your first batch
- Perform a patch test 24 hours before full use
- Apply to sore muscles 2-3 times daily as needed
- Track which formula works best for your specific pain points
Store your creation properly in glass containers, and you’ll have 6 months of natural muscle relief ready whenever tension, stiffness, or post-workout soreness strikes. Your muscles will thank you.
For more natural wellness solutions, explore our guides and how-tos section for additional DIY remedies you can make at home.
References
[1] Make Homemade Warming Muscle Rub – https://www.practicallyfunctional.com/make-homemade-warming-muscle-rub/
[2] Diy Muscle Rub – https://nikura.com/blogs/make-at-home/diy-muscle-rub
[3] Soothing Natural Muscle Rub Recipe Relief – https://www.wildfoods.co/blogs/content/soothing-natural-muscle-rub-recipe-relief
[4] Diy Soremusclerub – https://melissaknorris.com/diy-soremusclerub/